Must Read to use the MS Teams integration
PLEASE READ CAREFULLY FOR A SUCCESSFUL MS TEAMS INTEGRATION!
We are pleased to add a full MS Teams integration into Virtual Front Desk (VFD). This integration allows you to send video call notifications to an MS Teams user or MS Teams Call Queue instead of sending them to the Virtual Front Desk dashboard. The buttons on your VFD station can directly video call a user in the desktop or mobile MS Teams application. Please note this comes with limited functionalities listed below.
Before using this MS Teams integration you must purchase an MS Teams Calling plan assigned to the Microsoft administrator, and a Teams Phone Standard license for each other users. You can access these features through TAC (Teams Admin Console). Some of these settings can take up to 24 hours to be effective
TAC (Teams Admin Console) Settings to allow VFD to dial into your MS Teams
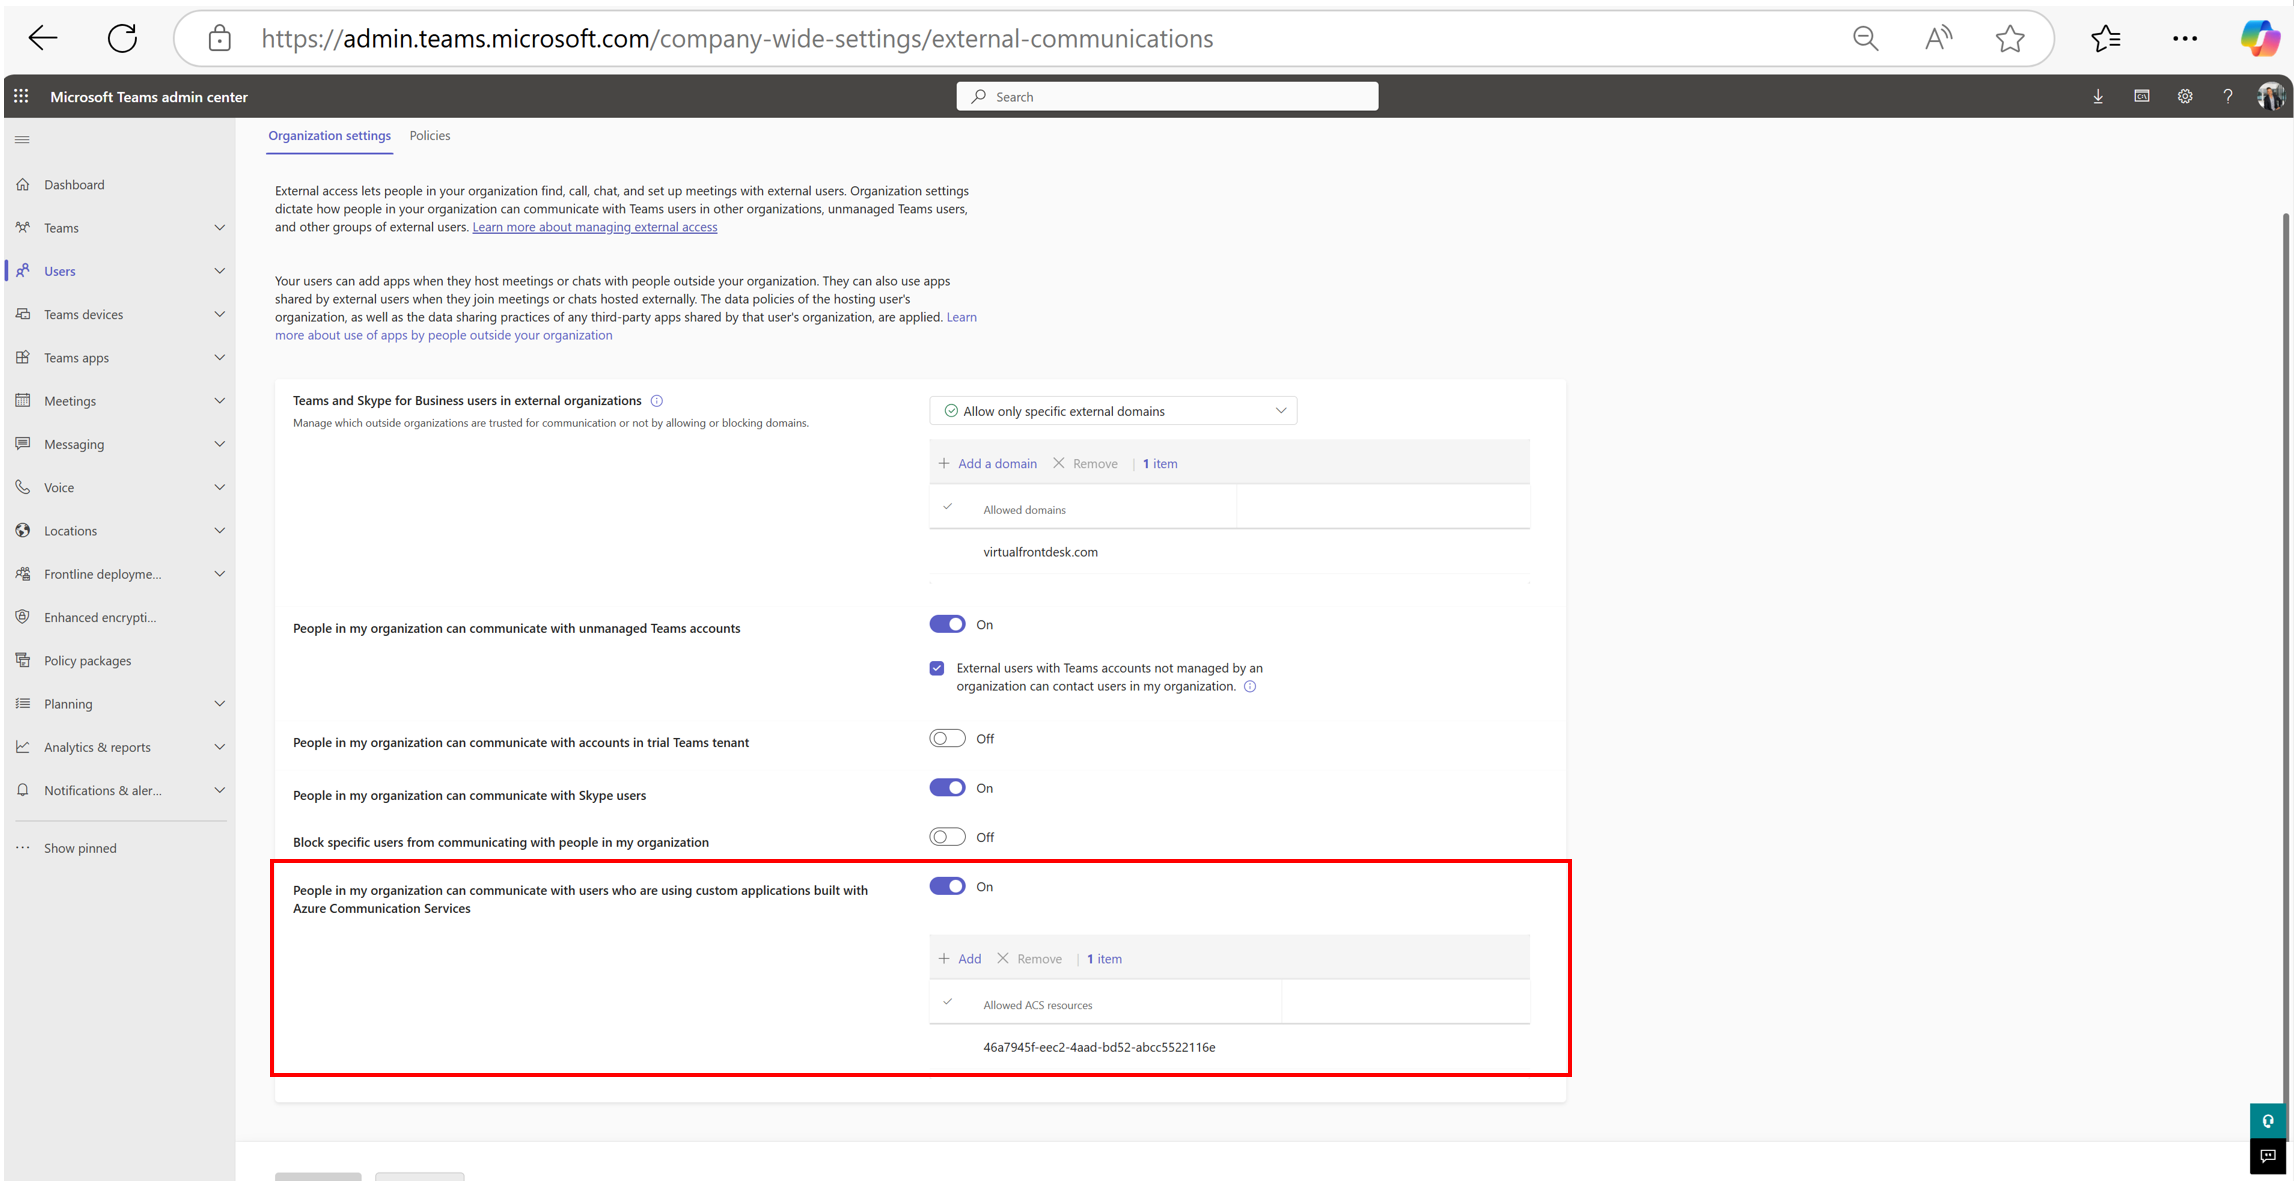
Please log in at External access - Microsoft Teams admin center
Enabling external access and federating with an ACS tenant are both visible in this screenshot (ACS tenants are all the way at the bottom)
Virtual Front Desk ACS Ressource number to add: 46a7945f-eec2-4aad-bd52-abcc5522116e
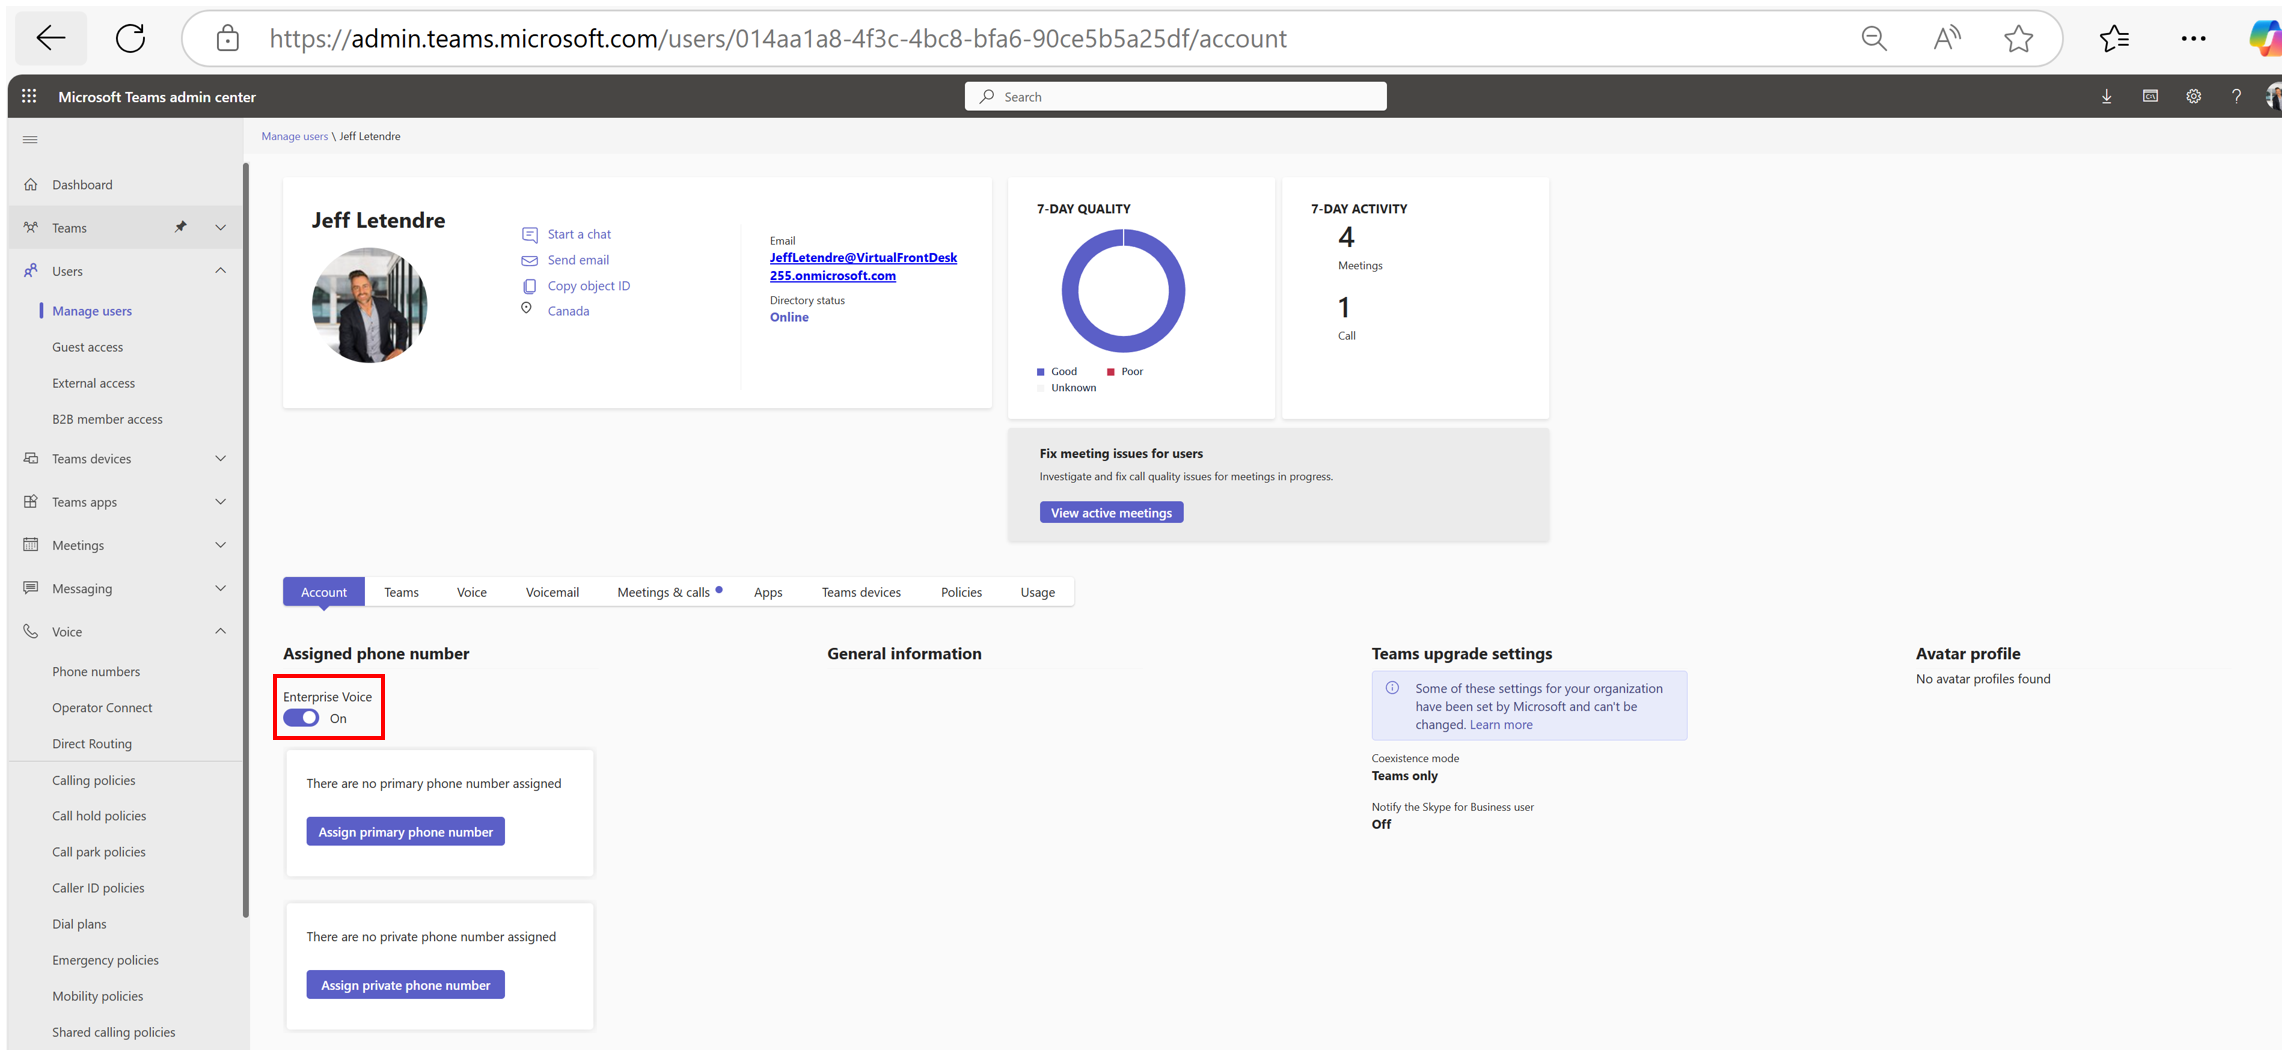
Enable "Enterprise Voice" for each user
**You can also complete the integration manually using PowerShell. Open Powershell as an admin and run this code:
Check the current execution policy
Get-ExecutionPolicy
Set the execution policy to RemoteSigned if it's not already
if ((Get-ExecutionPolicy) -ne 'RemoteSigned') {
Set-ExecutionPolicy RemoteSigned -Scope CurrentUser -Force
}
Install the Microsoft Teams module if not already installed
if (-not (Get-Module -Name MicrosoftTeams)) {
Install-Module -Name MicrosoftTeams -Force
}
Connect to Microsoft Teams
Connect-MicrosoftTeams
Set the allowlist
$allowlist = @('46a7945f-eec2-4aad-bd52-abcc5522116e')
Set ACS Federation Configuration
Set-CsTeamsAcsFederationConfiguration -EnableAcsUsers $True -AllowedAcsResources $allowlist
Enable ACS Federation Access
Set-CsExternalAccessPolicy -Identity Global -EnableAcsFederationAccess $true
Check the execution policy after making changes
Get-ExecutionPolicy
Final step; Enterprise voice enable each user with this powershell script:
Set-CsPhoneNumberAssignment -Identity "<User email>" -EnterpriseVoiceEnabled $true
----------------------------------------------------------------------------------------------------------------------------------------------------------------------------------------------
Next: Log in your Virtual Front Desk account with MS SSO
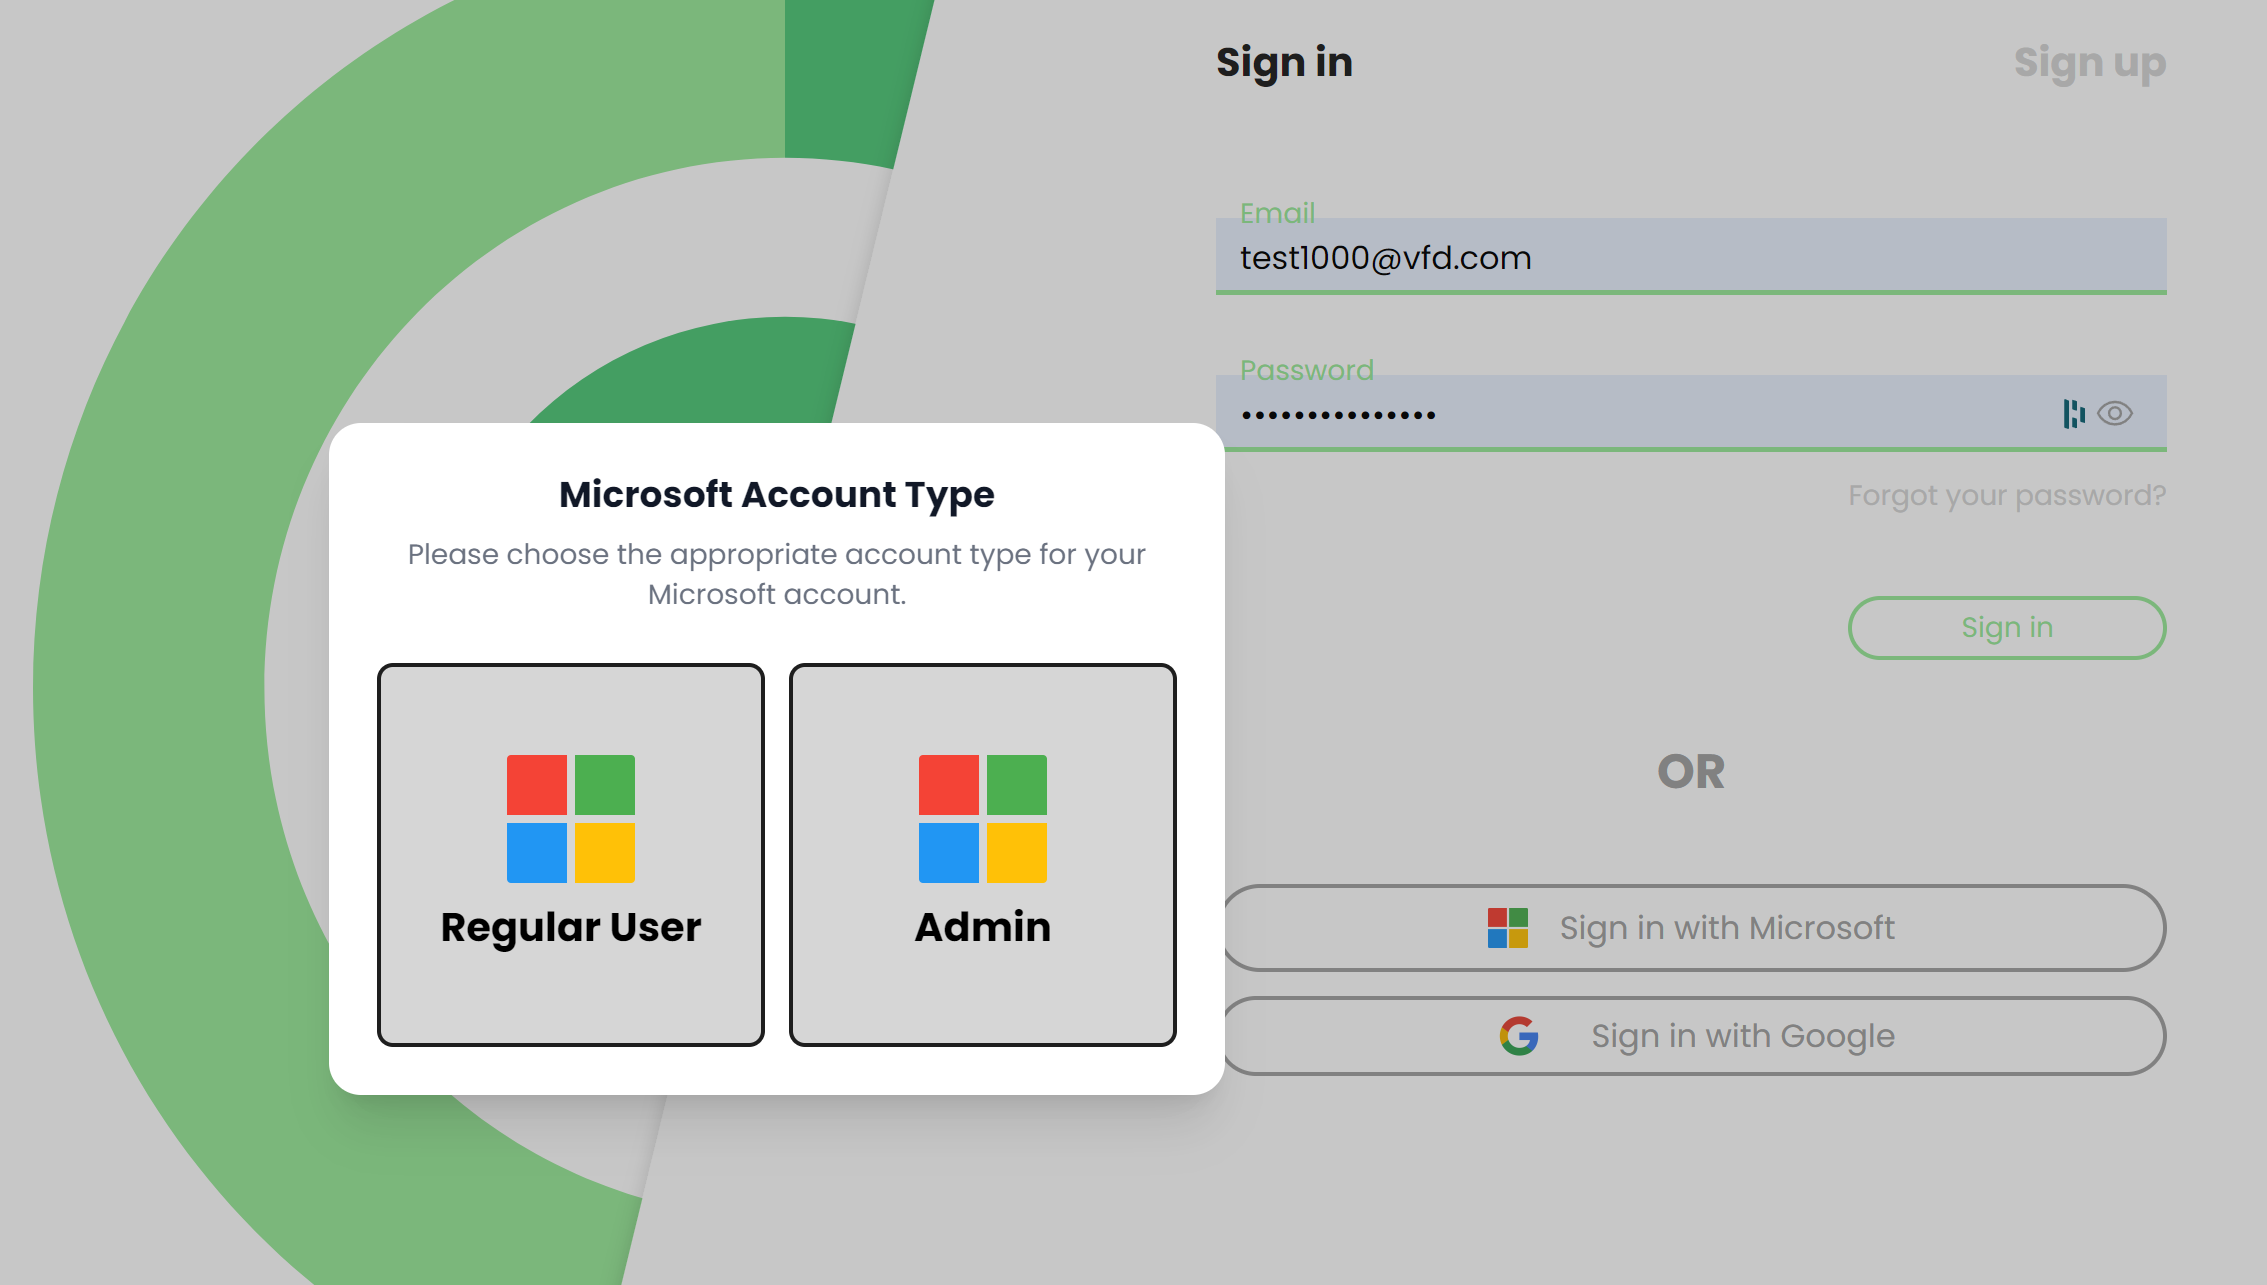
In order to be able to use the MS Teams functionality, you must log in using the Microsoft SSO option from the app.virtualfrontdesk.com. Choose ADMIN, log in with your Admin Enterprise Microsoft Account, and make sure you are logged in to your desktop Teams app with the same Admin Enterprise Microsoft Account. This action will pull the list of users from your MS Entra (AAD) tenant. The same goes for the regular users under your VFD Team, they must log in using the Microsoft SSO option and select regular user.
Settings
Under settings, make sure the MS Teams Calling option is switched on. While an account can use VFD and the Teams app simultaneously, each individual user must choose between receiving video call notifications in MS Teams or in the VFD dashboard.
Adding agents on your VFD team from MS Entra (AAD)
Under the VFD User tab, type in the Microsoft search bar the name of the users you wish to add to your team. If they already exist in your VFD team, you do not need to add them again. Ask those users to log in with the MS SSO and this will activate their MS Teams integration capability. You can also delete those users and add them again using the MS search bar. If the users were already part of groups, you will need to add them again. Once imported from AAD, these users do not need to log into Virtual Front Desk. They will automatically receive calls in Microsoft Teams, bypassing the VFD app entirely.
Using the MS Teams integration
You can now set your agents individually, in groups, create stations, and buttons, and use the SMS notifications and call forwarding options as usual.
MS Teams Call Queue
Important: the original administrators cannot be added to a group.
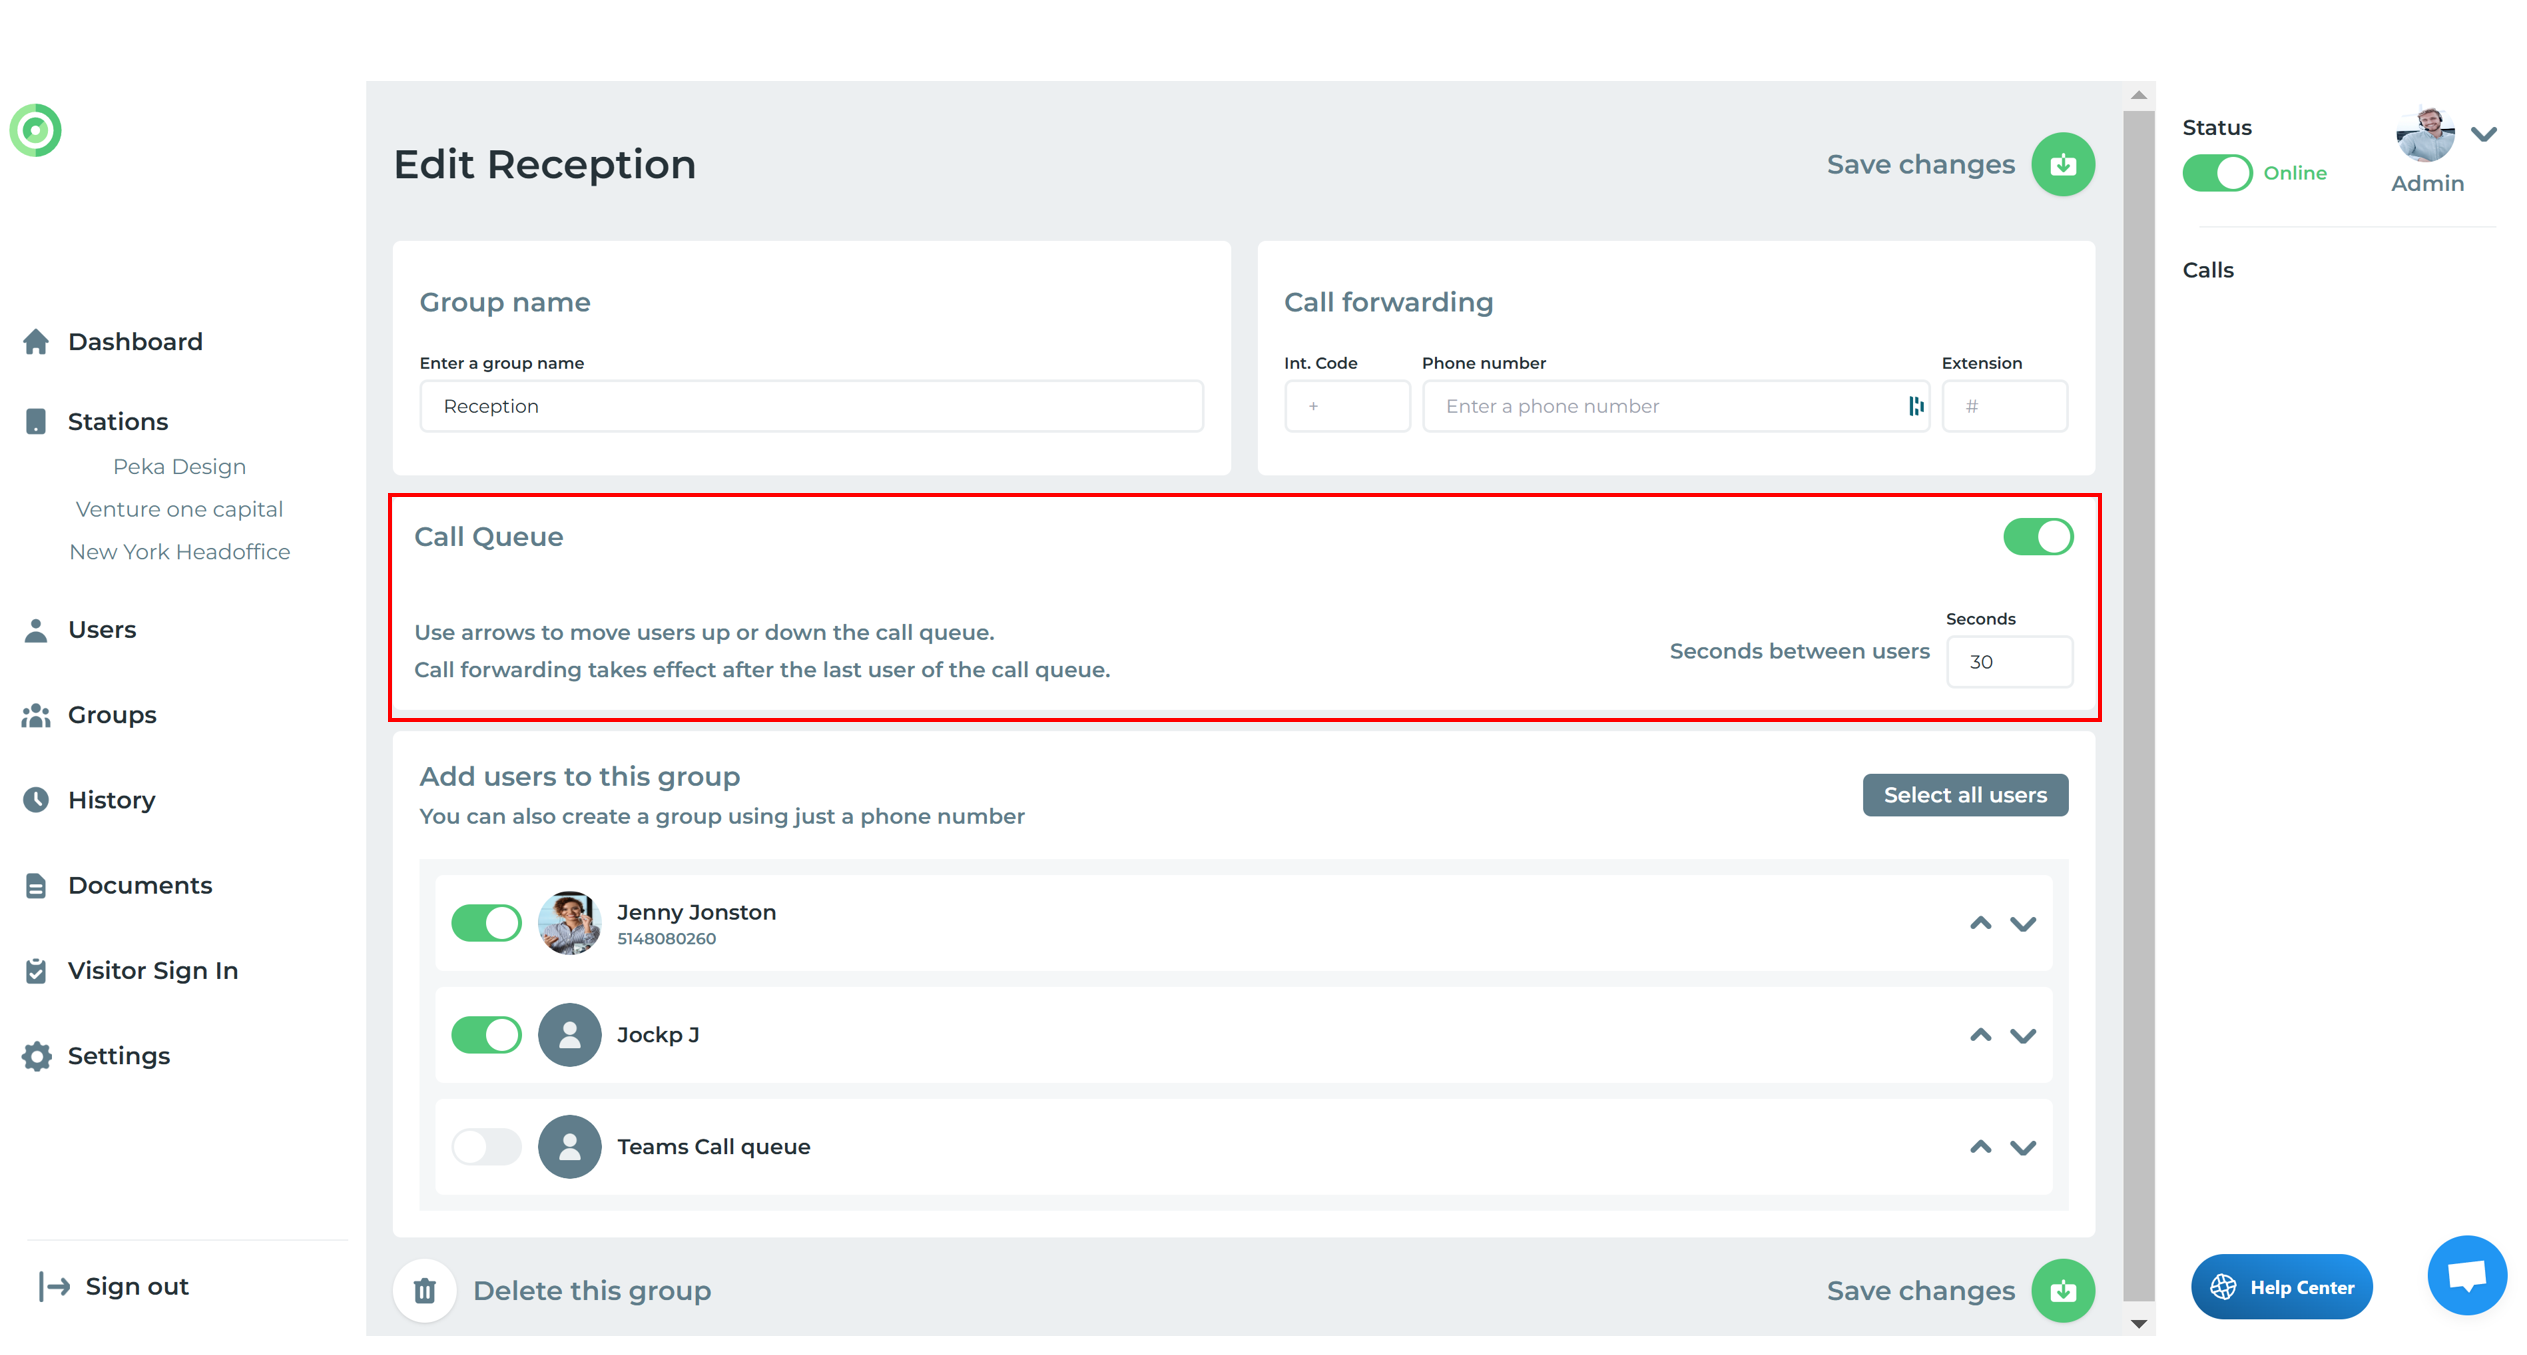
When creating a group with MS Teams users, be sure to enable the group call queue option to prevent a conference call where all users can join simultaneously.
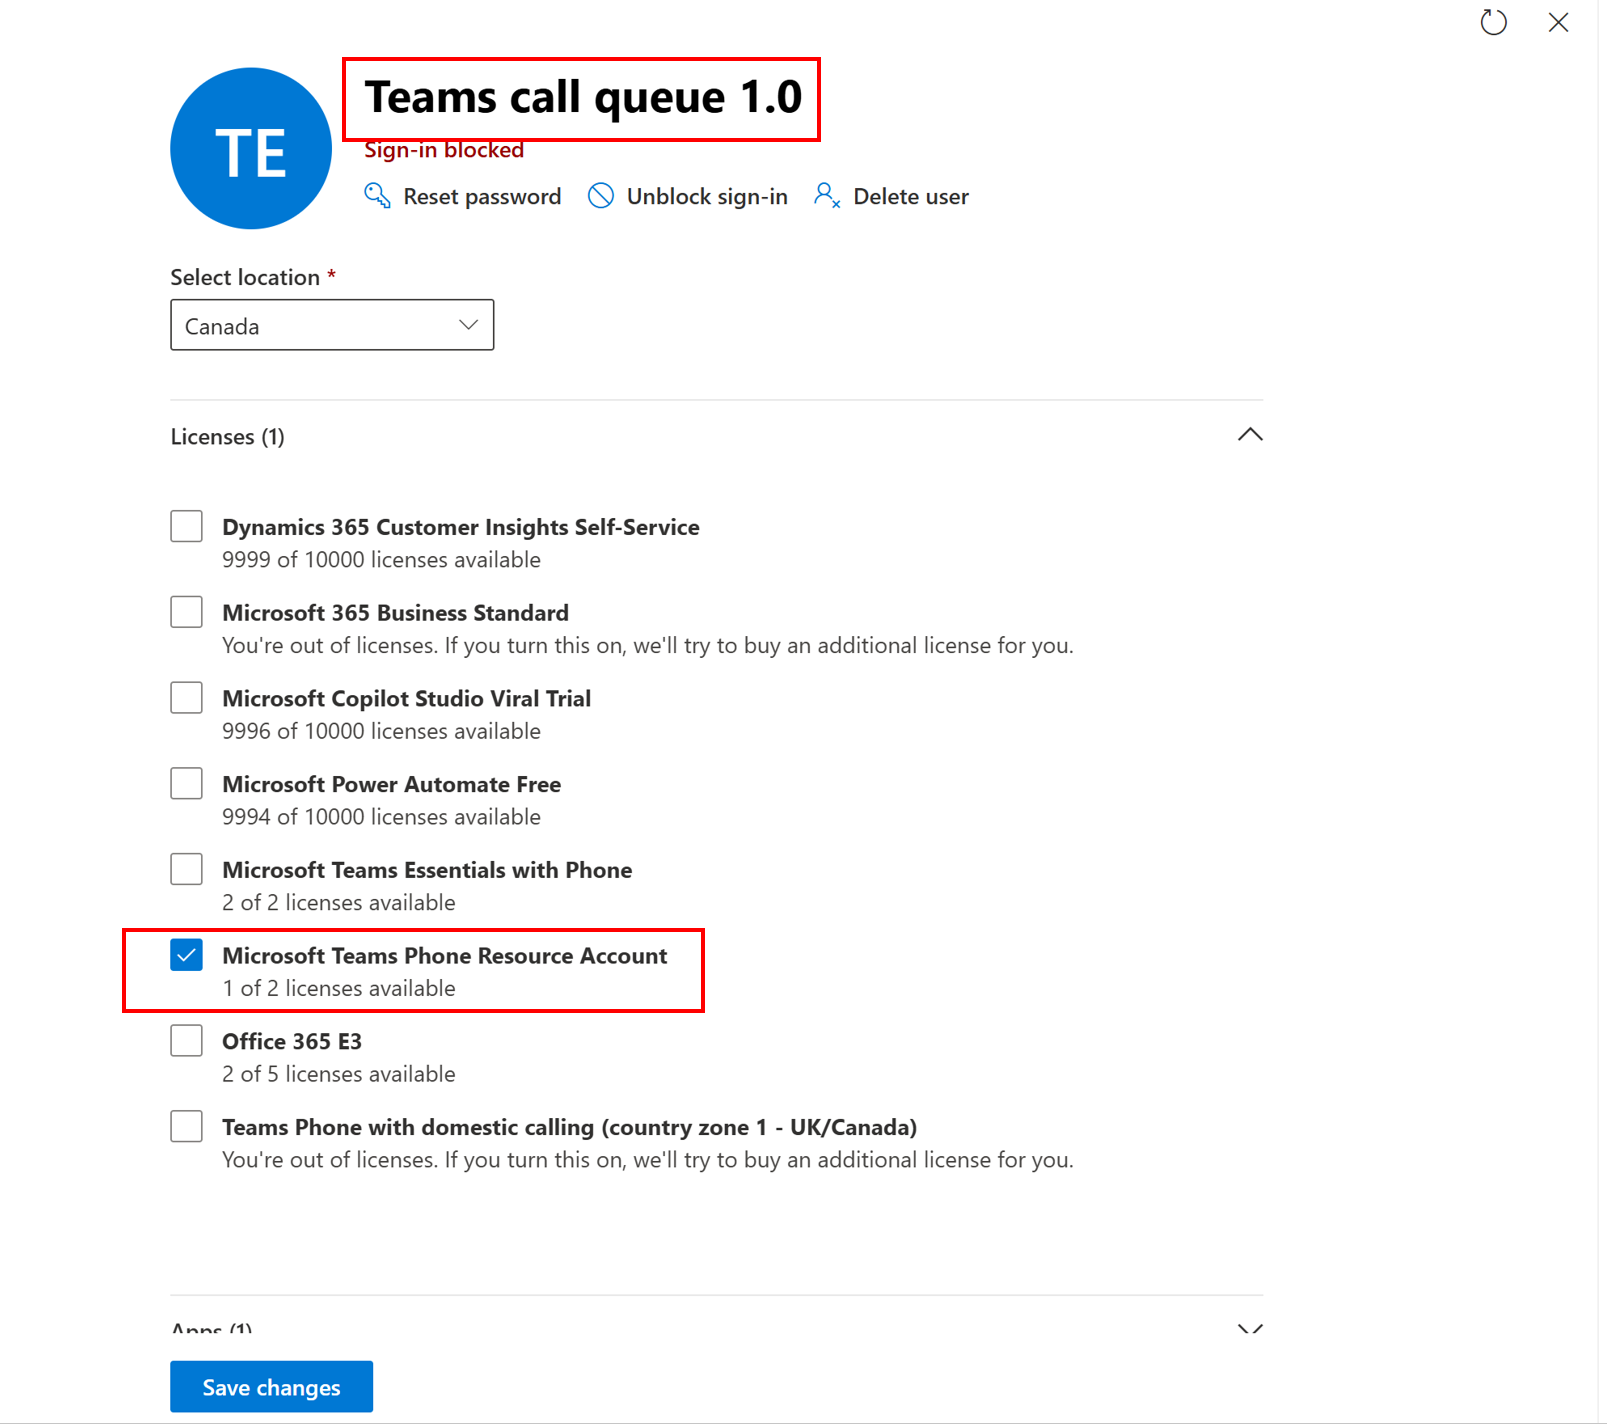
Alternatively, you can create the call queue within your MS Teams admin account and, import it as a regular user using the Microsoft AAD search box. Don't forget to enable the "MS Teams Call Queue" option to ensure proper call handling.
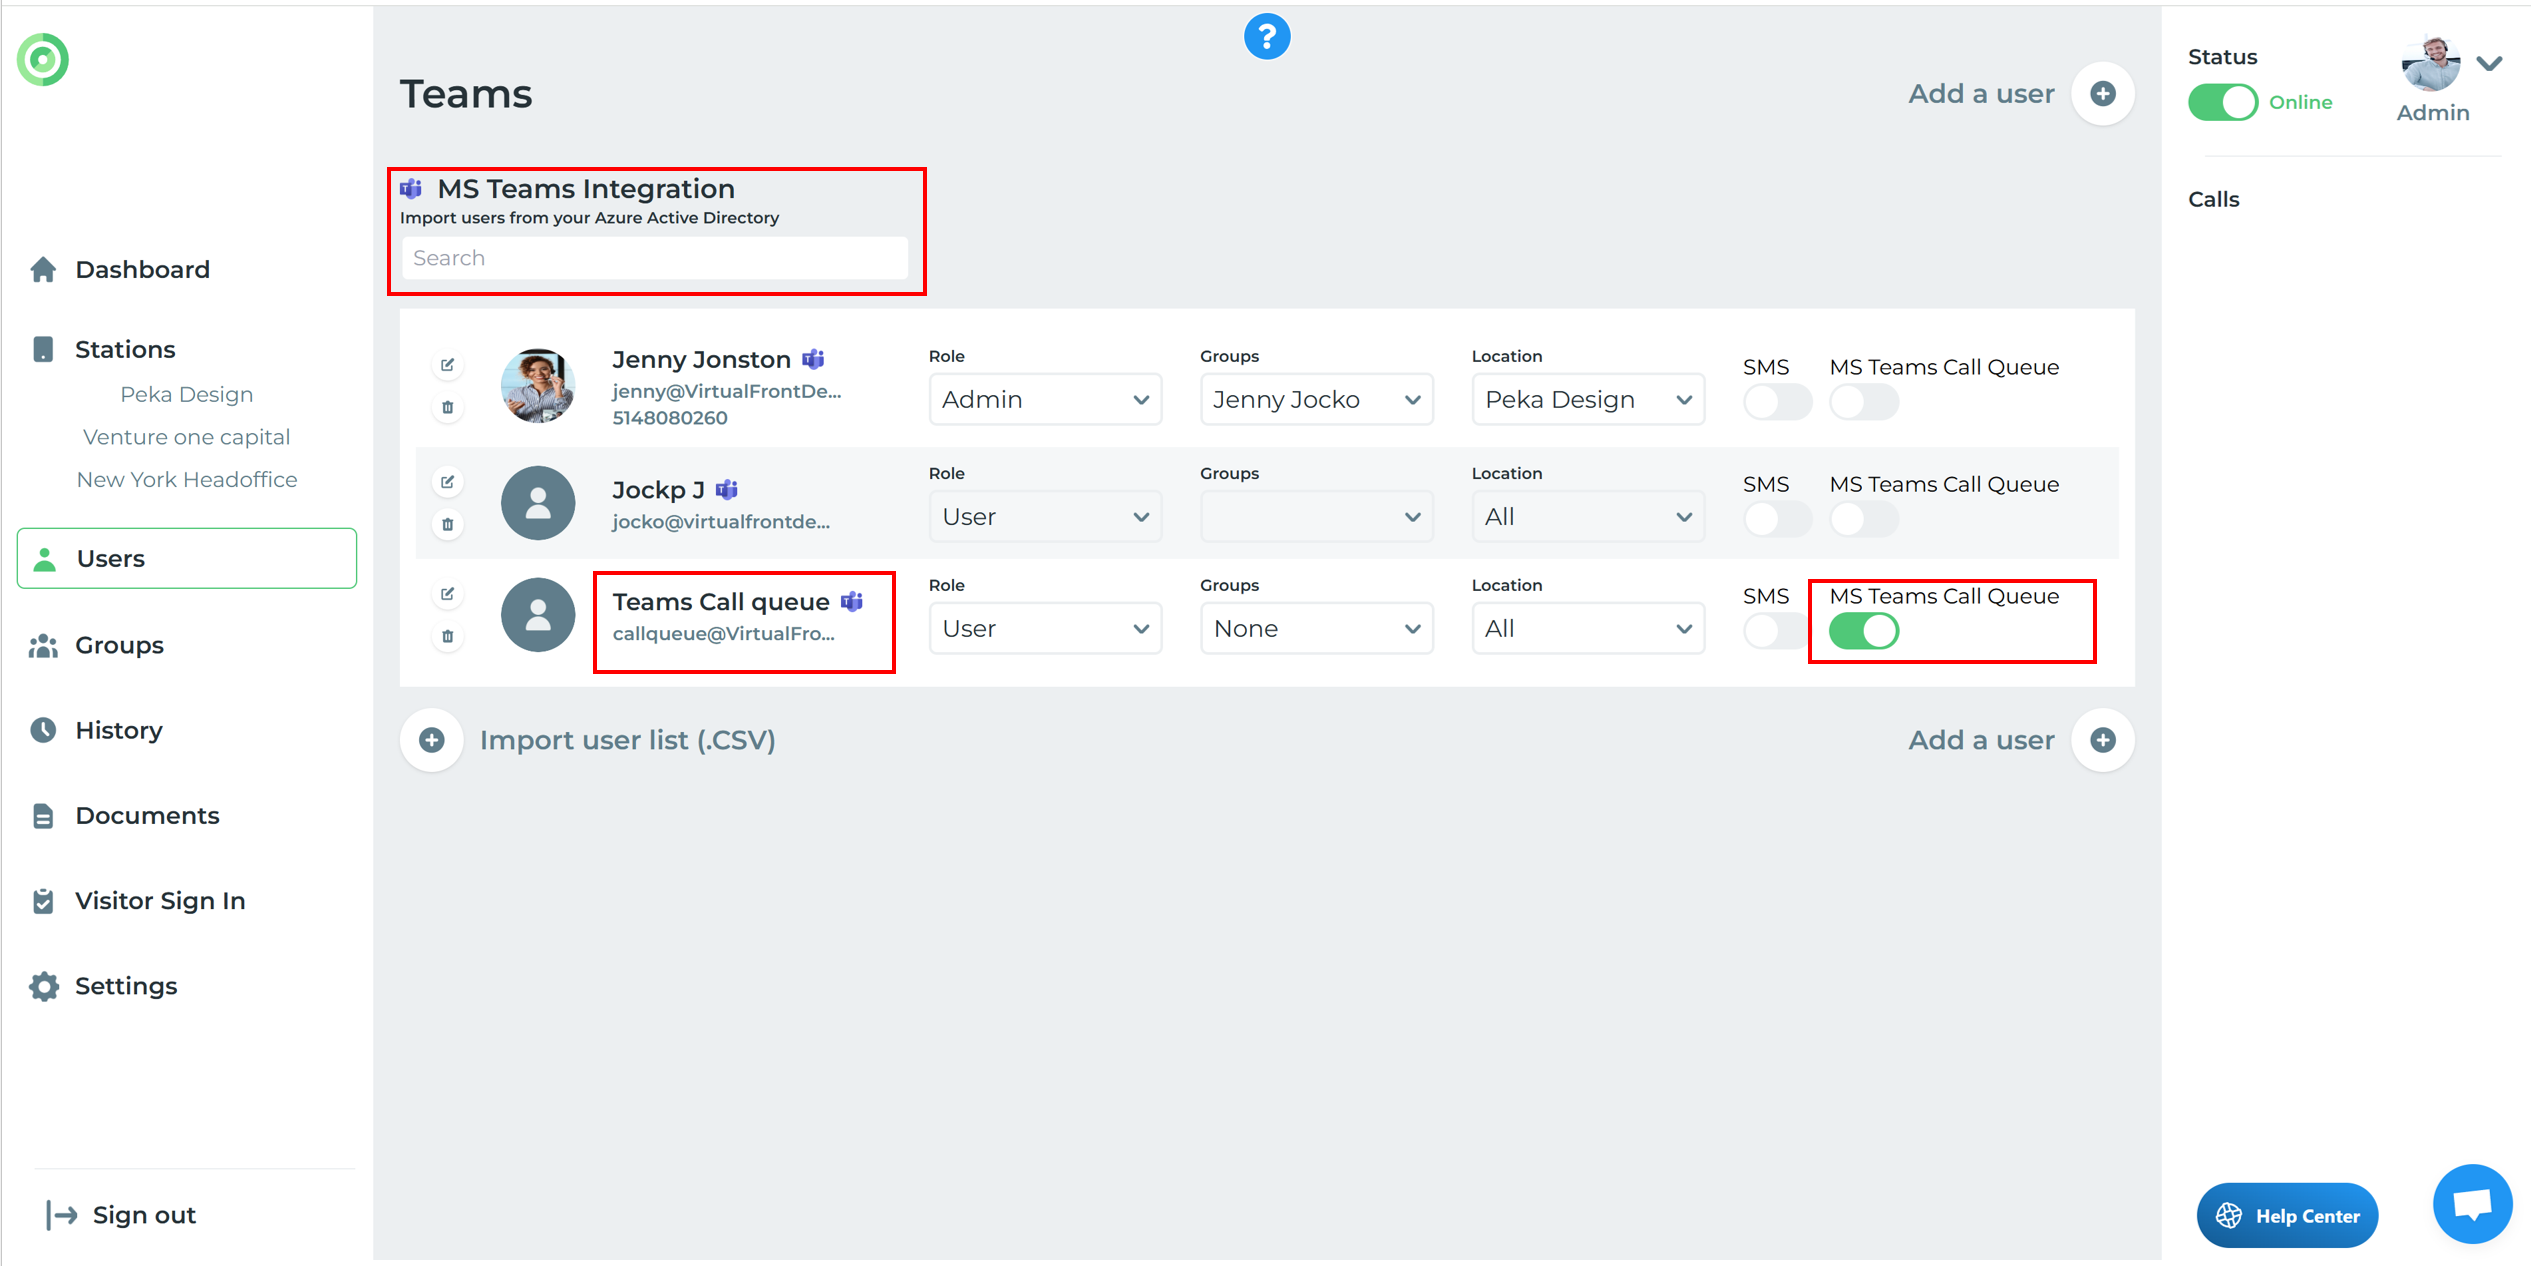
Please note: You must assign a free MS Teams Phone Ressource Account Licence to your call queue. (admin.microsoft.com)
Limitations:
- Some MS Teams features are not available.
- Most Virtual Front Desk features like taking IDs, screenshots, PDF to screen or printer, and QR codes are not available with MS Teams.
- Calls in MS teams in your History have limited details.
