
Visitor sign in, sign out and Express QR code sign in
Our visitor sign-in feature allows you to register your visitors seamlessly. You can create personalized forms with custom questions, collect signed PDFs such as NDAs directly on the screen, display interactive forms using external URLs (iFrame), request visitor selfies, and print visitor badges.
Once the form is completed, the station notifies the host via video call, phone call, SMS, or email, depending on your configuration. Please note, SMS and Email notifications are not available for MS Teams users.
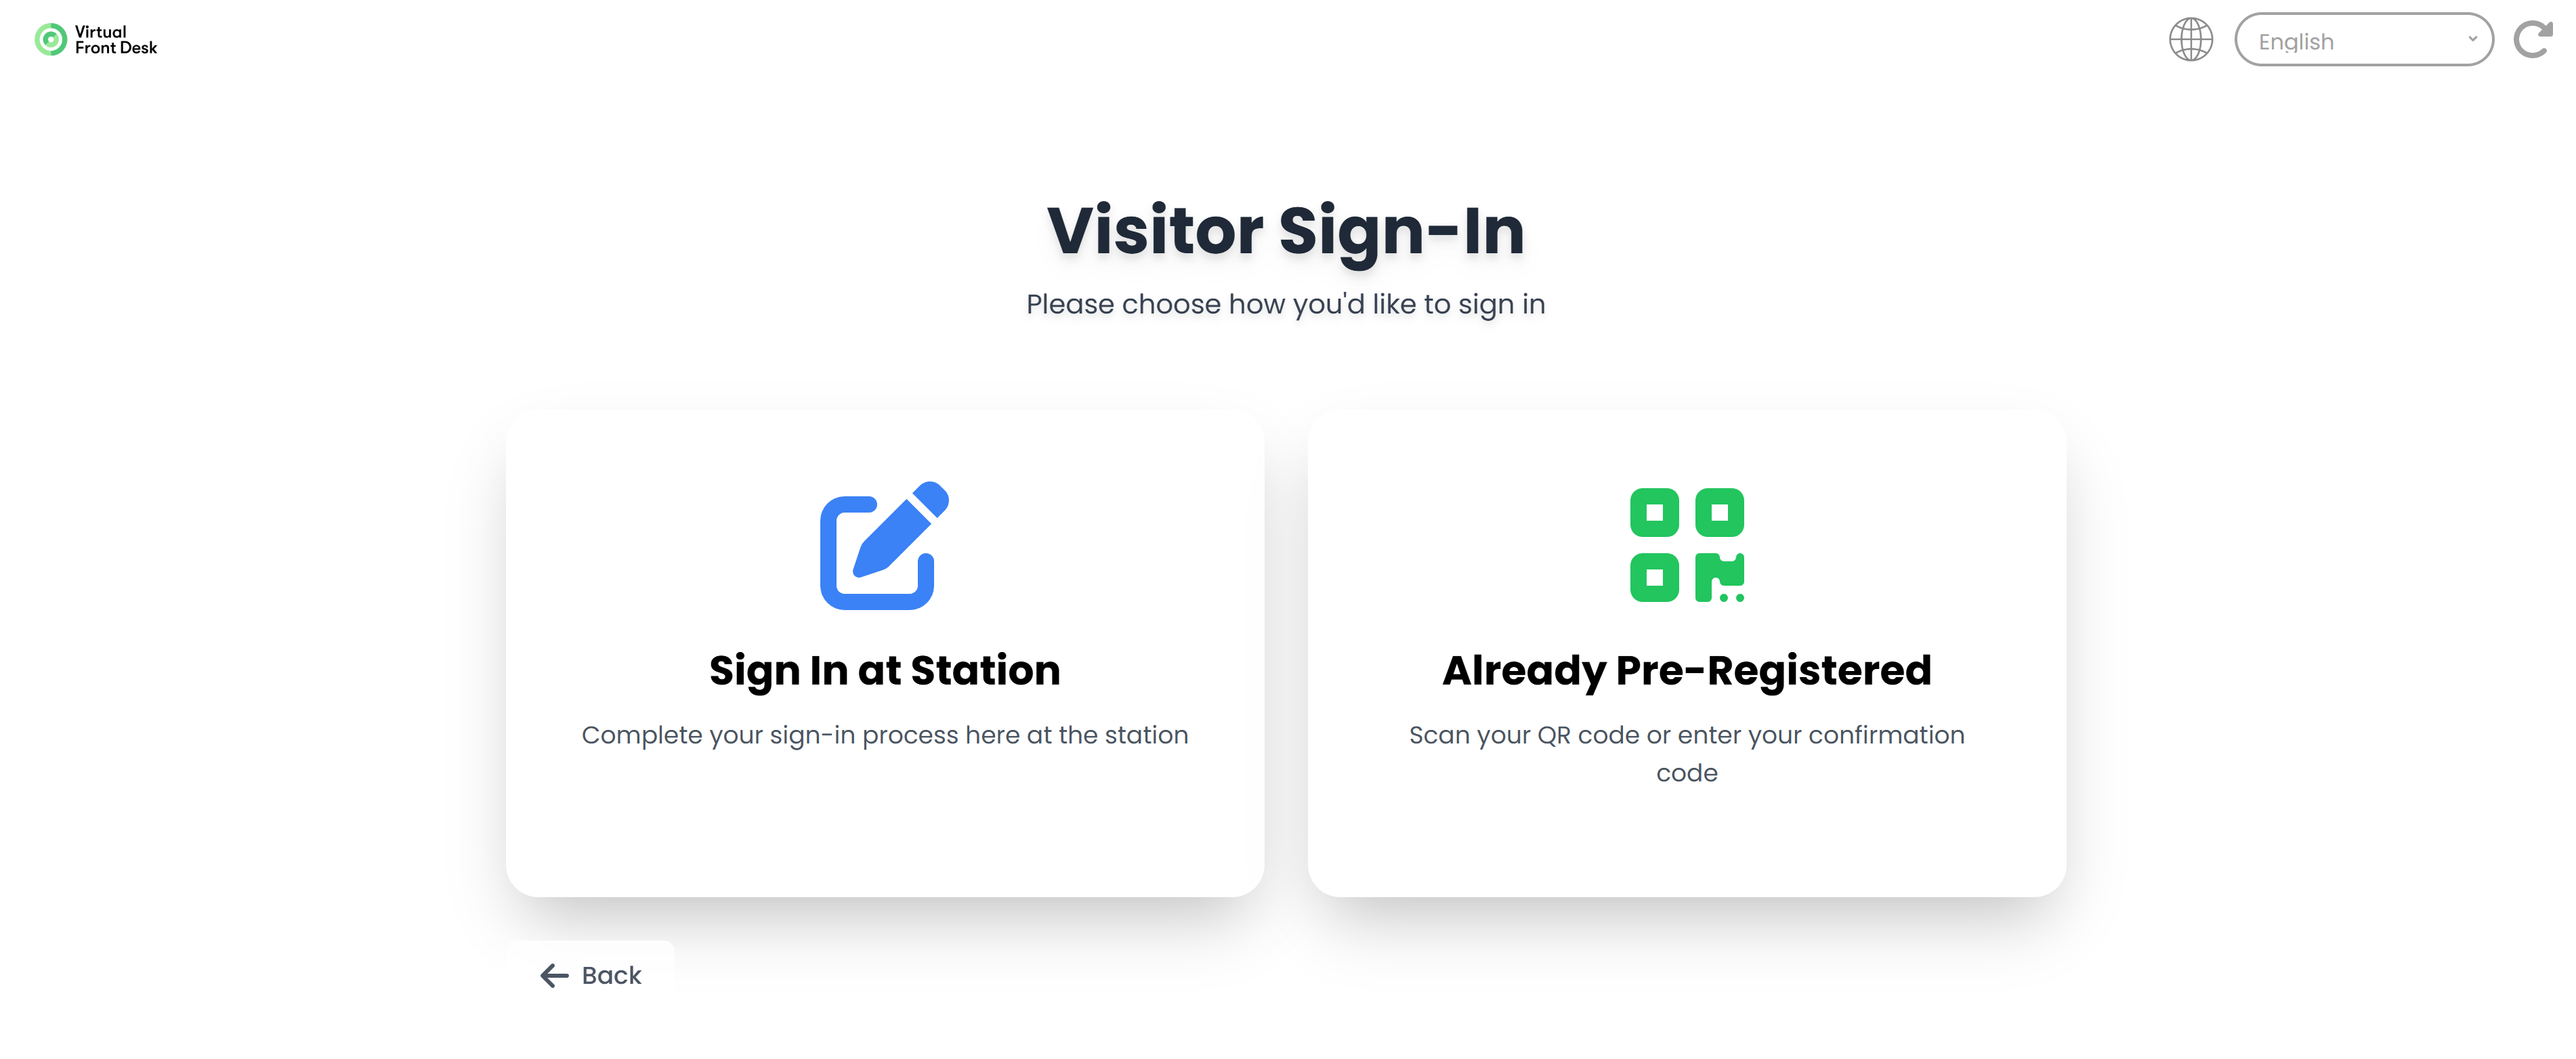
Visitors can also pre-register by email and use Express Sign-In at the station with a QR code or a 4-digit code. After express check-in, the optional badge prints automatically and notifications are sent just as if the visitor had completed the form directly on the station.
Create your Visitor sign in
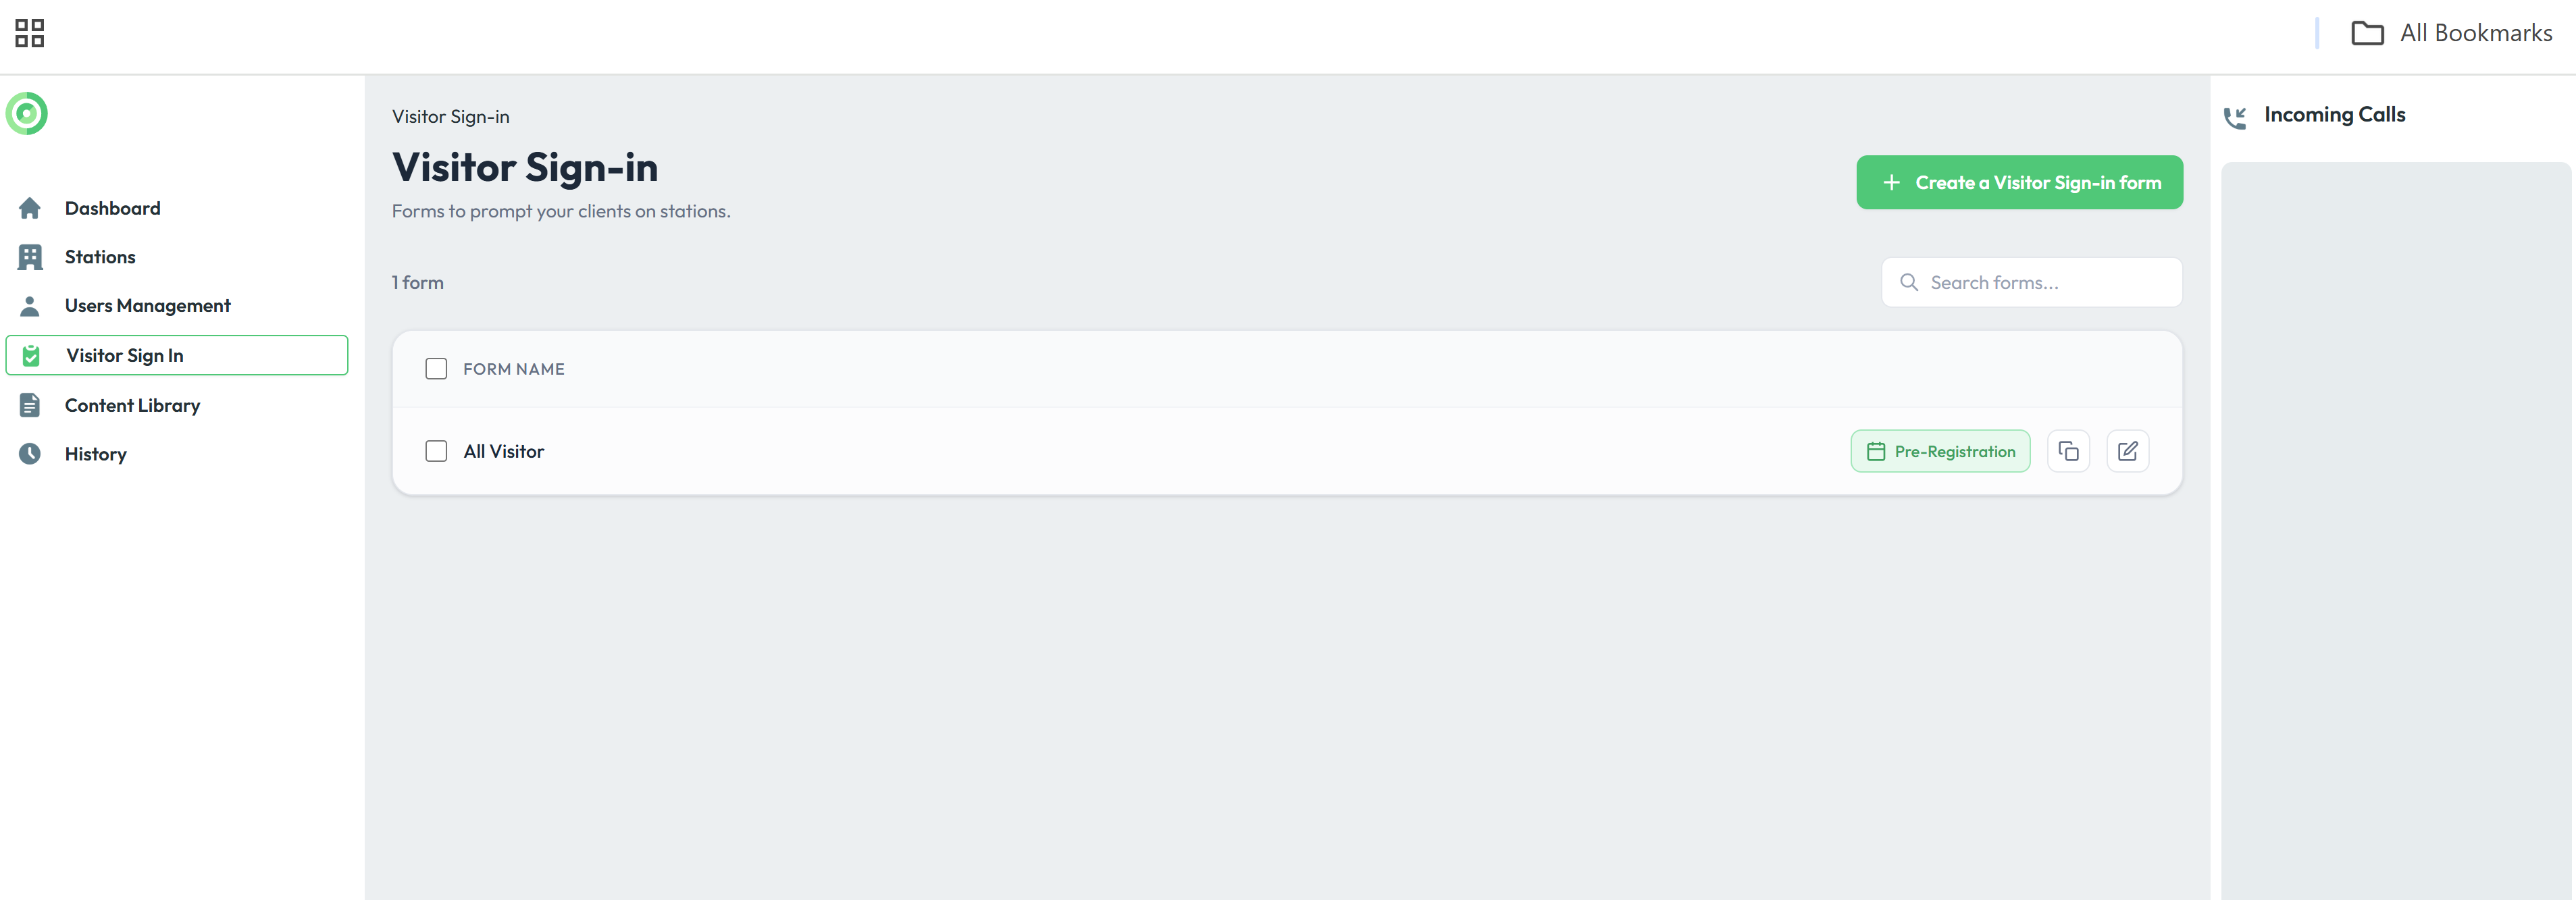
To create a visitor sign-in form, go to the Visitor Sign-In tab and click Create. Follow the four steps to complete the form.
Once the form is created, go to your Station button settings, select Visitor Sign-In as the action, and choose the appropriate sign-in form.
Step 1. Name
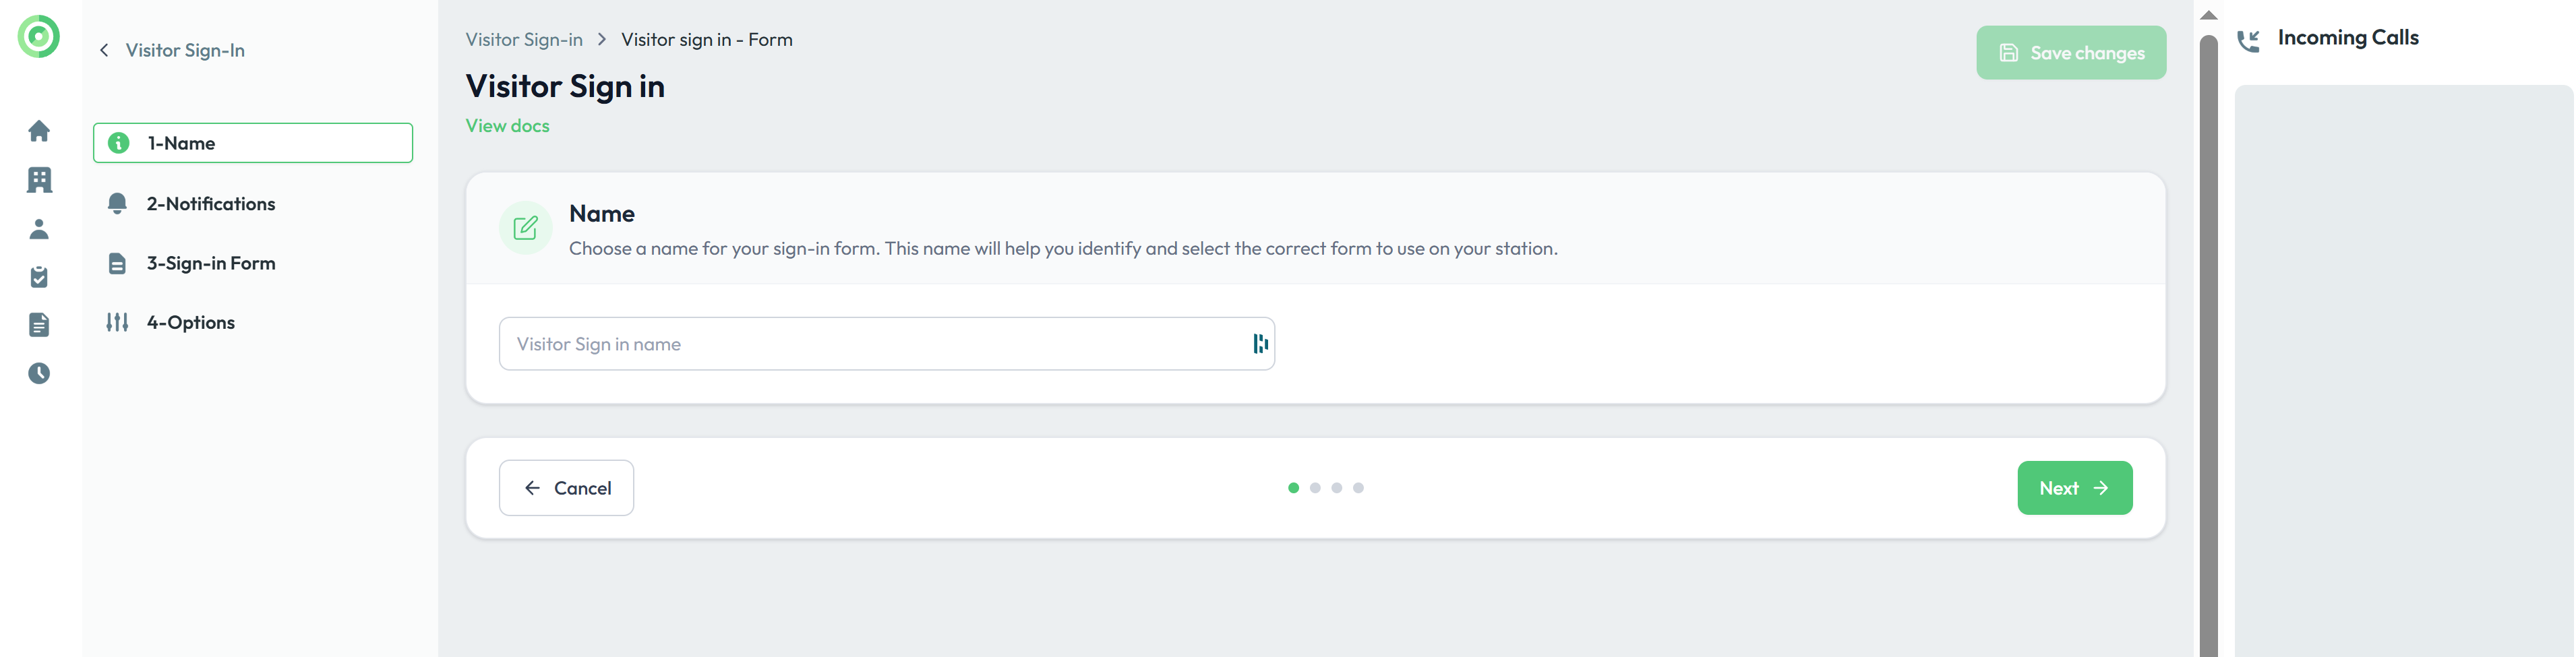
Choose a name for your sign-in form. This name will help you identify and select the correct form to use on your station.
Step 2. Notifications
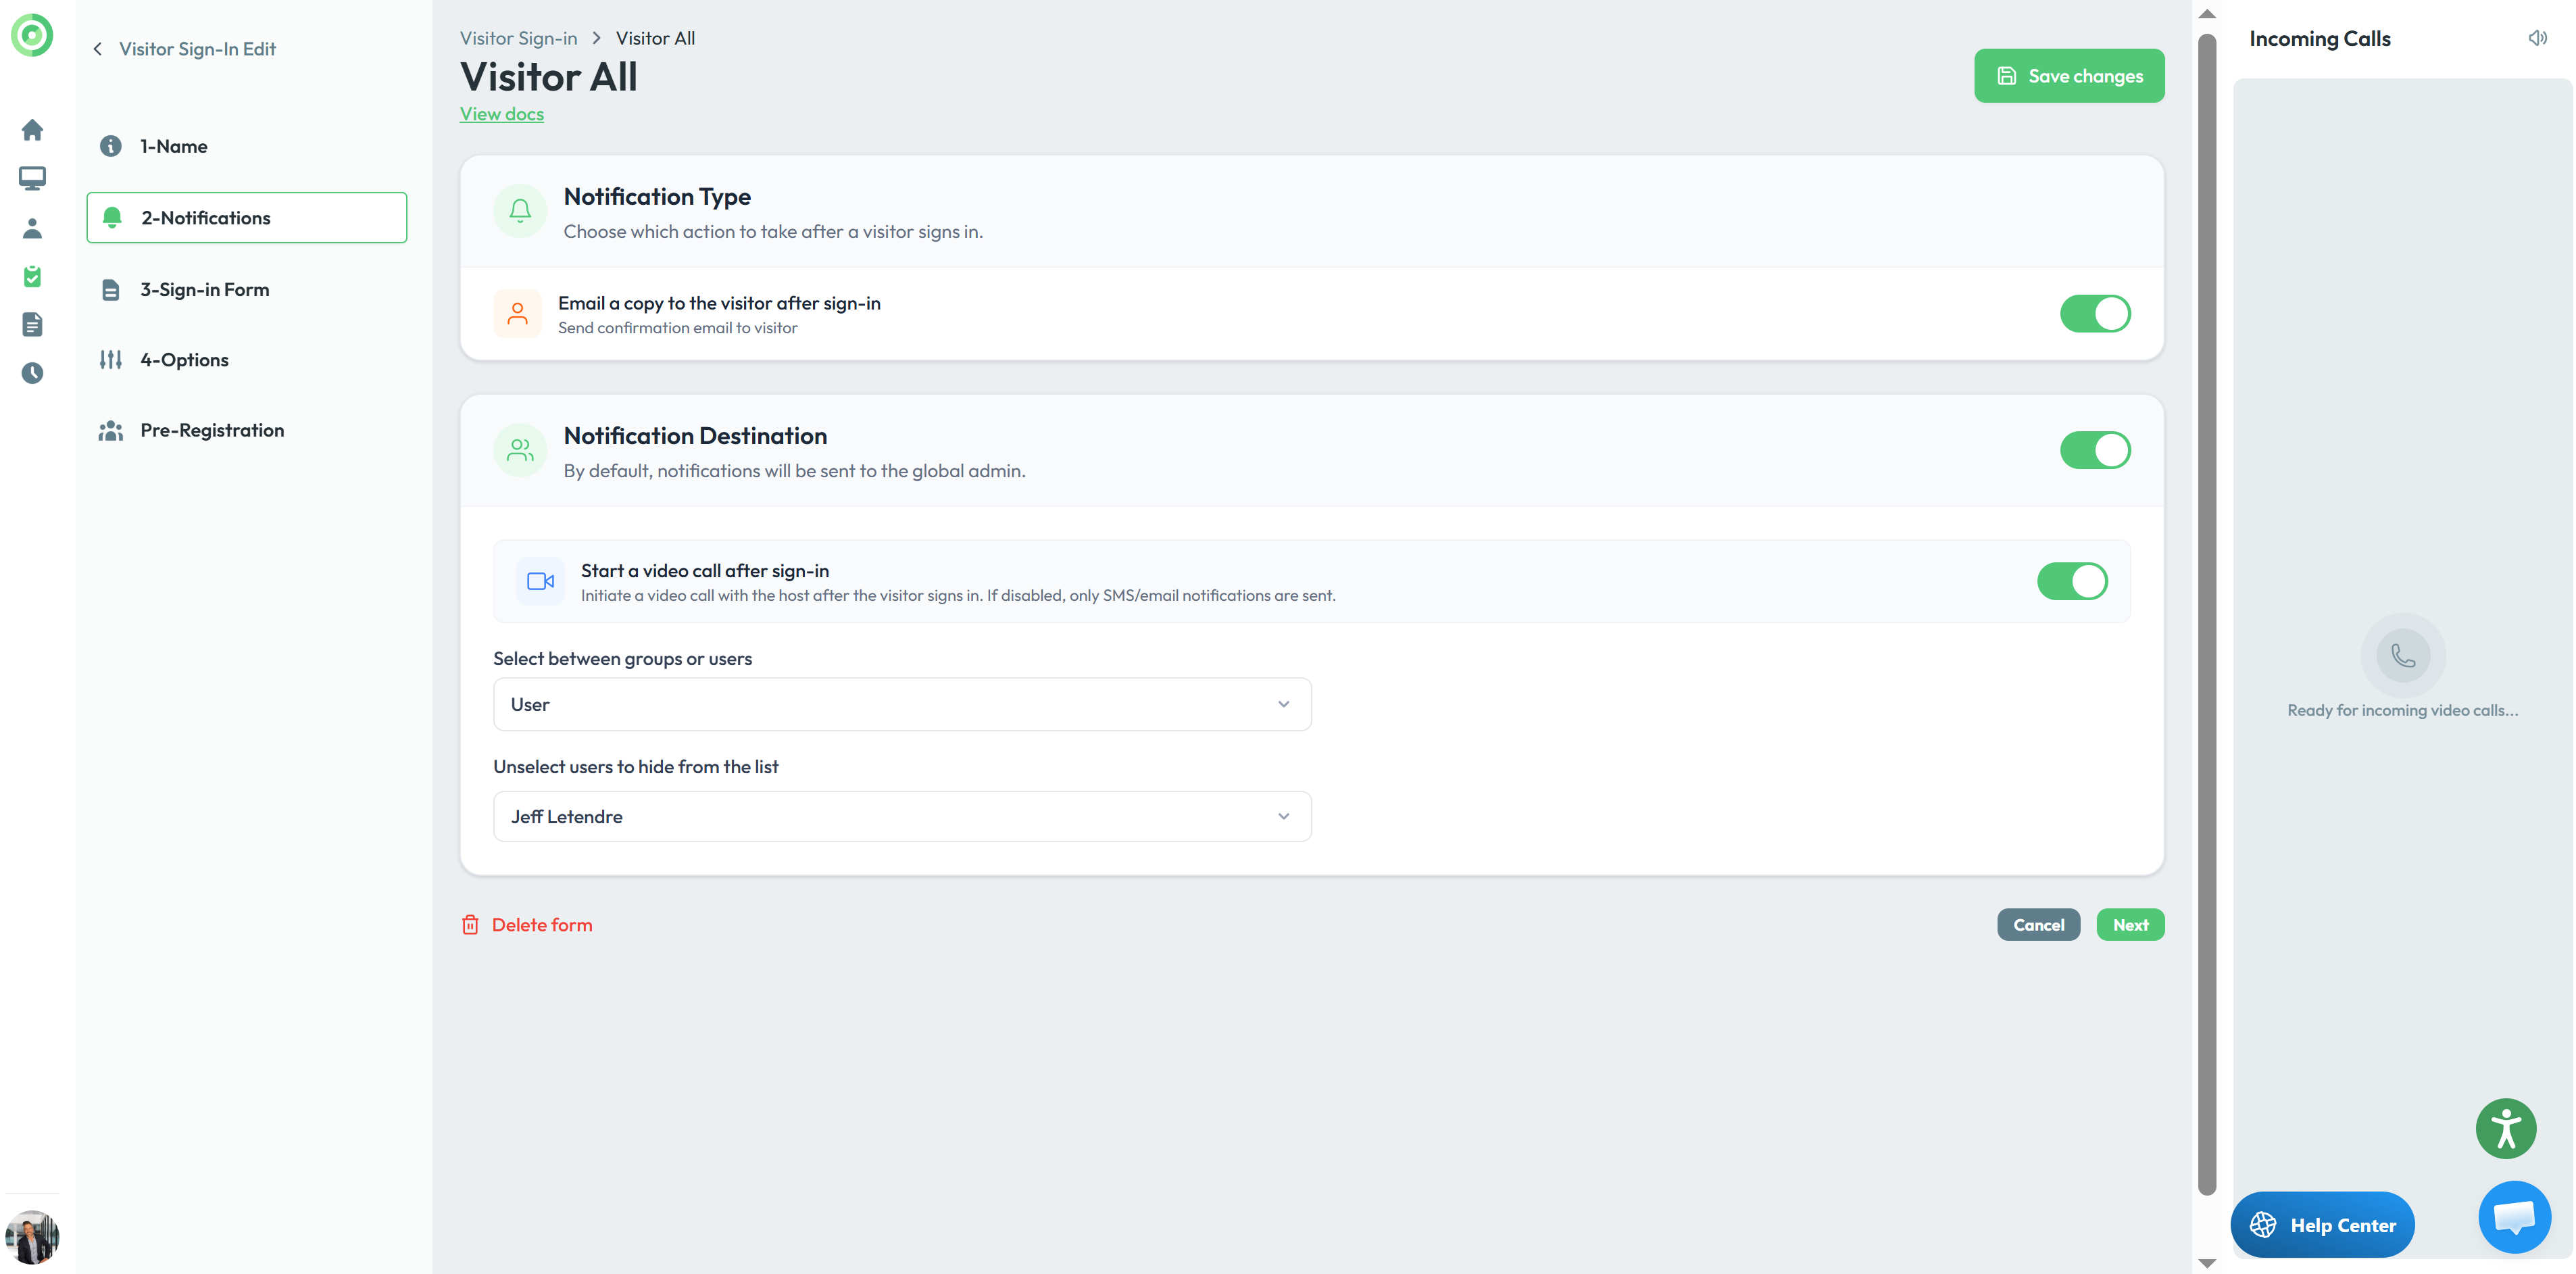
Notifications
In this section, you can choose whether to send the visitor a copy of the sign-in form by email. You can also select who should be notified after the visitor signs in, or allow the visitor to choose the person they have an appointment with if multiple users are listed. Whether the notifications is sent by SMS, email, phone call of video, is determined by the user's own preferences. Additionally, you can disable the video call option.
Users and groups for Microsoft Teams
SMS and email notifications are not supported for Microsoft Teams users. Microsoft Teams users who are part of a group must use the Virtual Front Desk call queue functionality associated with that group. As an alternative for group calling, you can select a Microsoft Teams call queue or auto attendant created in the Teams Admin Center. These call queues can be imported as standard Azure users; however, you must enable the “MS Teams Call Queue” toggle to indicate that the entry represents a call queue rather than a regular user.
Step 3. Sign in form
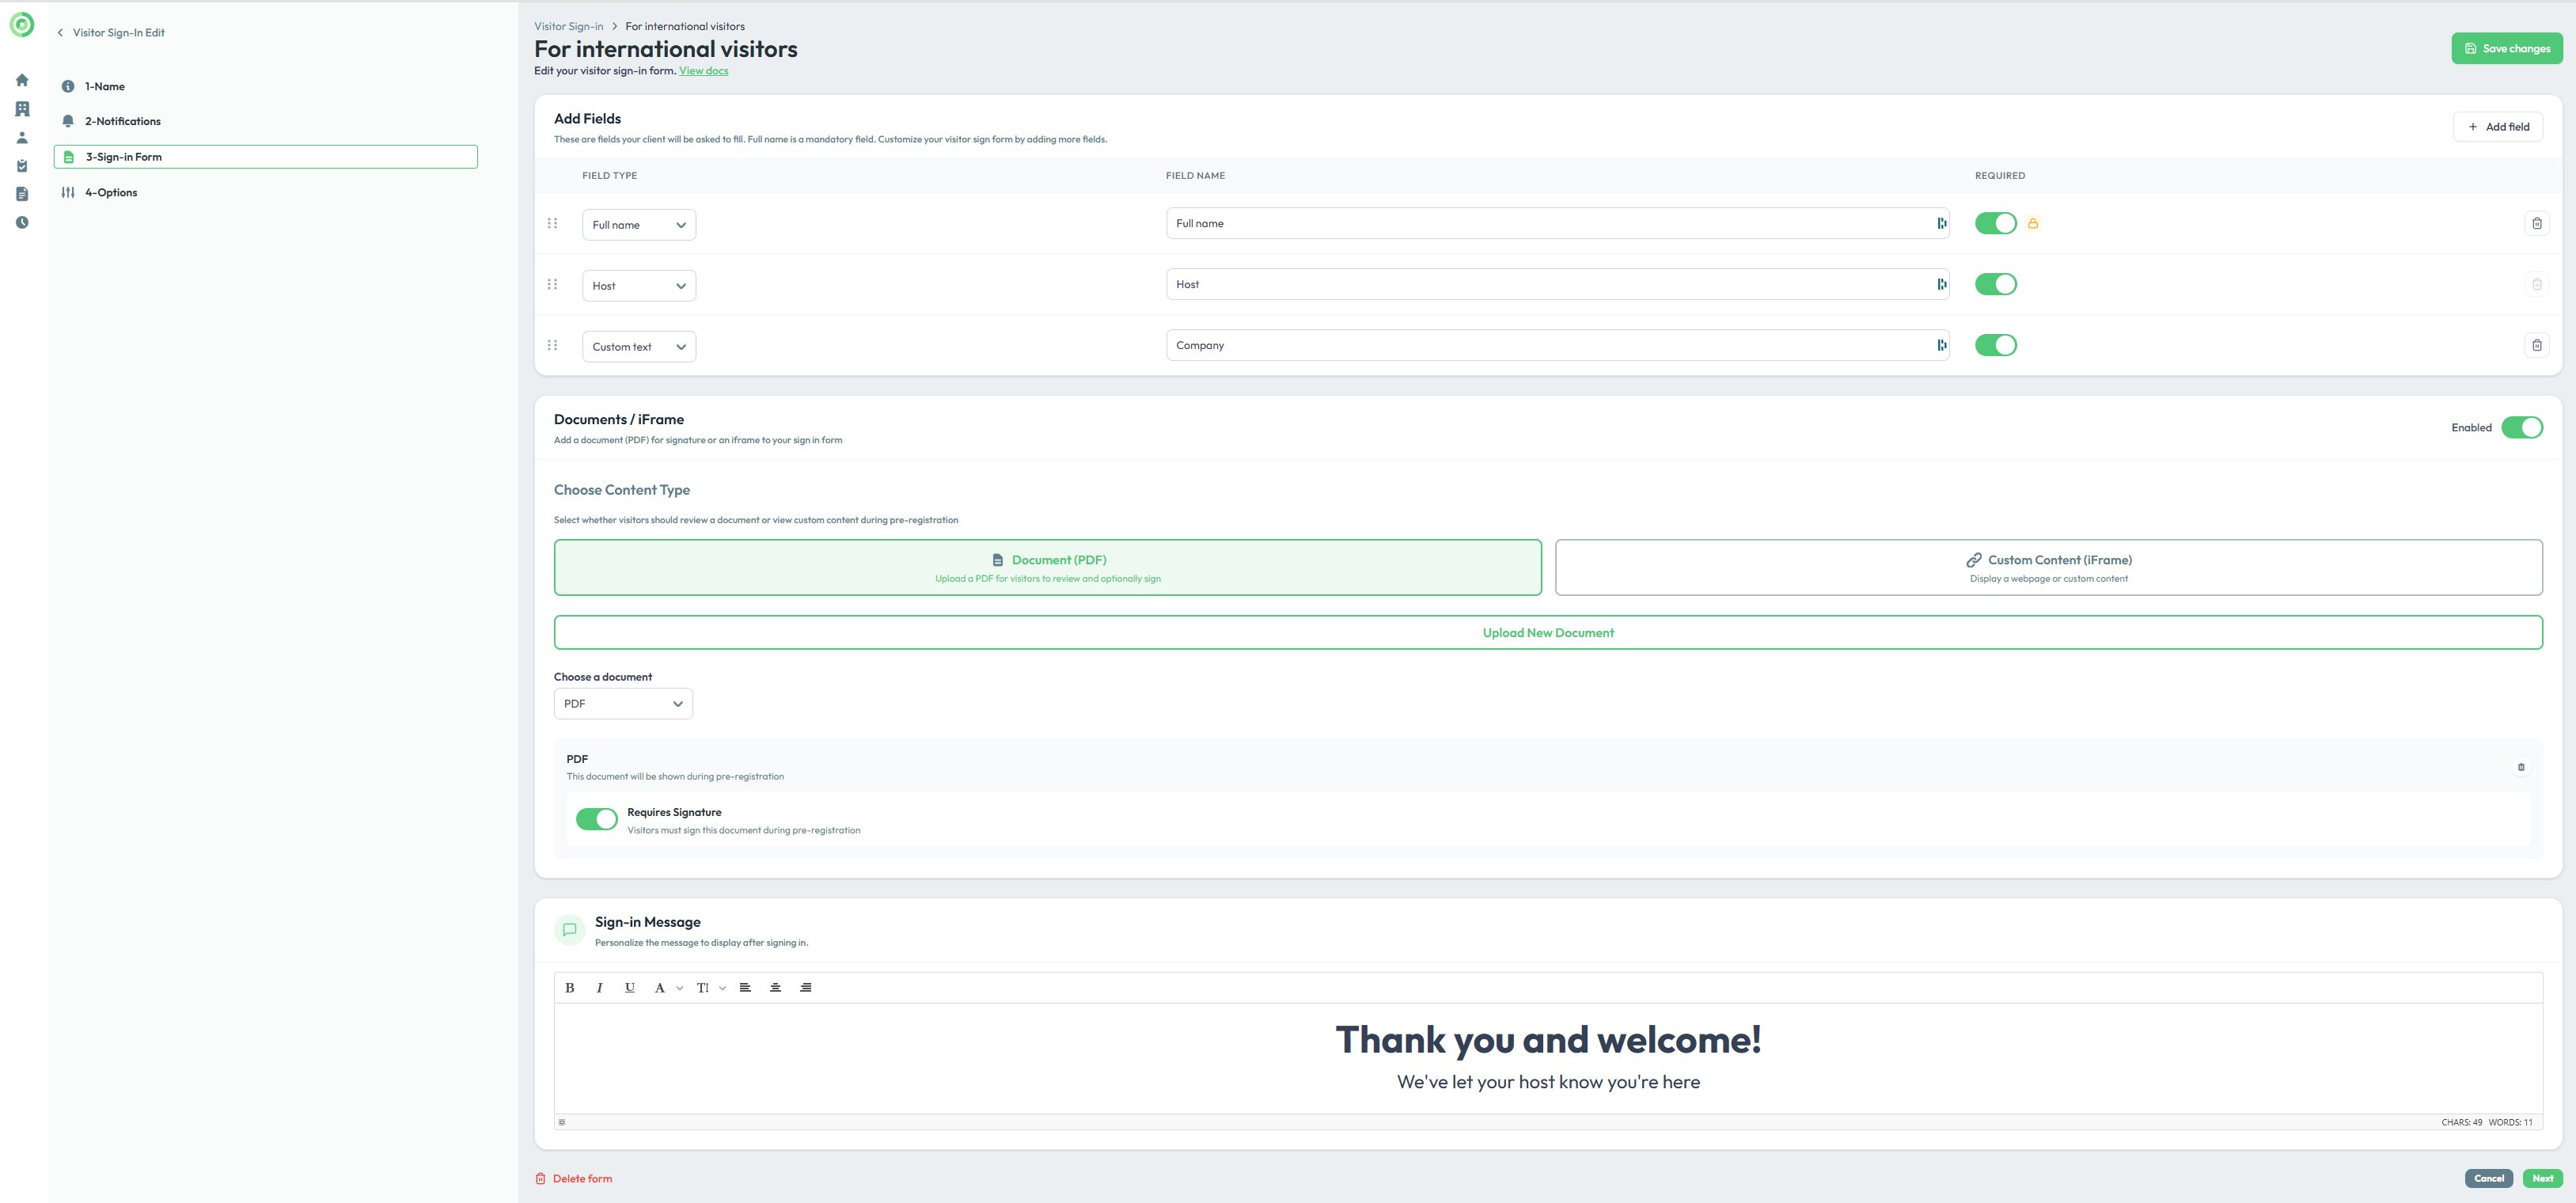
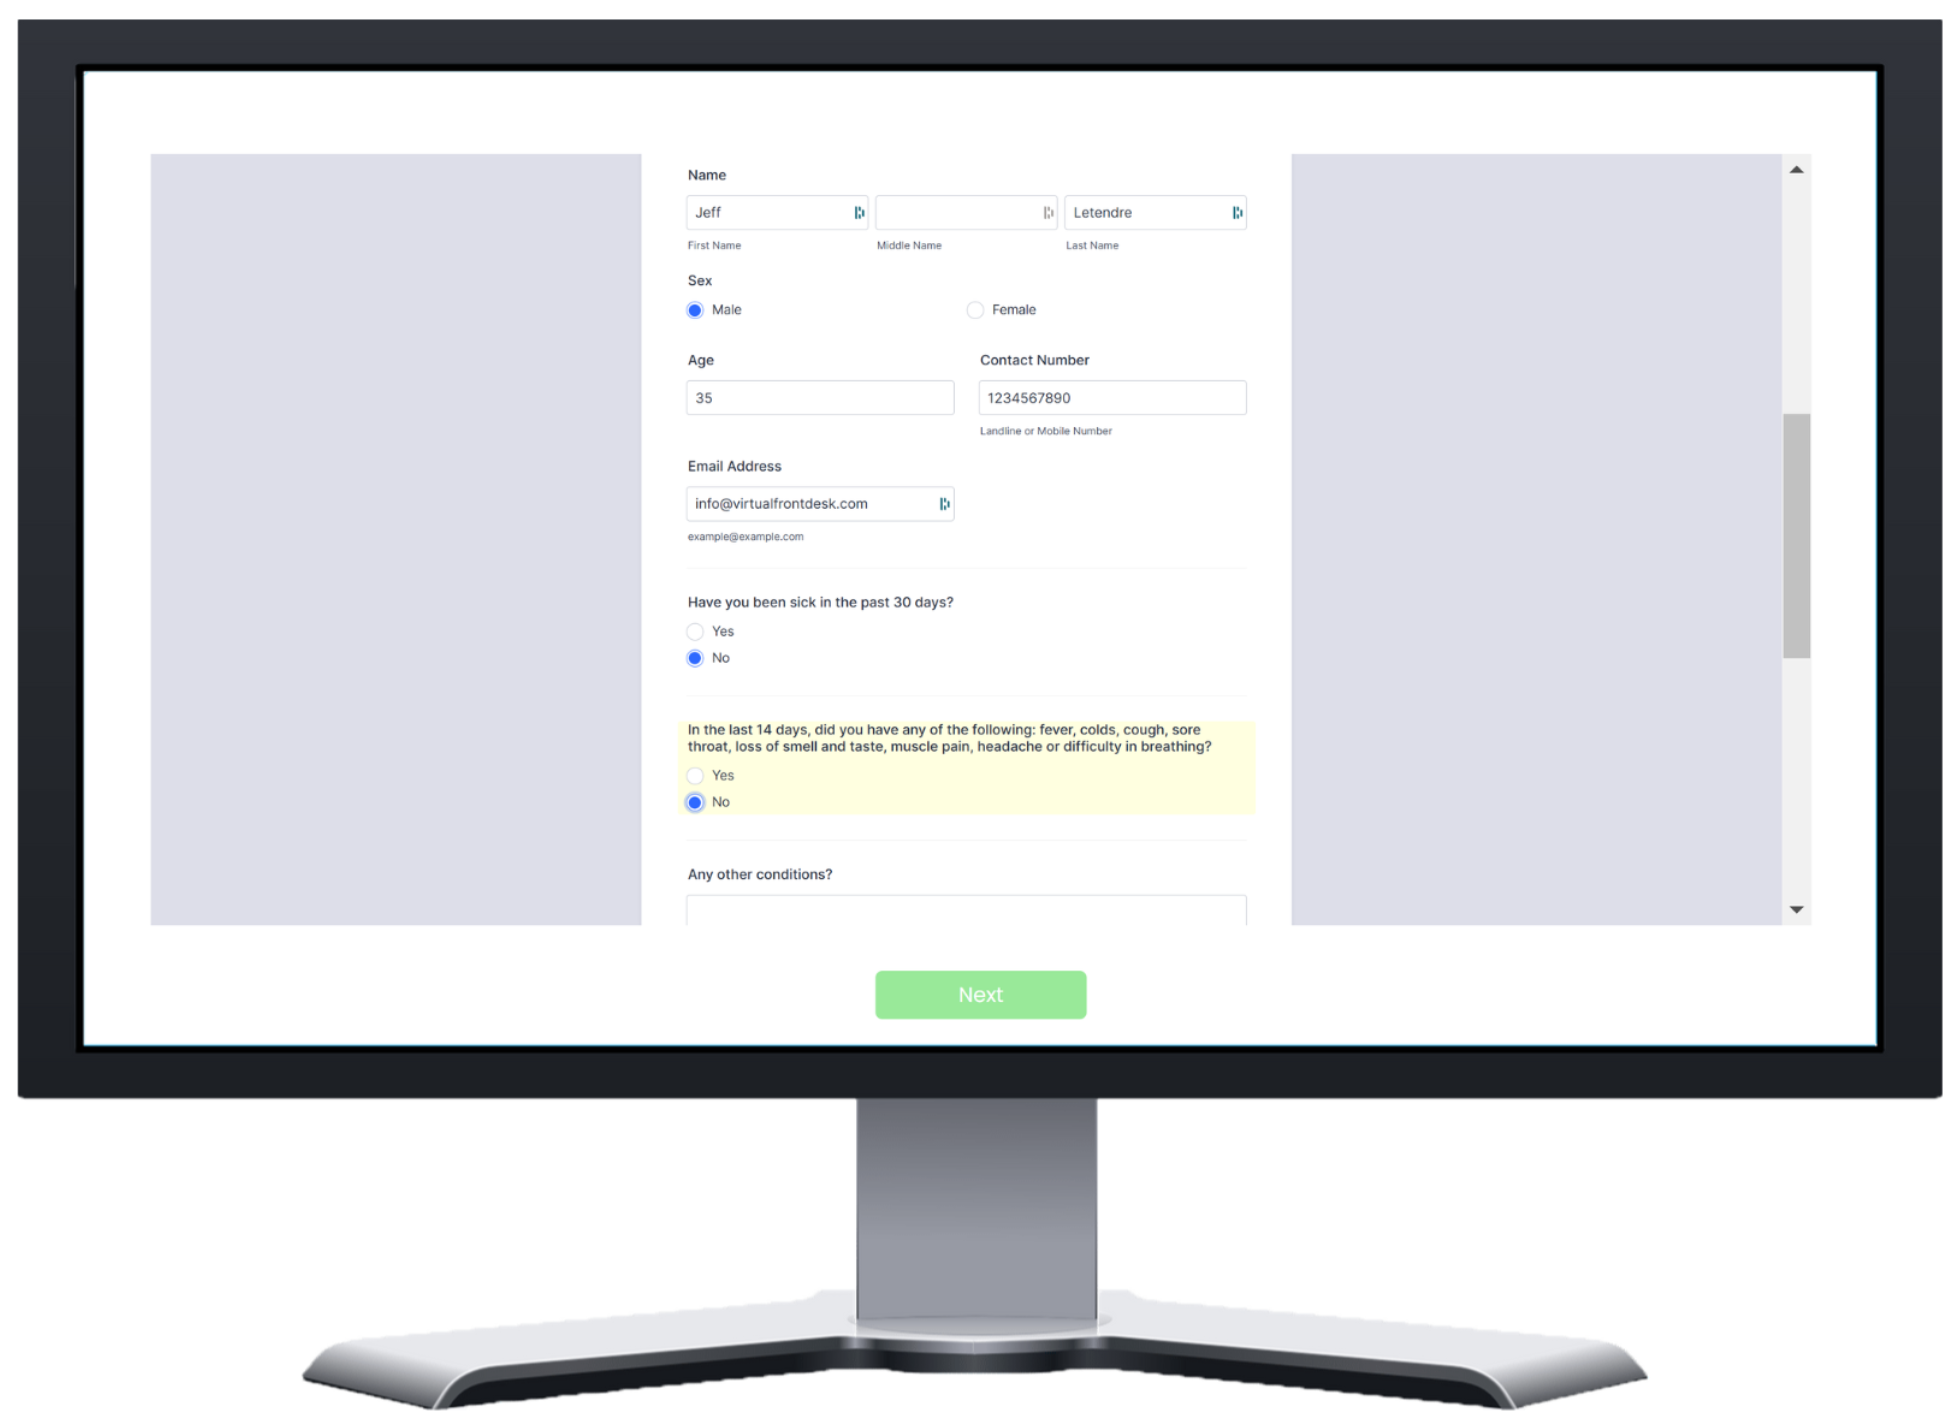
Create your form by adding custom fields. Some fields may be required depending on the notification options you selected in the previous step.
You can attach a PDF for visitors to read or sign, or choose the iFrame option to display an online form directly within the station (for example, a Jotform or Google Form). Please note that the online form has limitations and must support iFrame embedding (URL hidden).
Step 4. Options
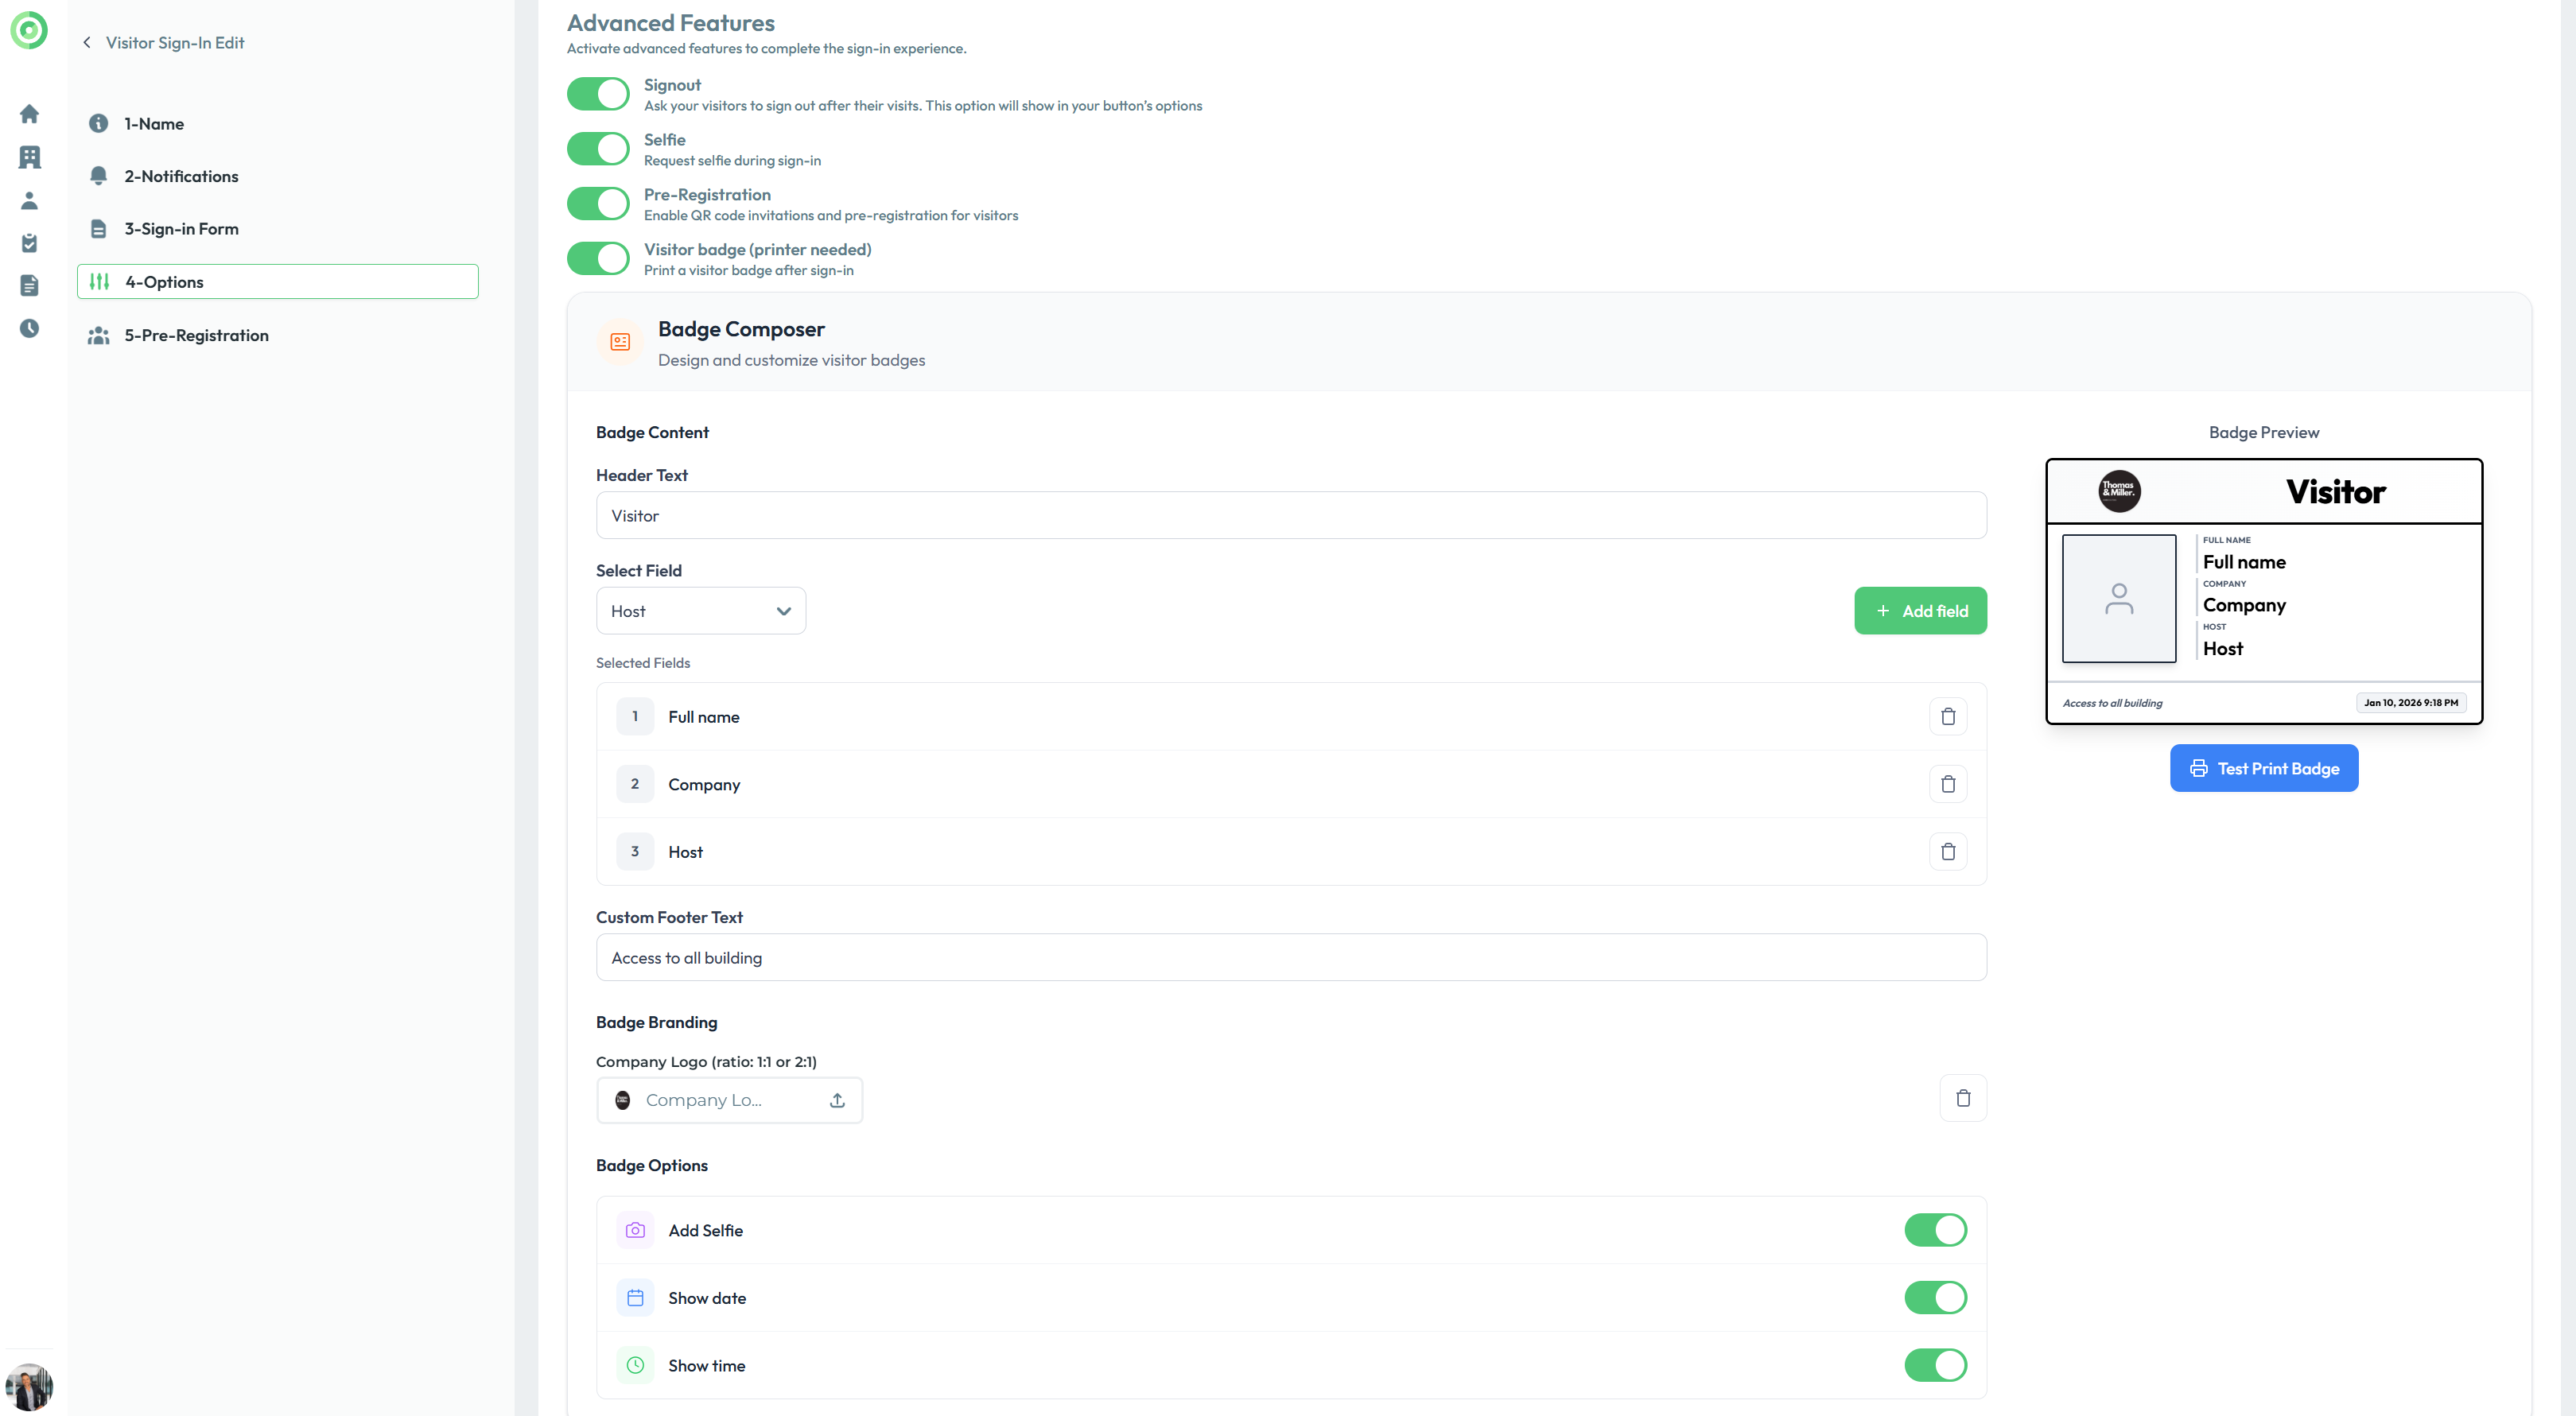
Sign out
If you decide to include a sign-out option, it will share the same name as the visitor sign-in form in your button's list of actions. To enable visitors to sign out, create a button with the sign-out option. Visitors will then enter the first letter of their name, select their name from the list, and complete the sign-out process. In the Visitor Sign-In History, you’ll be able to track who has signed in and out, along with the information they provided.
Selfie
Request a selfie that can be printed on a visitor badge or stored in your sign-in log for future reference.
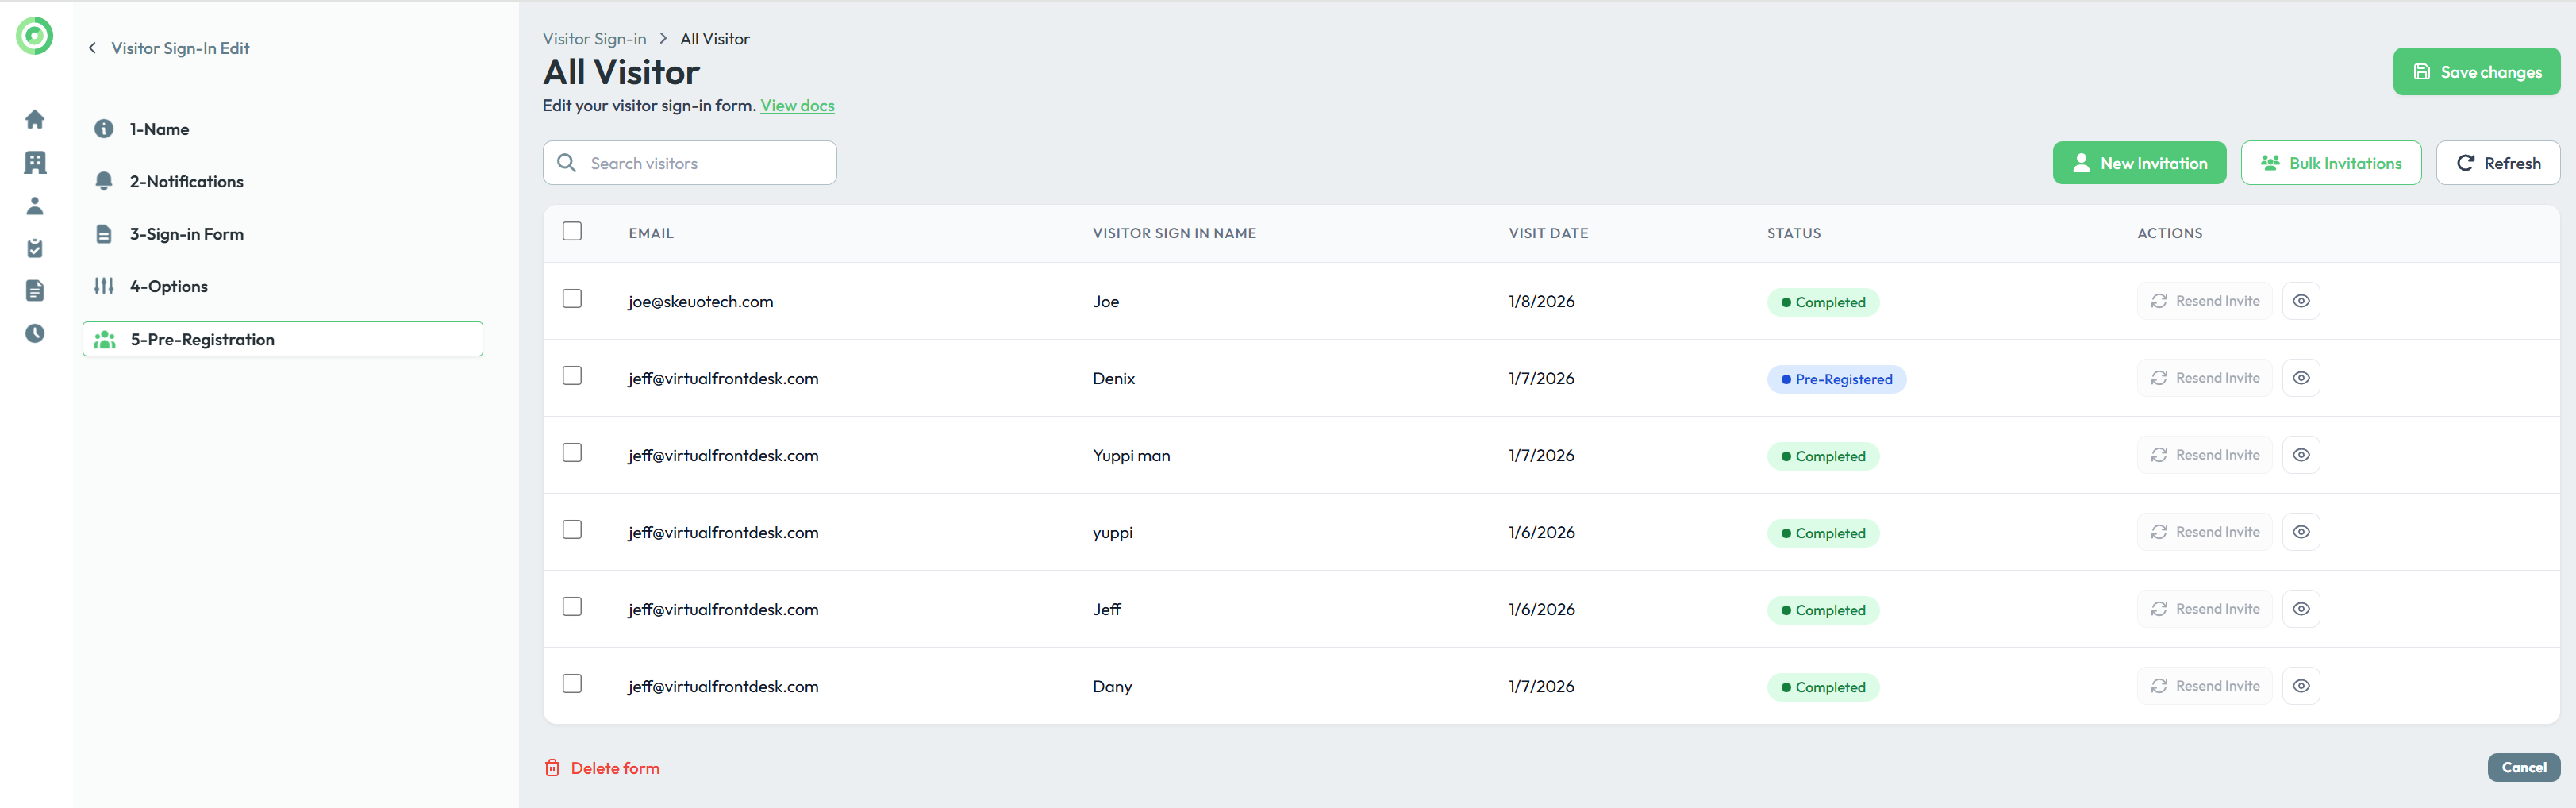
Pre registration
This option enables Express Sign-In using a QR code or a digital code. It allows to email the sign-in form to visitors so they can pre-register on their computer or smartphone. You will see this option after saving your Sign in form.

Click pre registration and create a new invitation.
This invitation will be email to the visitor, with an easy step by step guide on how to pre register.
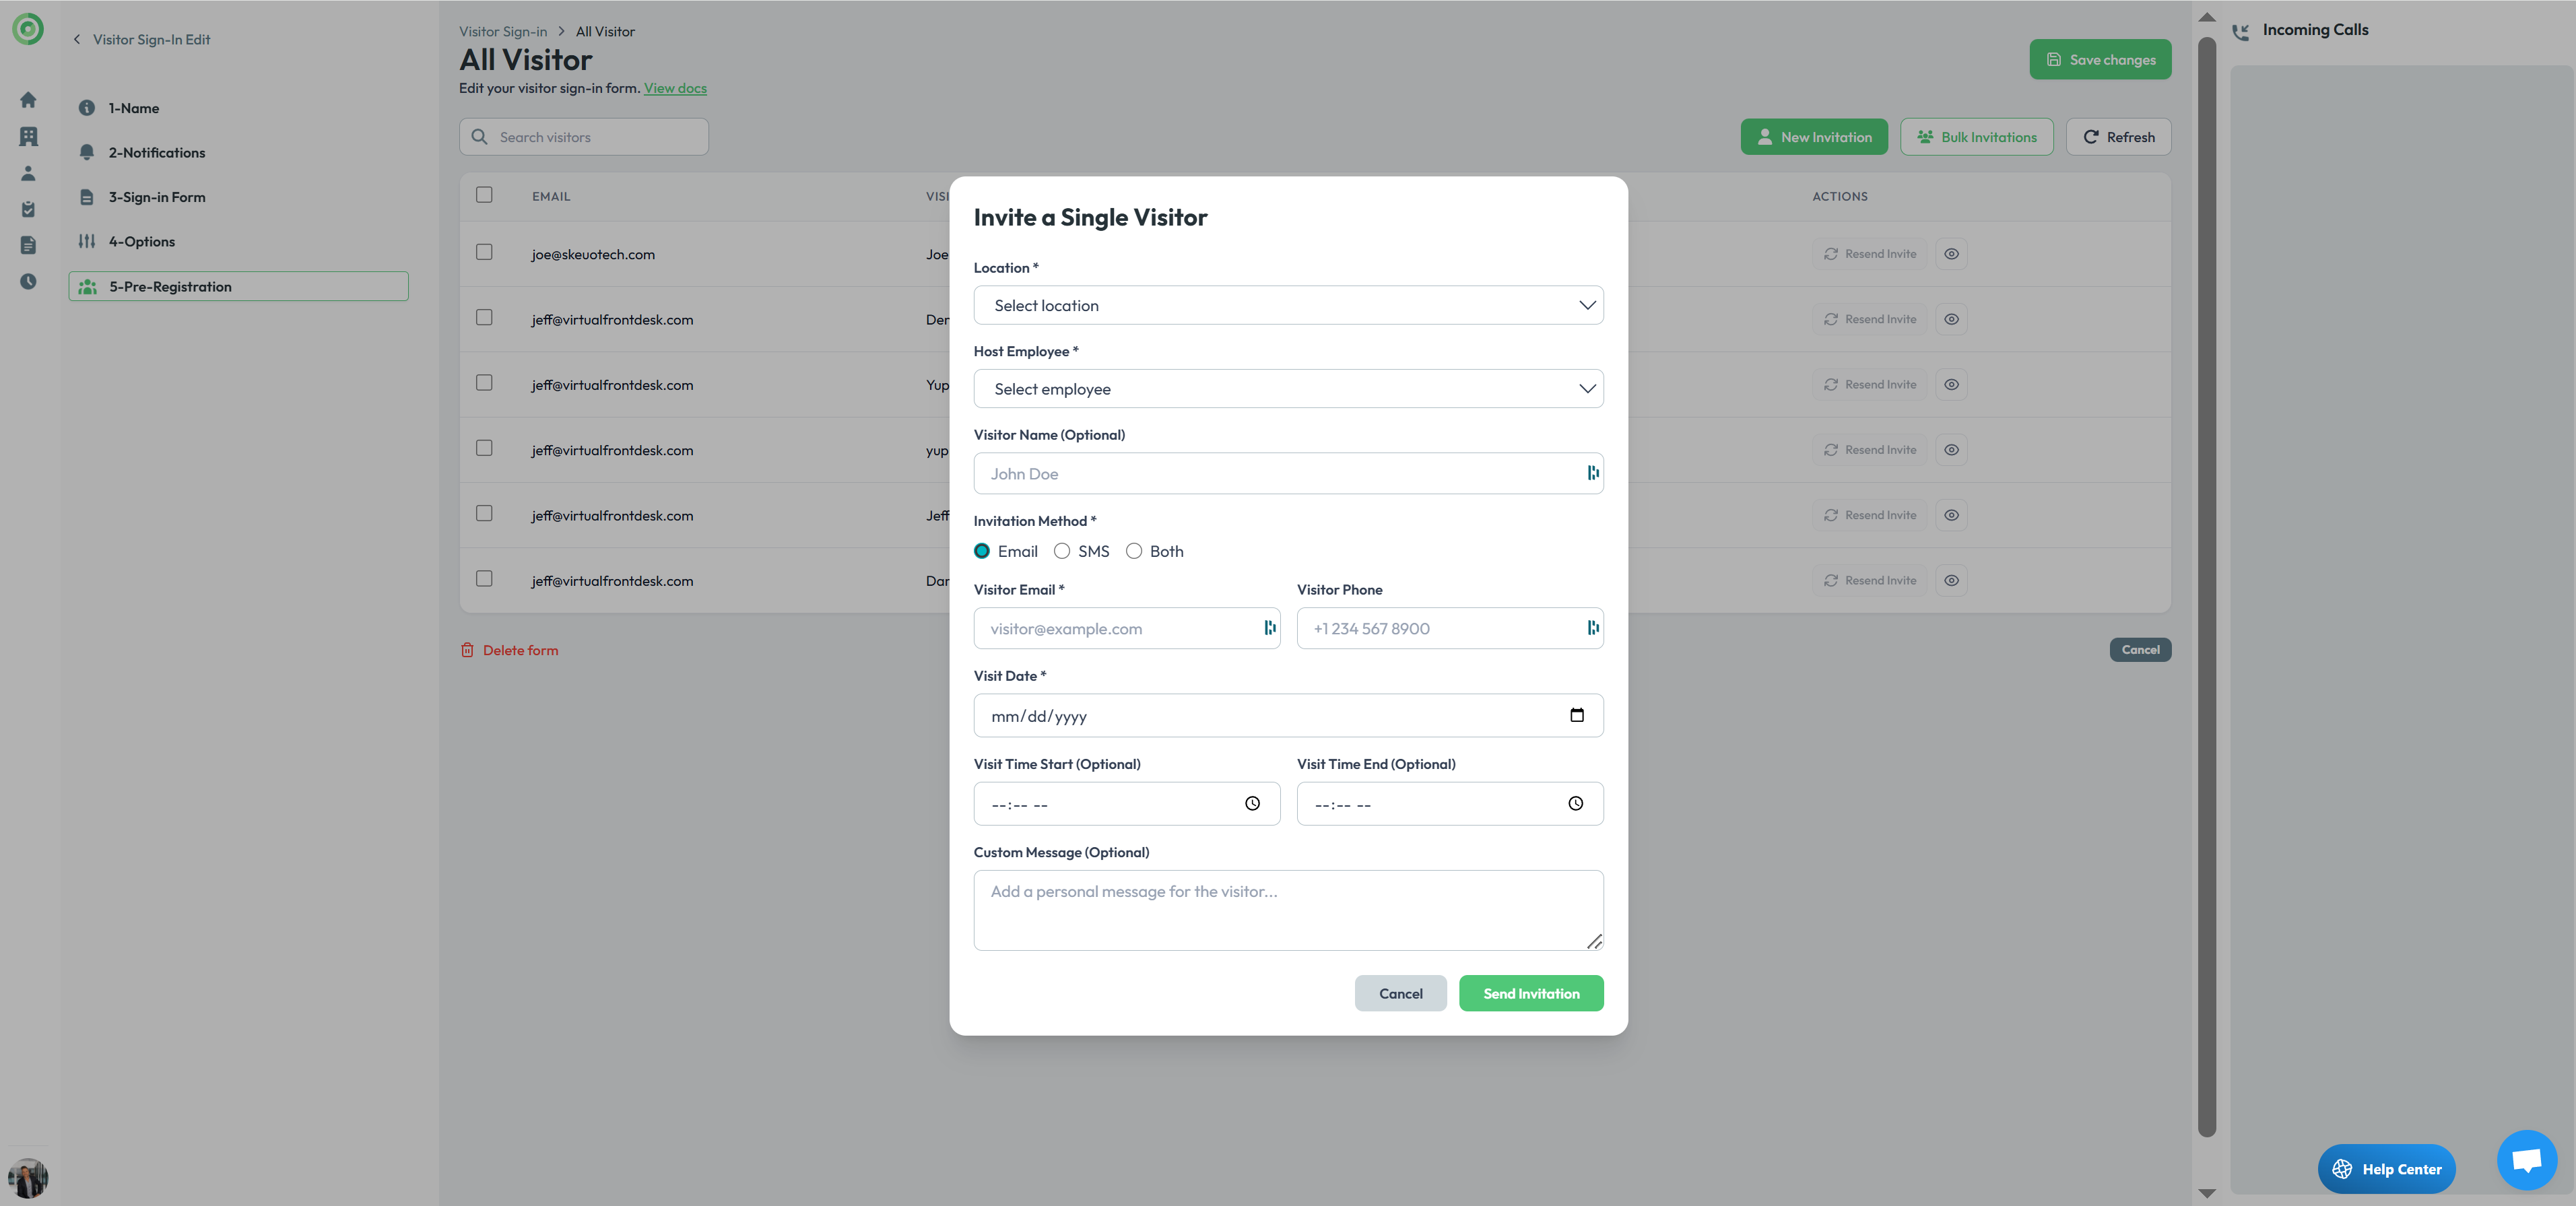
Once they arrive at the station, they simply scan the QR code or enter the digital code provided. The badge will print automatically, and notifications will be sent just as if the visitor had completed the sign-in form directly on the station. 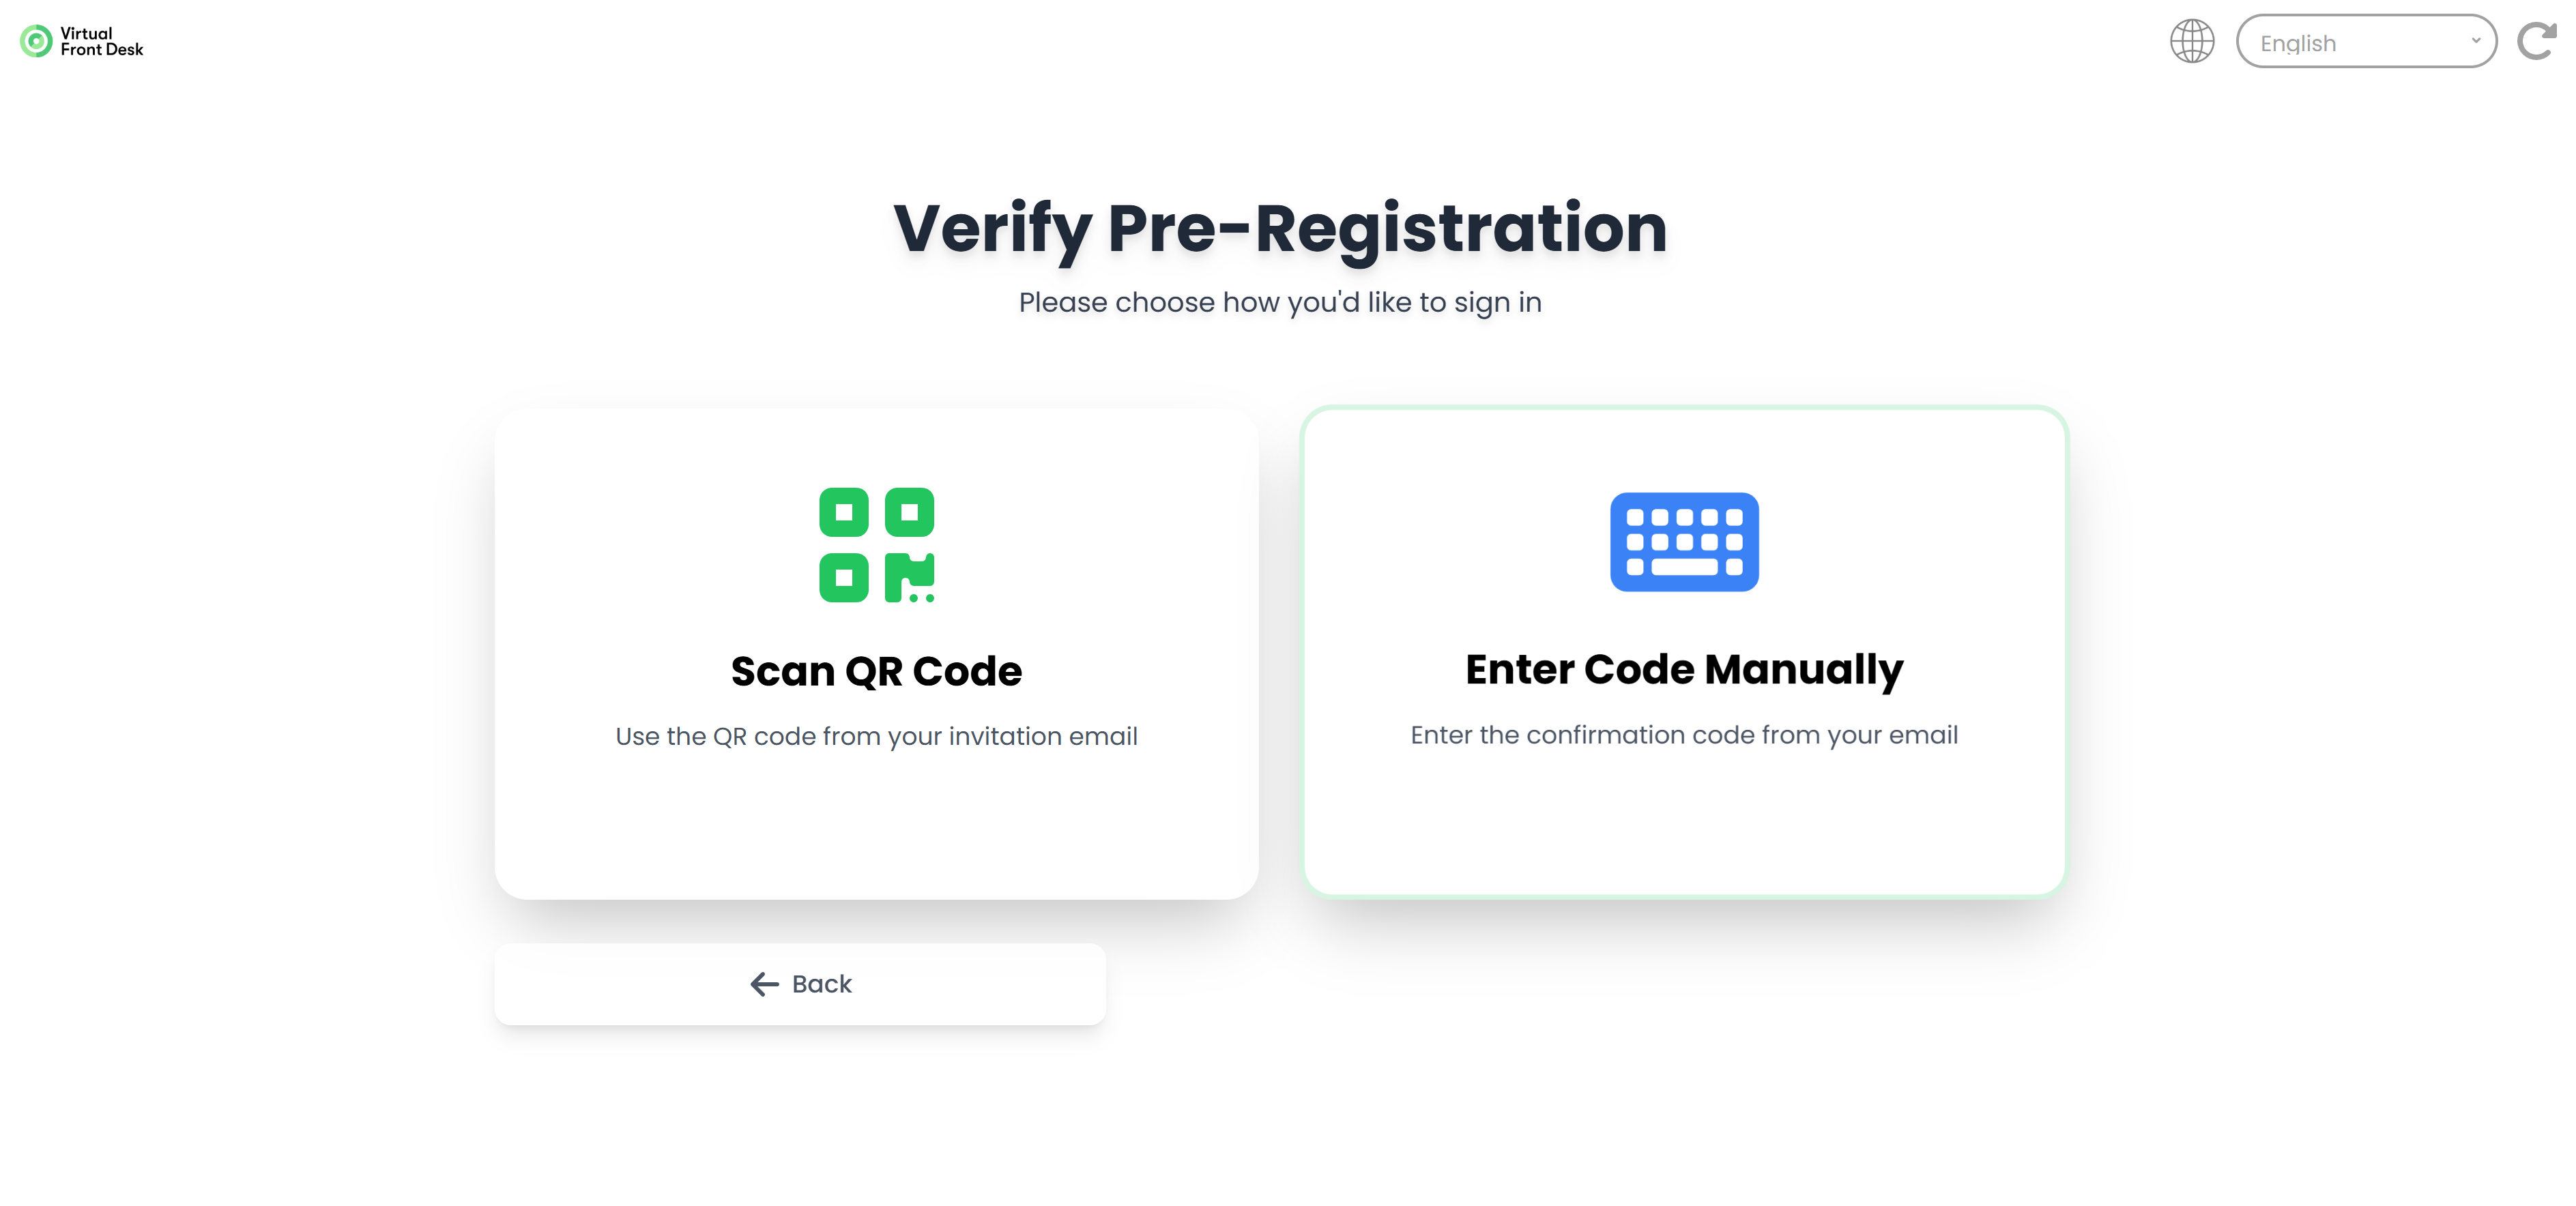
Visitor Badge
Follow the steps to configure the fields of your visitor badge and preview. Please refer to this article to configure your label printer.