Users
Users
Users are the people a station can reach. Although we call them users, a user can also represent a receptionist or a company, for example in a coworking space where several businesses share one building.
1. Open User management
Click User management in the main menu. The Users tab lists everyone in your organization with their role, location, groups and sign-in method. The cards at the top show who is online, who answered the most calls this week, the fastest average pickup and total time on calls.
Use the filters to narrow the list by role, location, group or source, or search by name. Click the pencil icon on a row to edit a user.
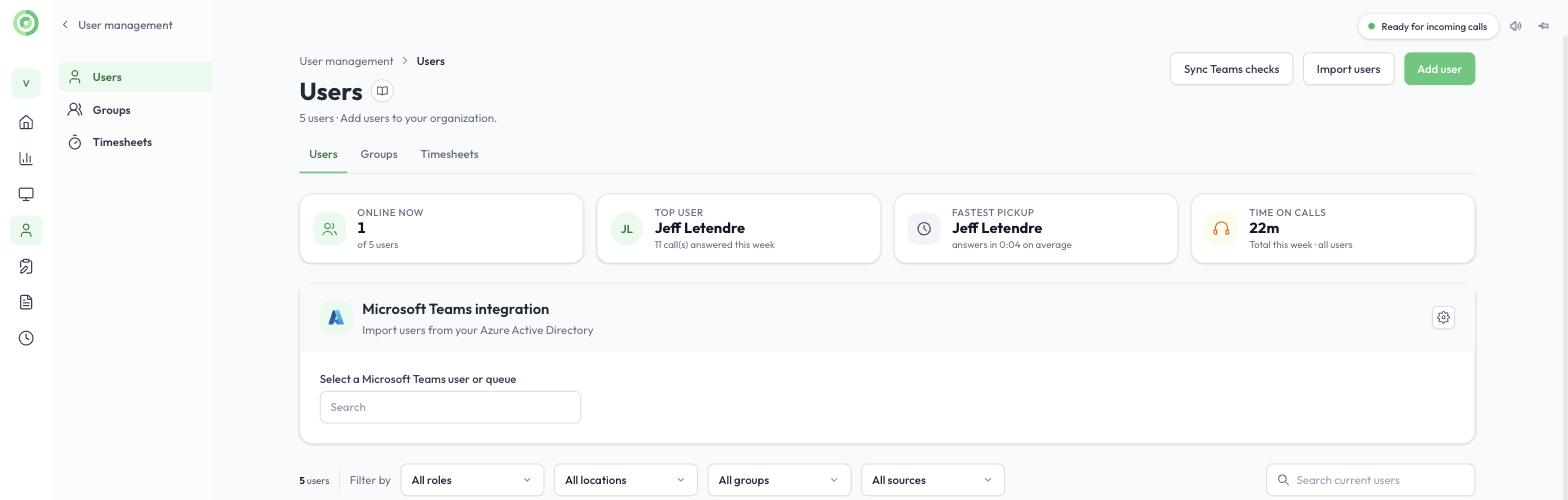
The Users page
The Groups tab is where you set up groups and call queues (see Groups and call queue), and the Timesheets tab shows clock-in and clock-out records.
2. Add a user
Click Add user at the top right and choose how to add the person:
- VFD manual user: creates the user in Virtual Front Desk and sends them an email invitation. They receive calls in the Virtual Front Desk dashboard.
- Azure directory: imports users or call queues from your Microsoft Entra ID (Azure Active Directory) so they receive calls directly in Microsoft Teams. To complete the Microsoft Teams setup, read Ms Teams integration for video calls, call queue & auto attendant.
Note: Importing users from Azure directory is the only way to have station calls ring them in Microsoft Teams. Users invited by email receive calls in the Virtual Front Desk dashboard and mobile app, and cannot be connected to Microsoft Teams.
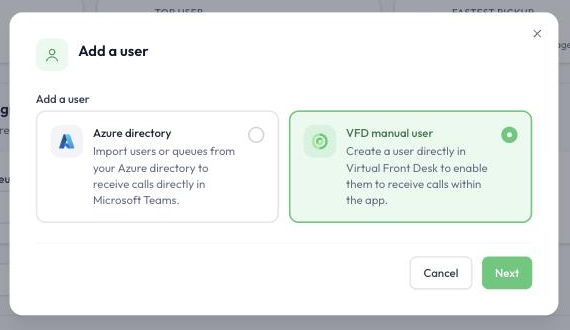
Choosing how to add a user
You can also use Import users to add several users at once, or search for a Microsoft Teams user or queue in the Microsoft Teams integration panel on the Users page.
3. Fill in the user’s details
For a VFD manual user, the Invite a new user page asks for:
- Photo (optional), First name, Last name and Email.
- Role: choose what the user can access (see section 5).
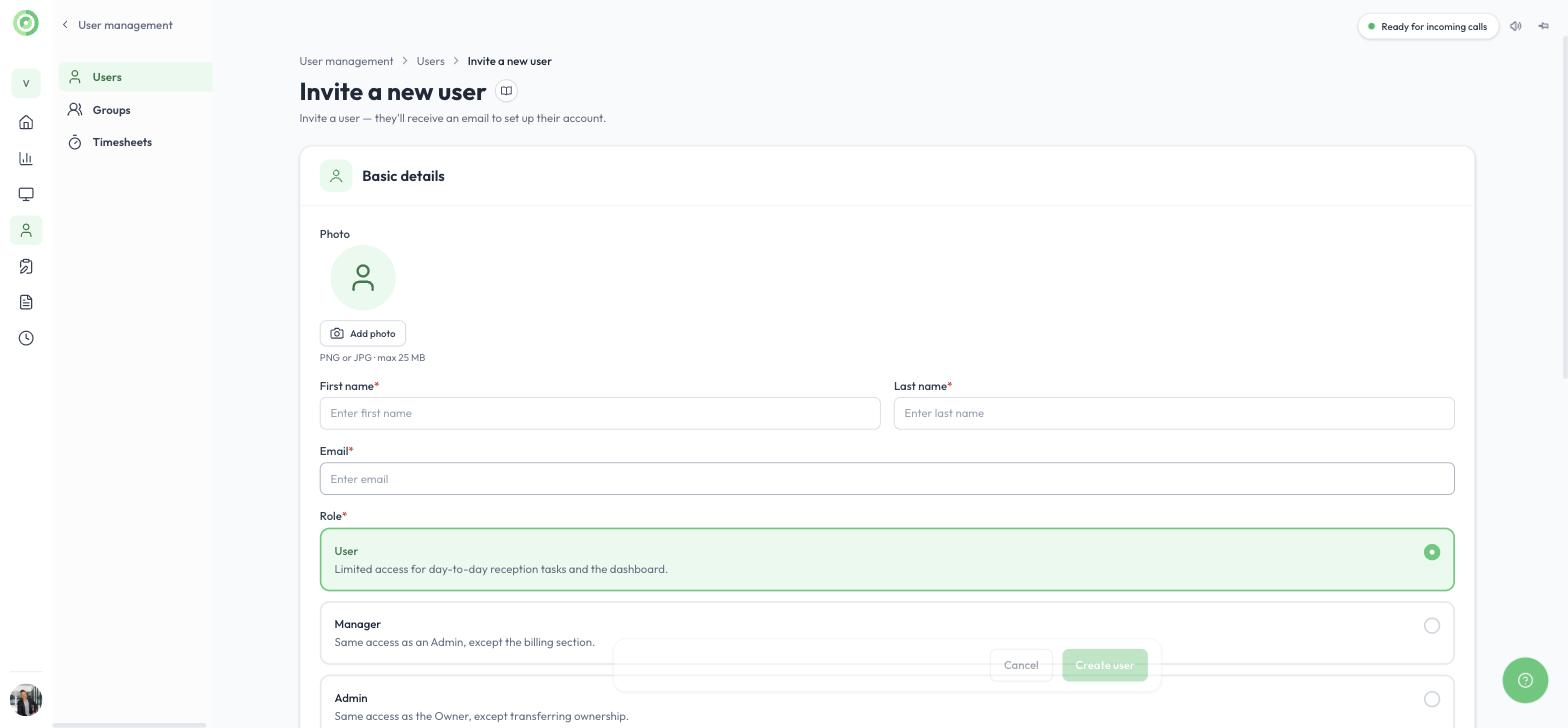
Inviting a new user and choosing a role
Under Assigned access, choose the Groups the user belongs to and the Locations they cover. New users are added to the Default group automatically; you can remove it.
Under Calls & notifications, choose how the user is reached when a station calls:
- Activate SMS notification: a text message as soon as a station calls the user.
- Email notification: an email as soon as a station calls the user. On by default.
- Call forwarding number: forwards the call to a phone if the user does not answer.
Click Create user to send the invitation.
4. What the user receives
The user receives an email with a link to set up their account and sign in. If the person already has a Virtual Front Desk account, no email is sent. Instead, the next time they sign in, a message invites them to join your organization.
The user shows as Pending until they sign in and join. Once they have joined, users can change their own notification preferences under Settings > Notifications & calls.
5. Roles
Every user has one of four roles:
| Role | Access |
|---|---|
| Owner | Full access, including billing and transferring ownership. The person who created the organization is its owner. |
| Admin | Same access as the owner, except transferring ownership. |
| Manager | Same access as an admin, except billing. |
| User | Limited access for day-to-day reception tasks and the dashboard. |
New users are assigned the User role unless you choose another. To change a role, click the pencil icon next to the user and select the new role.
To learn about owning or belonging to several organizations, read Organizations, owner, admin and regular users.