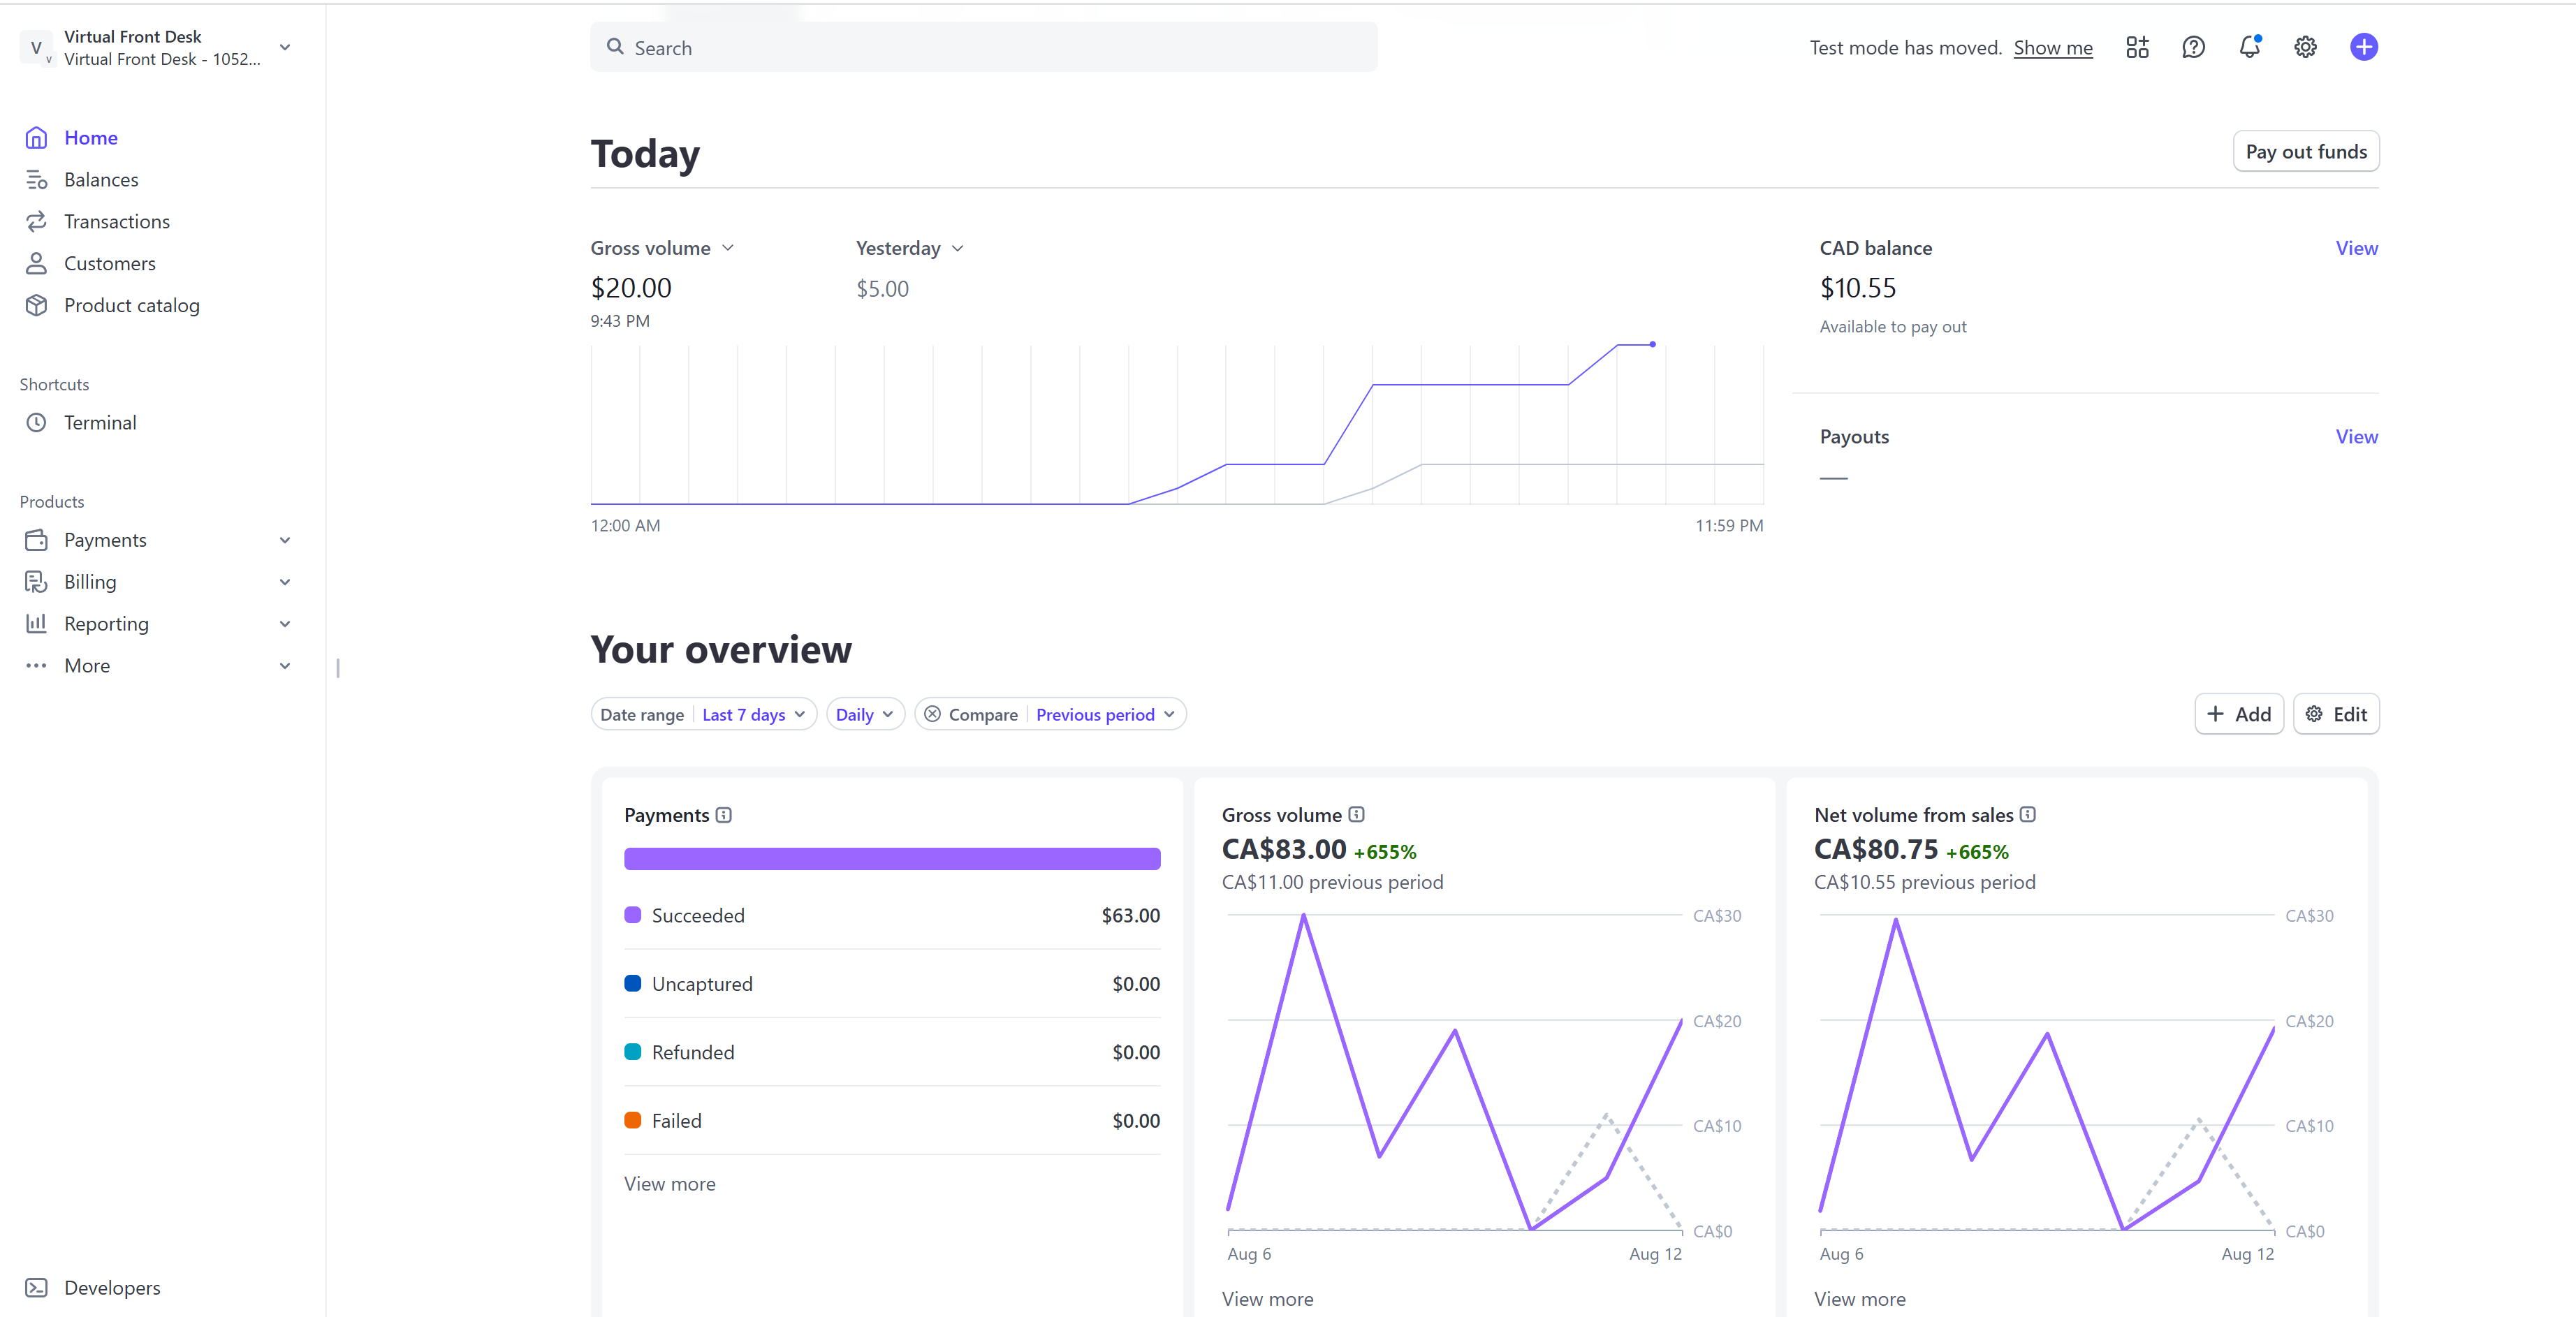
Payments Stripe Terminal, Credit and Debit Card Reader, POS Point of Sales
Payments, Stripe Terminal, credit and debit card reader (POS)
With the Stripe integration, you can take credit and debit card payments at a station during a live video call. In a few clicks, you send an invoice to the station screen and a payment request to a Stripe card reader next to the station. The visitor pays on the reader and automatically receives the invoice and receipt by email.
Payments are available only on the Enterprise plan.
Step 1. Create a Stripe account
If you do not have one yet, create a Stripe account at stripe.com.
Step 2. Order a Stripe Terminal S700
Order a Stripe Terminal S700 card reader for each station that will take payments.
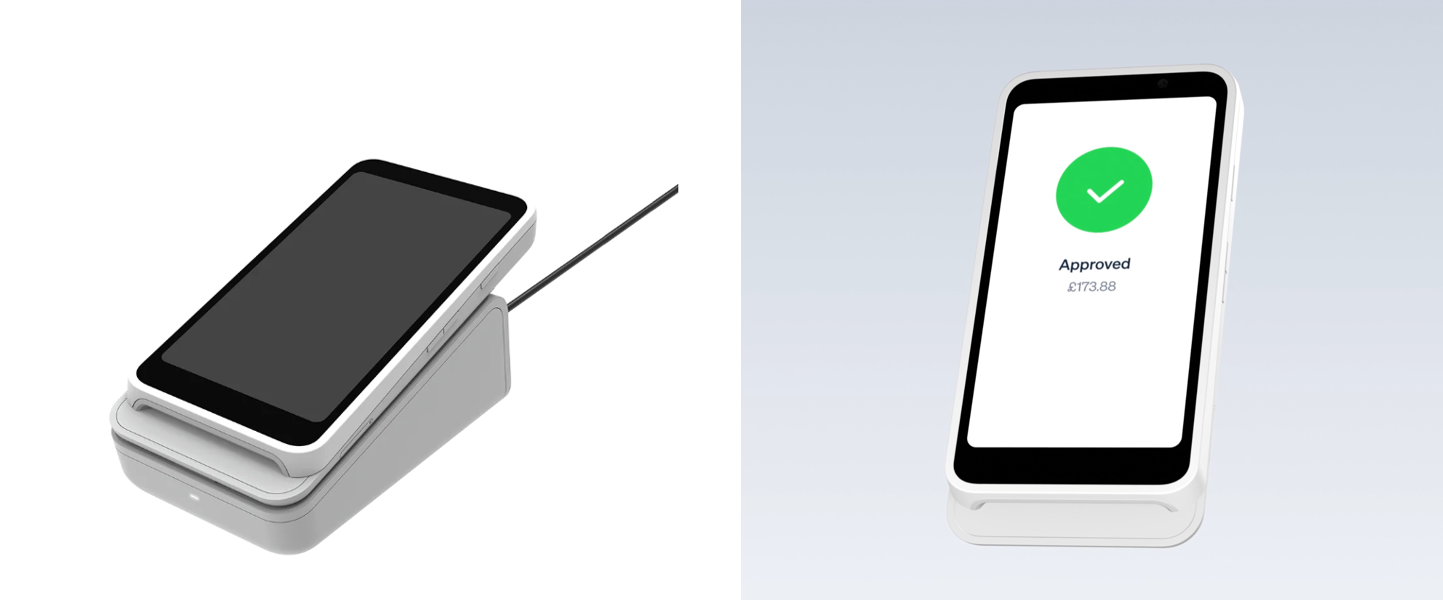
The Stripe Terminal S700 card reader
Tip: The default admin password (PIN) of the Stripe S700 is 07139.
Step 3. Connect your Stripe account
- Click the gear icon next to your name, then under Organization, select Integrations.
- Under Payment terminals, click Connect.
- Select the Stripe account you want to connect and click Connect.

The Payment terminals integration, connected
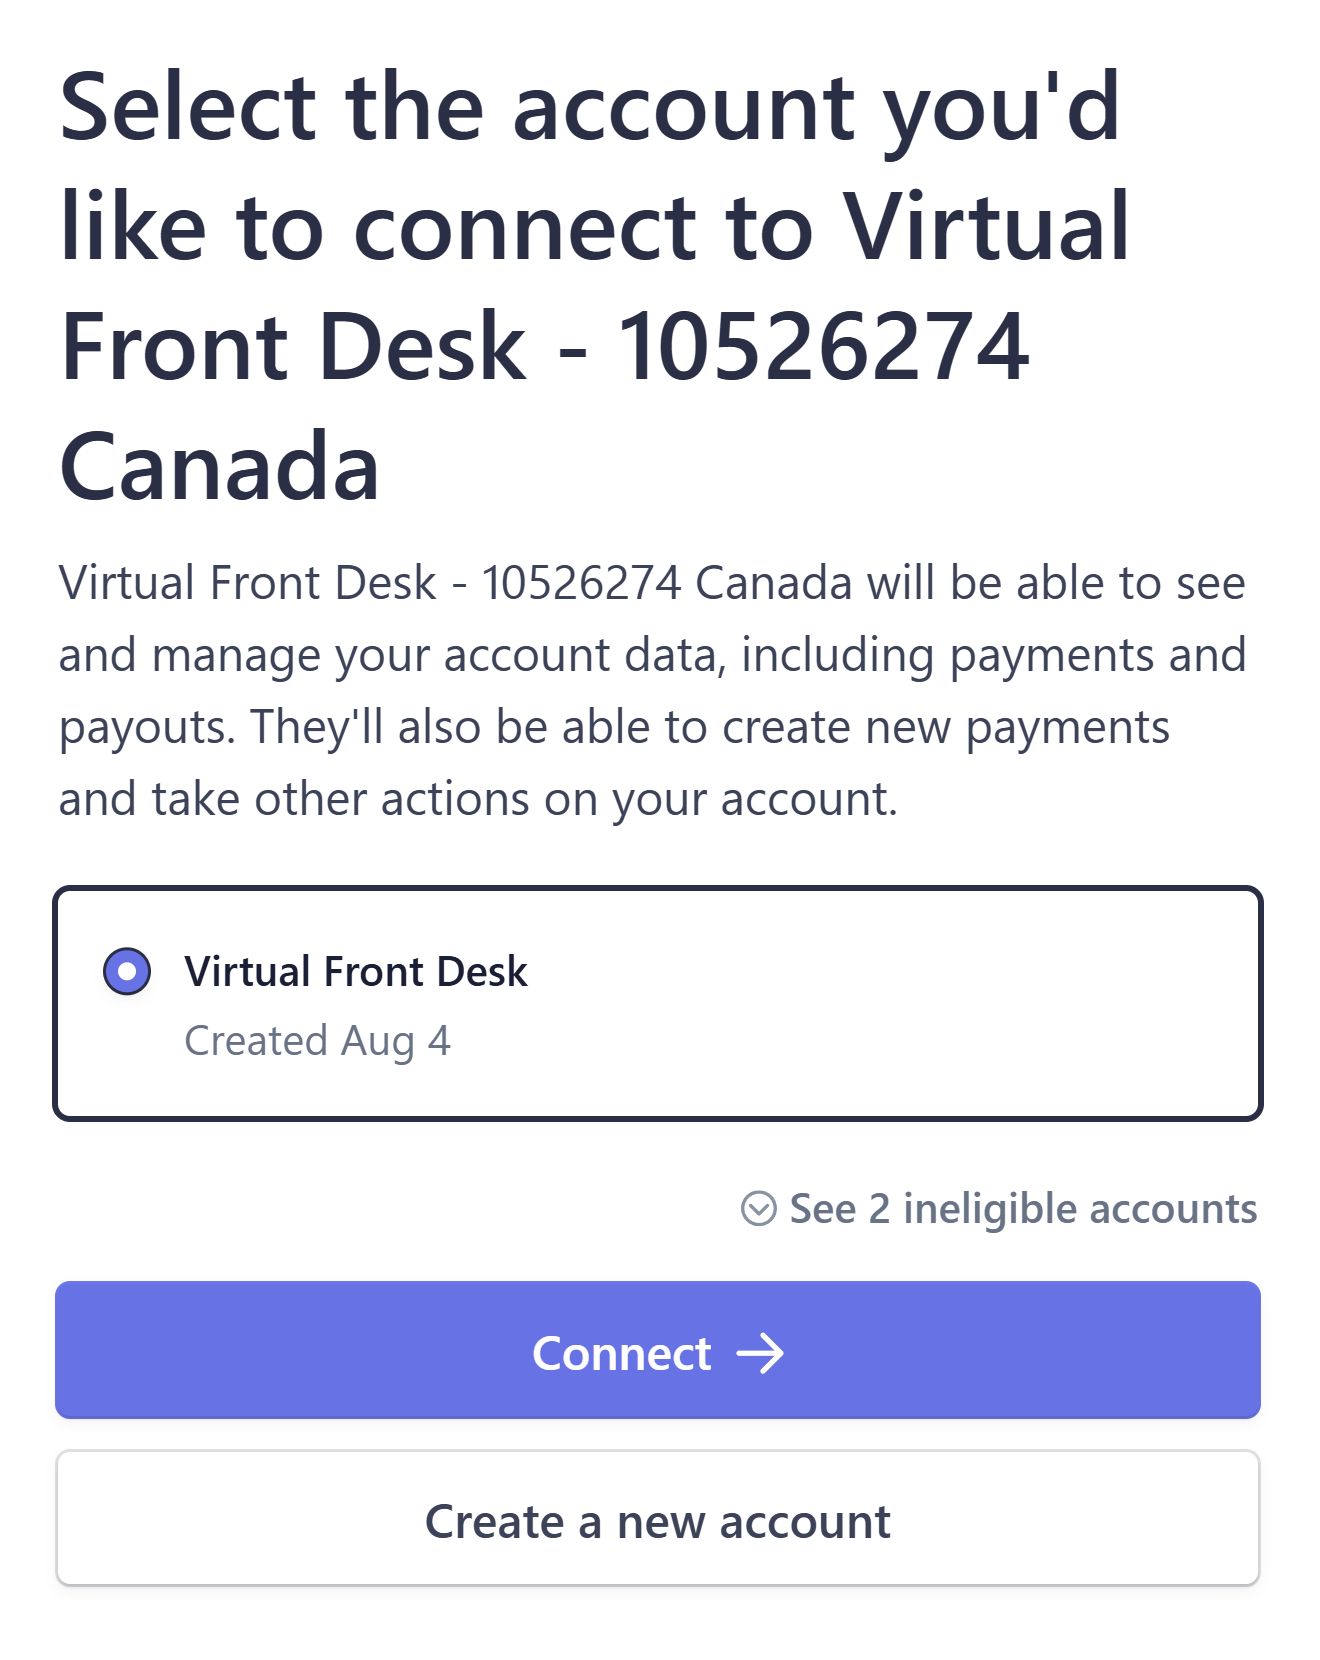
Selecting the Stripe account to connect
Once connected, the integration shows Connected.
Step 4. Add the card reader to a station
- In the main menu, click Stations, then open the station that will take payments.
- Open the Payment (POS) tab and click Add a terminal.
- Enter the terminal information and the pairing code shown on your Stripe S700, then click Add terminal.
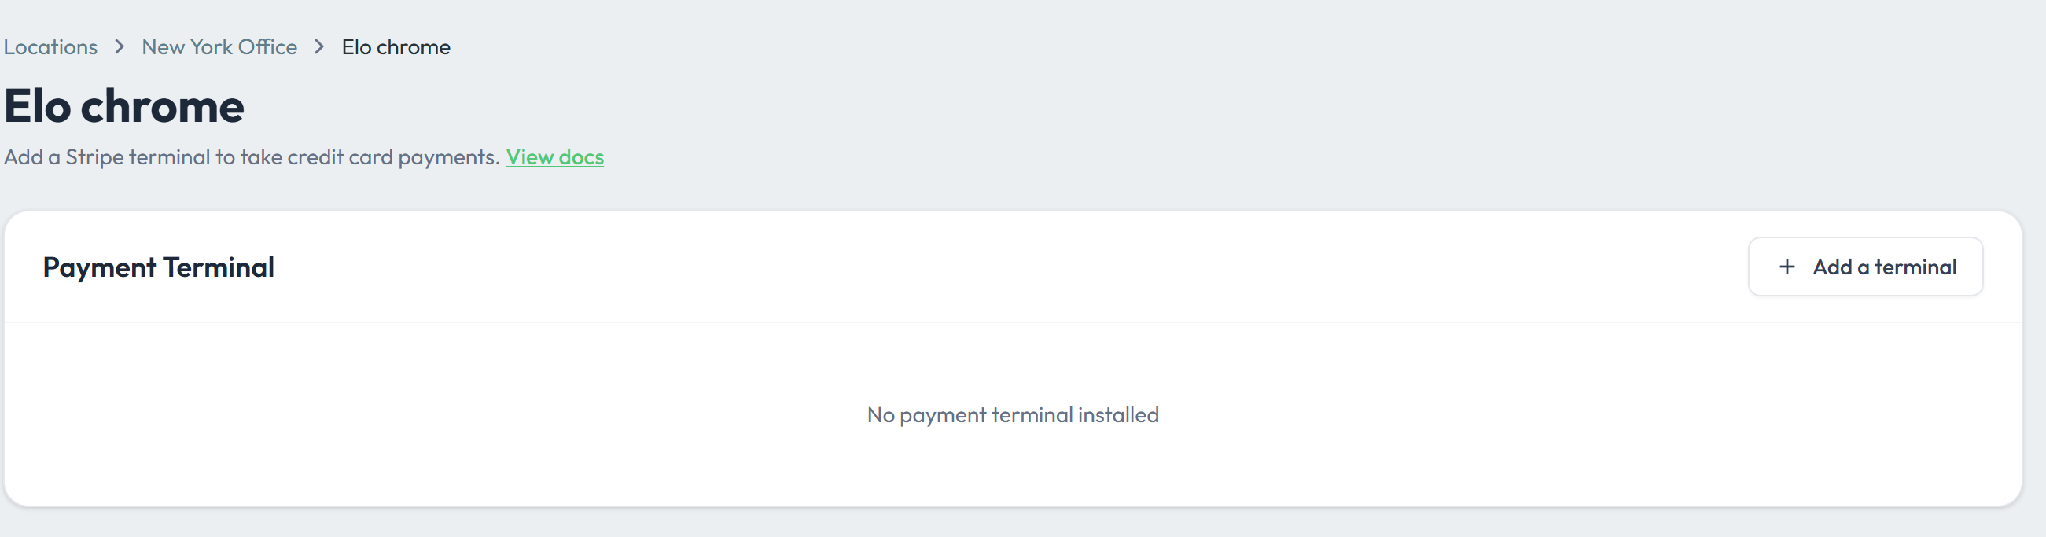
The Payment (POS) tab of a station
The terminal now appears in the list with its status. Online means it is ready to take payments.
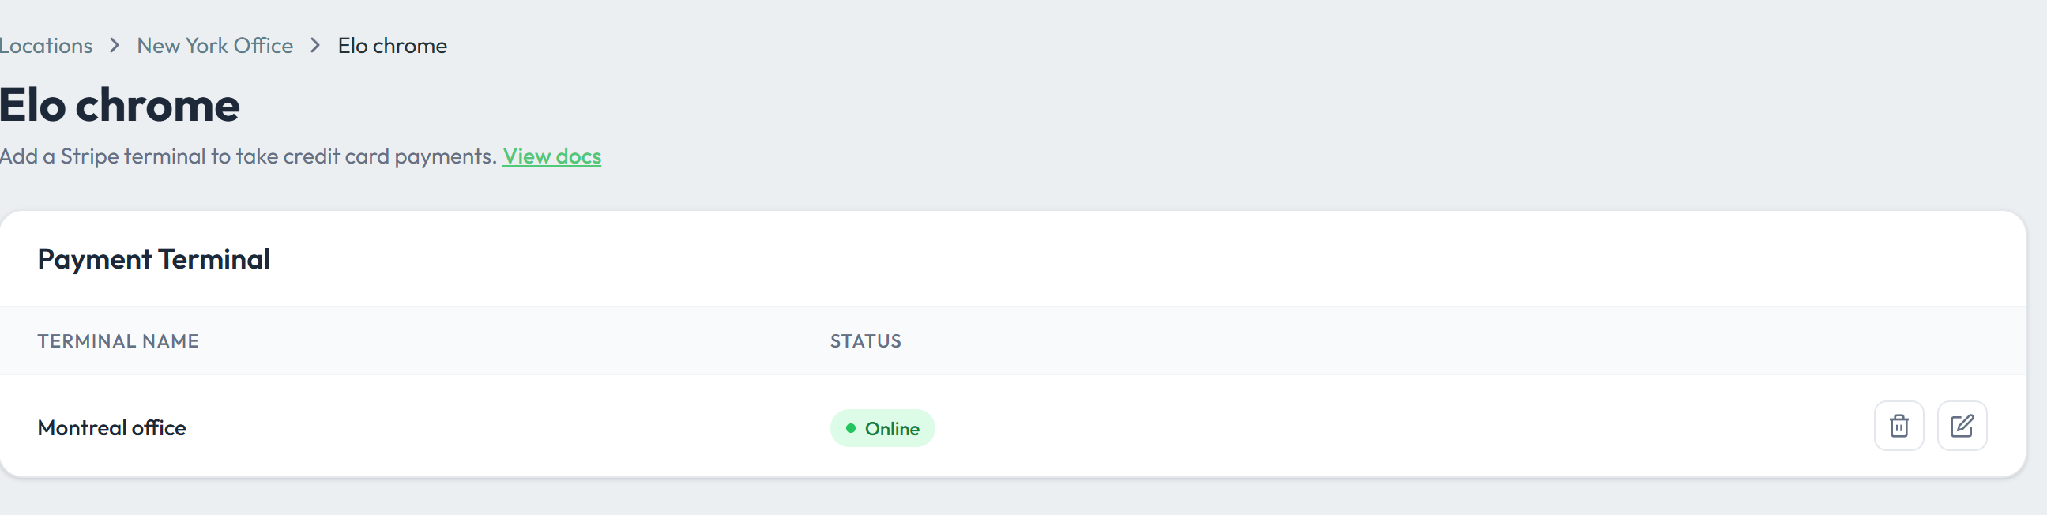
A payment terminal added to a station
The card reader is also added automatically to your Stripe account, under Terminal > Readers.

The card reader in the Stripe dashboard
Take a payment during a call
- During a live video call, click the credit card icon in the toolbar below the video.
- Upload the invoice (PDF) to show the visitor, and enter a description, the client’s name and email, and the amount.
- Click Send Payment Request.
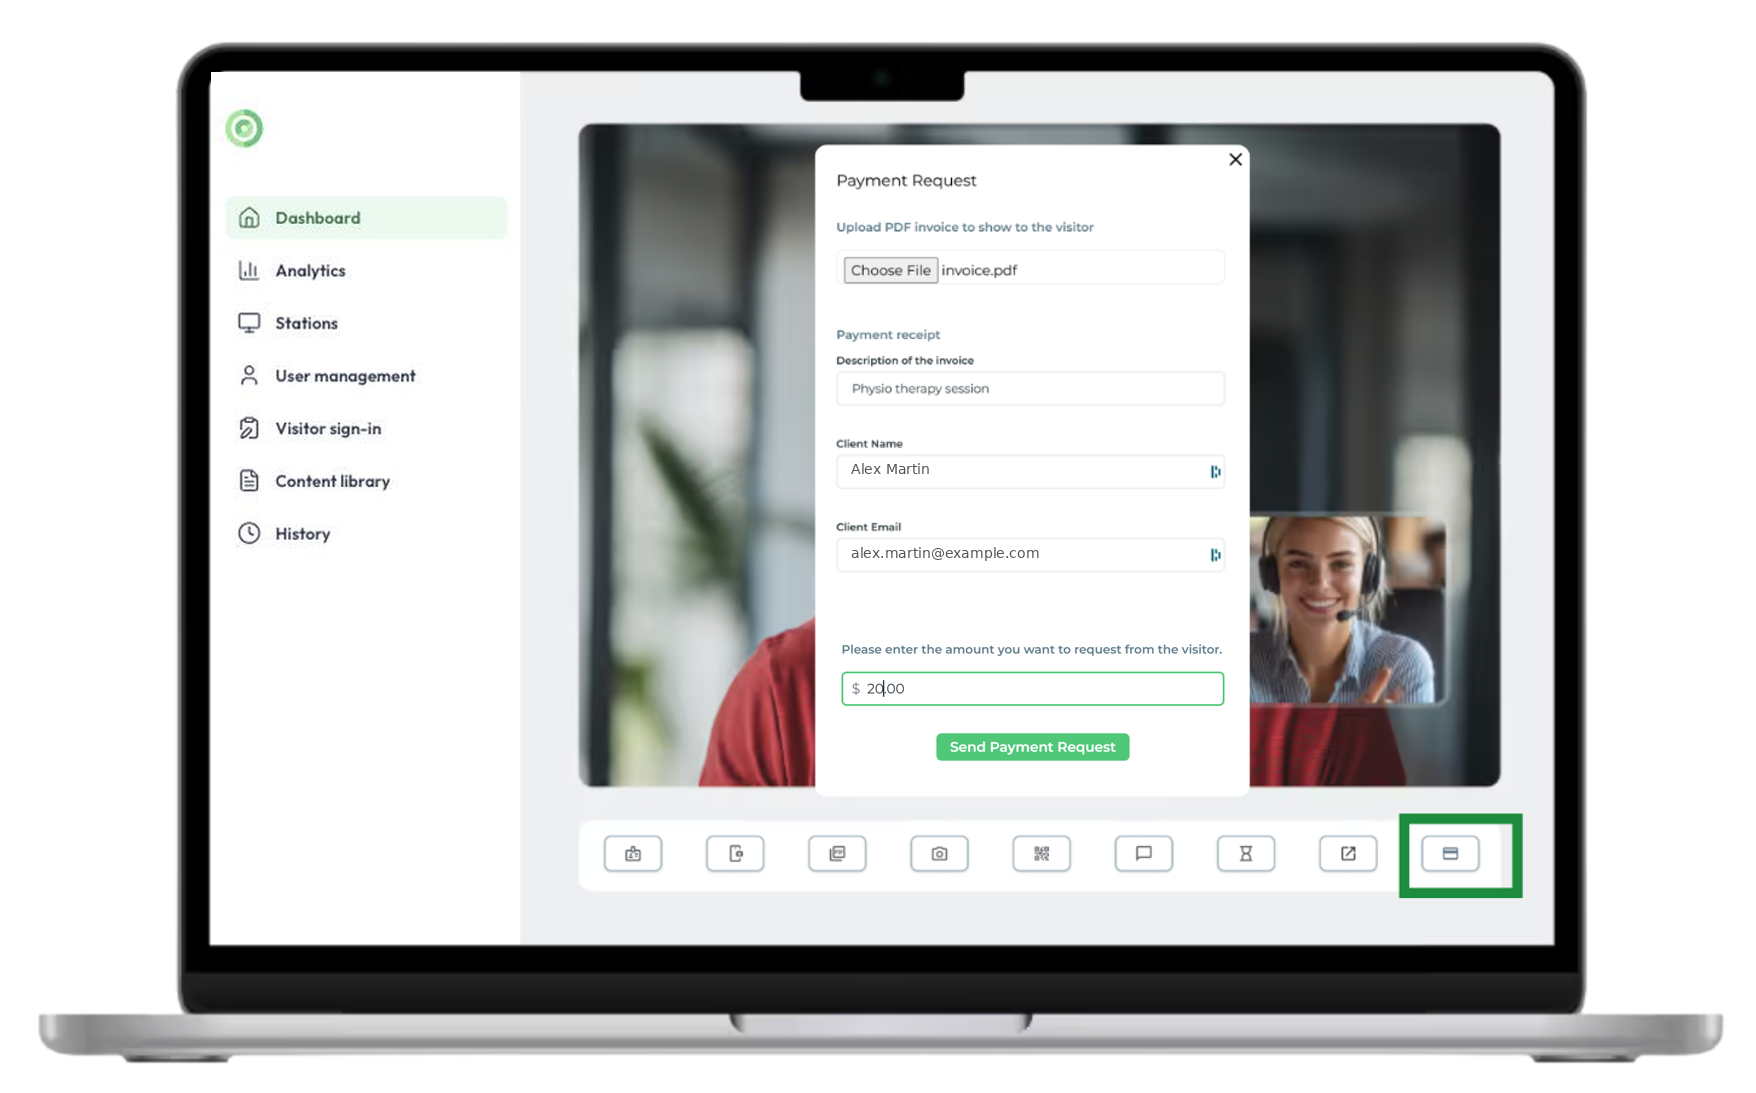
The Payment Request window during a call
The invoice appears on the station screen, and the amount appears on the card reader. The visitor taps, inserts or swipes their card to pay.
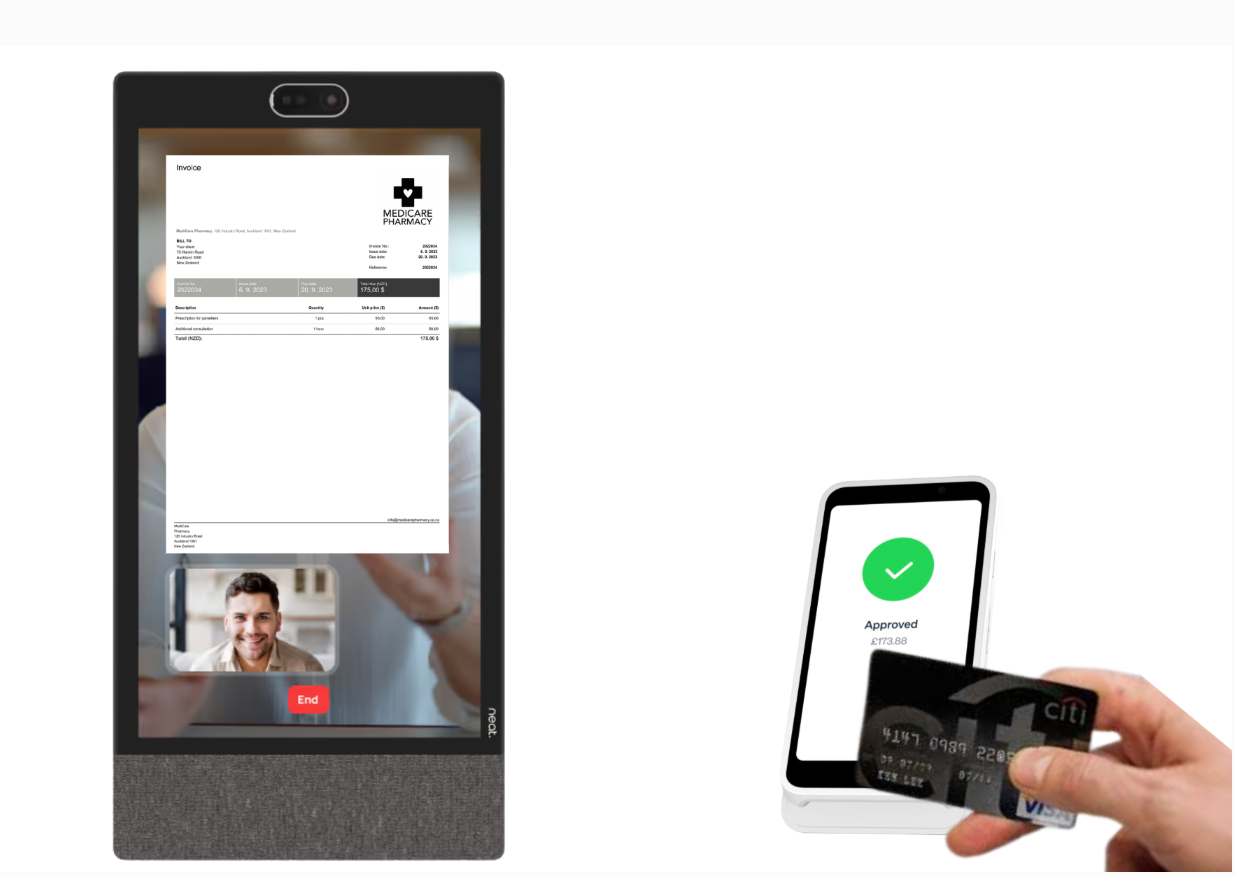
The invoice on the station screen and the payment on the card reader
When the payment is complete, the visitor receives a copy of the invoice and the receipt by email.
Track your payments
Every payment is saved in the Virtual Front Desk dashboard under History > Transaction logs, with the terminal, amount, currency, status, client name and email, and date and time.
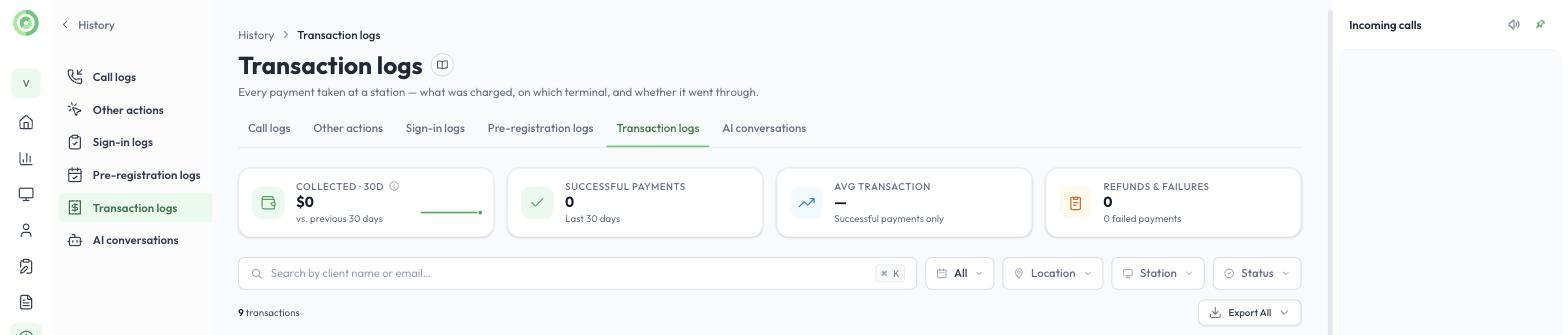
Transaction logs
For accounting and reporting, all transactions are also available in your Stripe dashboard.
To learn more, read History: Call logs, Other actions, Sign-in logs, Pre-registration logs, Transaction logs and AI conversations and Live Call Features.
For accounting and reporting, all transactions can be accessed in your Stripe account dashboard.