Neat Pulse and setting up your Neat Frame with Virtual Front Desk
Getting Started with Neat Pulse, Frame and Virtual Front Desk
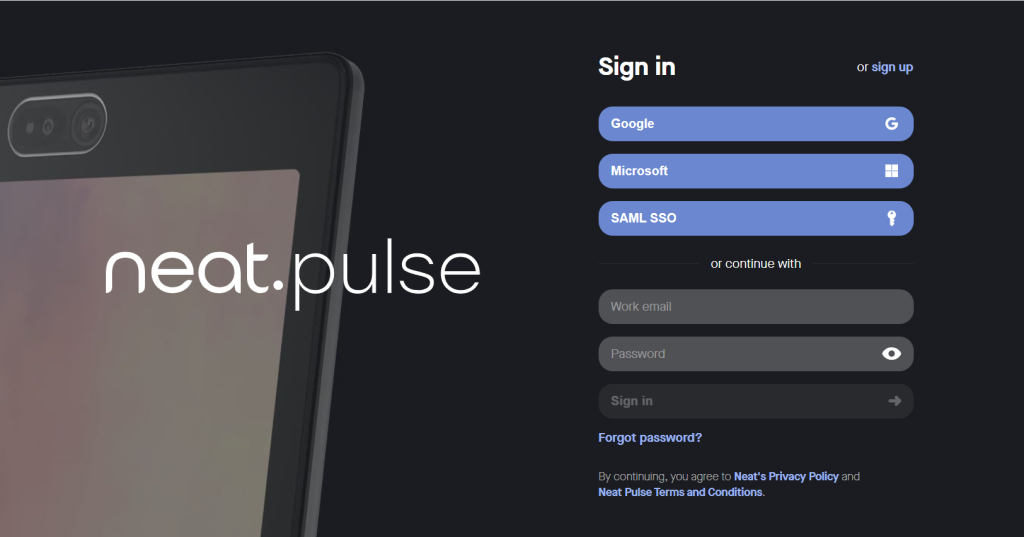
- Go to pulse.neat.no.
- On the login page, select Sign up in the top right-hand corner.
- Enter the company email address you’d like to link to your Neat Pulse account.
- Follow the on-screen instructions. (If prompted, Select the Free Starter plan)
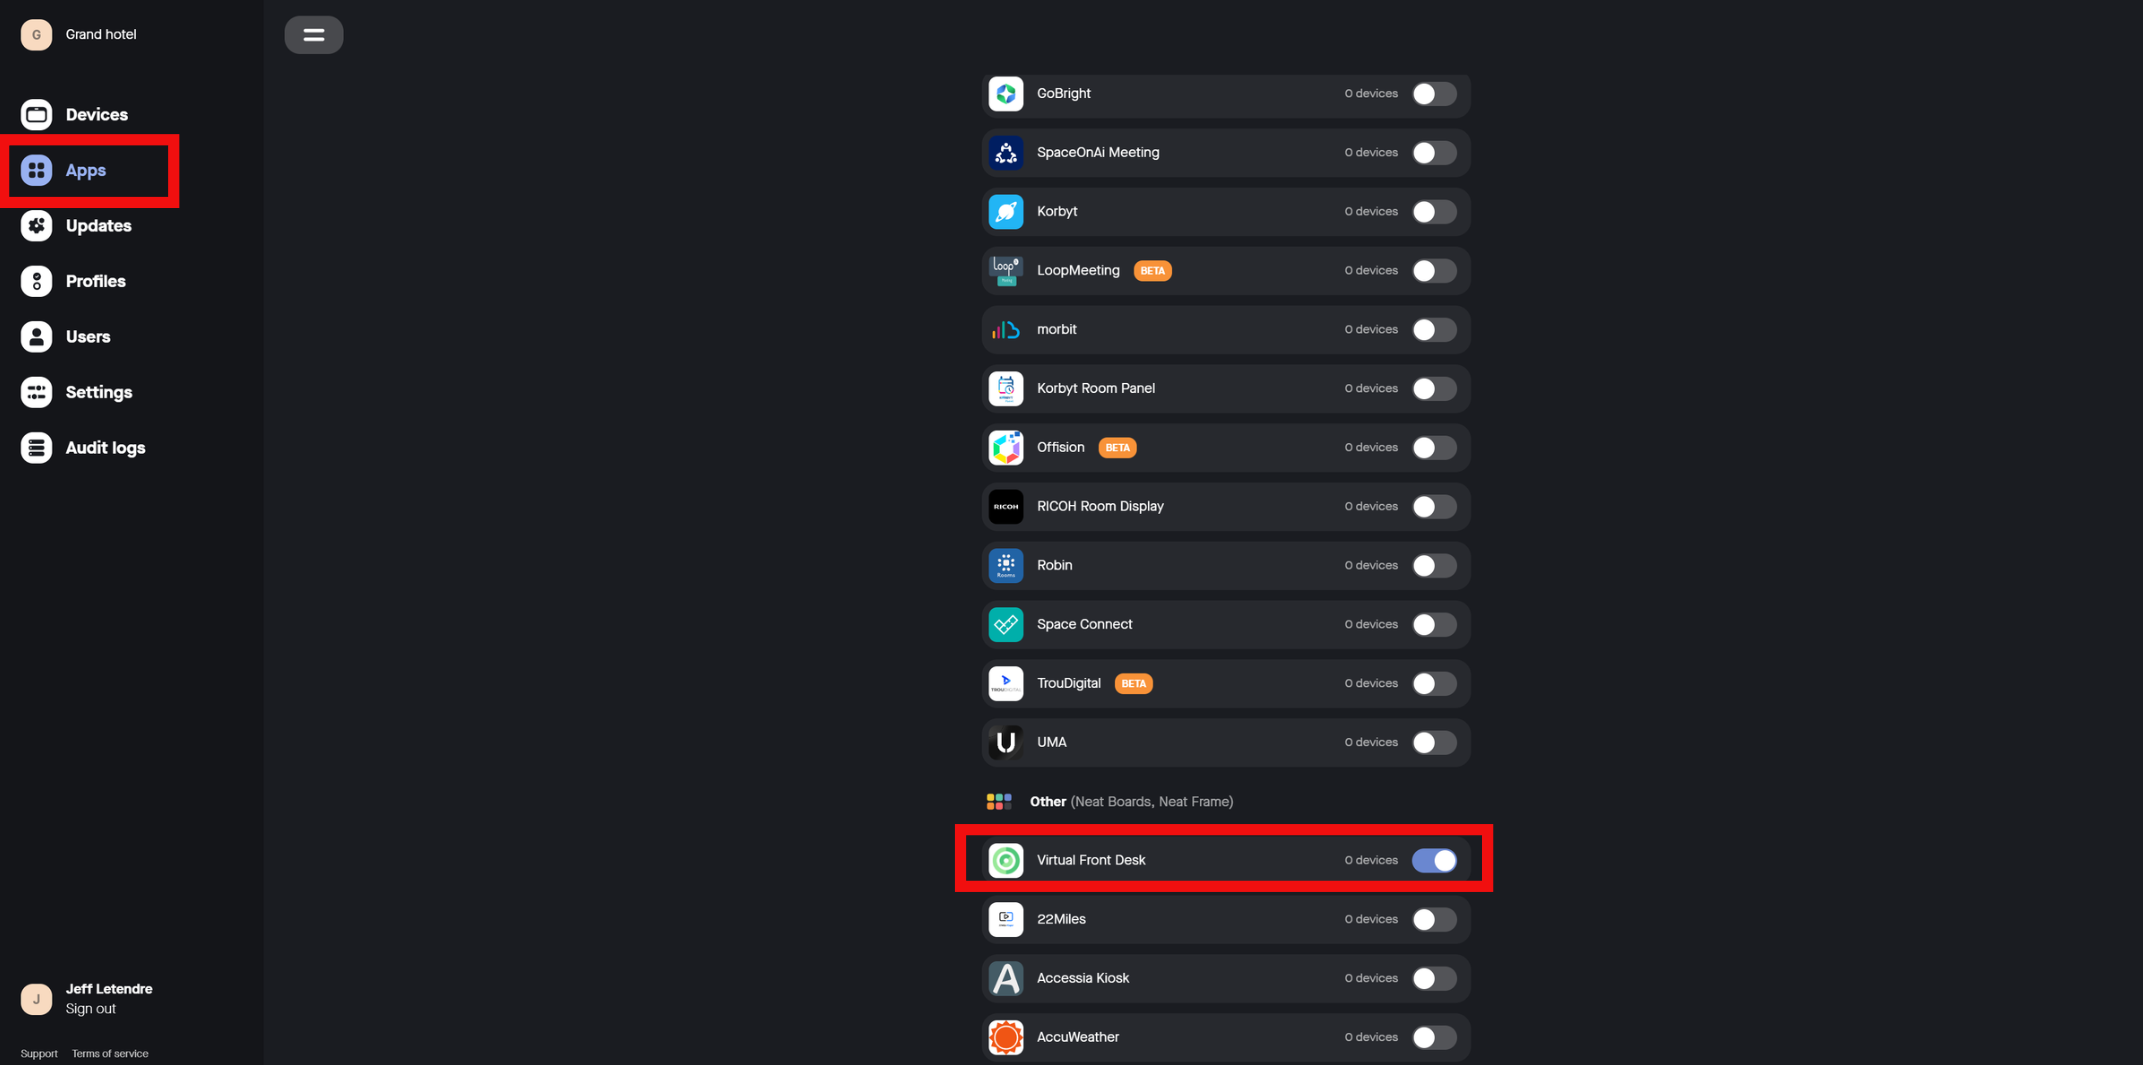
- Go to the Apps menu and toggle on Virtual Front Desk.
How to Set Up Neat Frame
1. Power up your Neat Frame
Connect your Neat Frame to AC power.
2. Configure language, network, and time zone settings
Once the Frame powers on, the user interface takes you through the following steps:
- Select a language and click Continue.
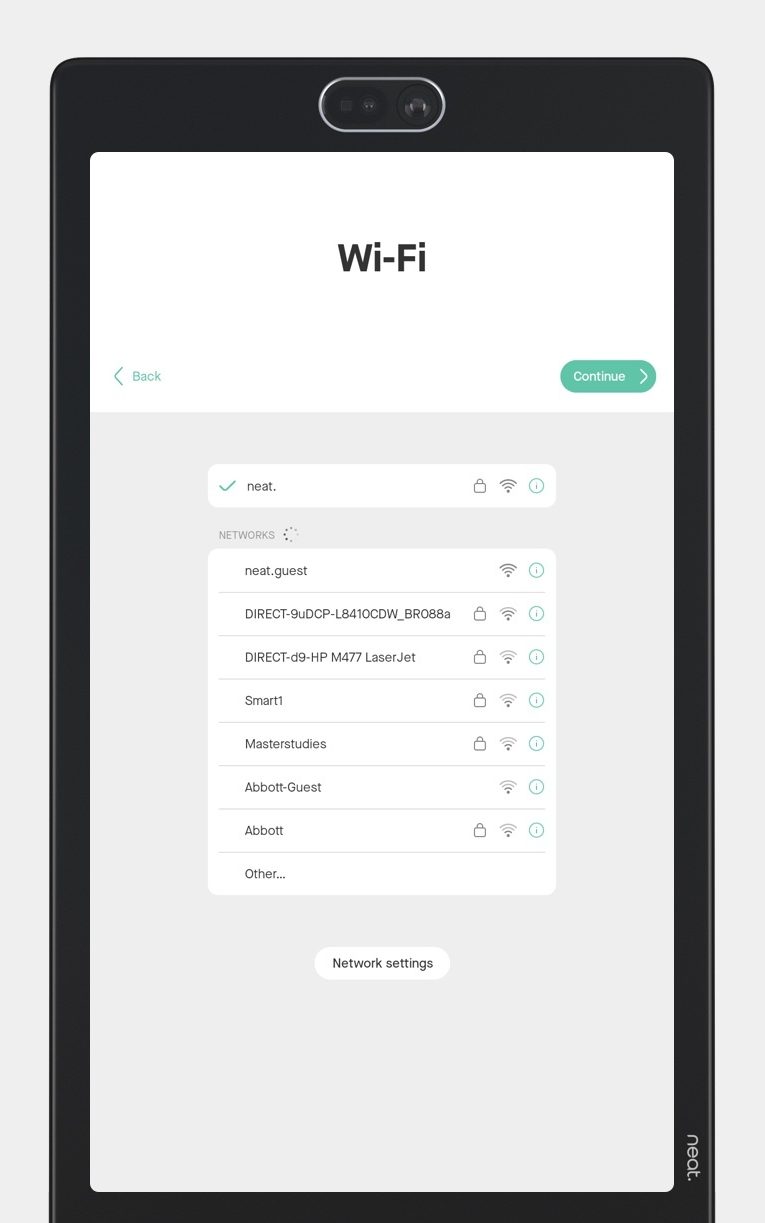
- Connect the Frame to Wi-Fi (see Figure 1) by selecting your preferred network. Once the network connection is established, click Continue. *If you are asked to enter your Admin password to reconnect your Frame to a Network, It is the last 6 digits of your serial number.
(If you want to use an Ethernet connection instead, you can connect Frame to your network using an Ethernet -> USB-C adaptor.) - Select a time zone to use on your device and click Continue.
- You then have the option to select a 24-hour clock on the Time page. Click Continue.
3. Enroll your Frame on Neat Pulse
The next screen gives you the option to enroll your device on Neat Pulse.
Important Note: You can only use your device to access Virtual Front Desk on Neat App Hub after you have enrolled your device on Neat Pulse.
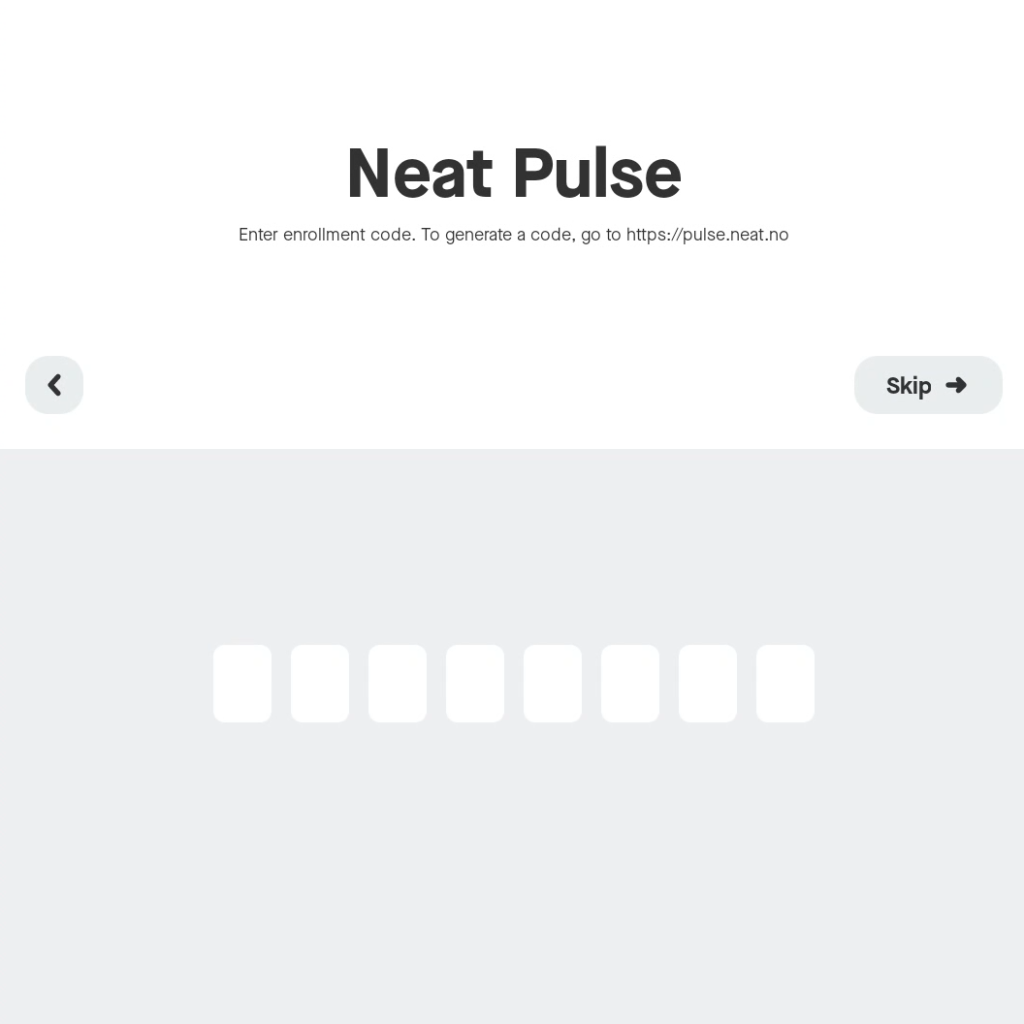
- Go to https://pulse.neat.no/ and login.
- If you already have a named space created in Pulse that you wish to add your Neat device to, simply open that space and click Generate Code.
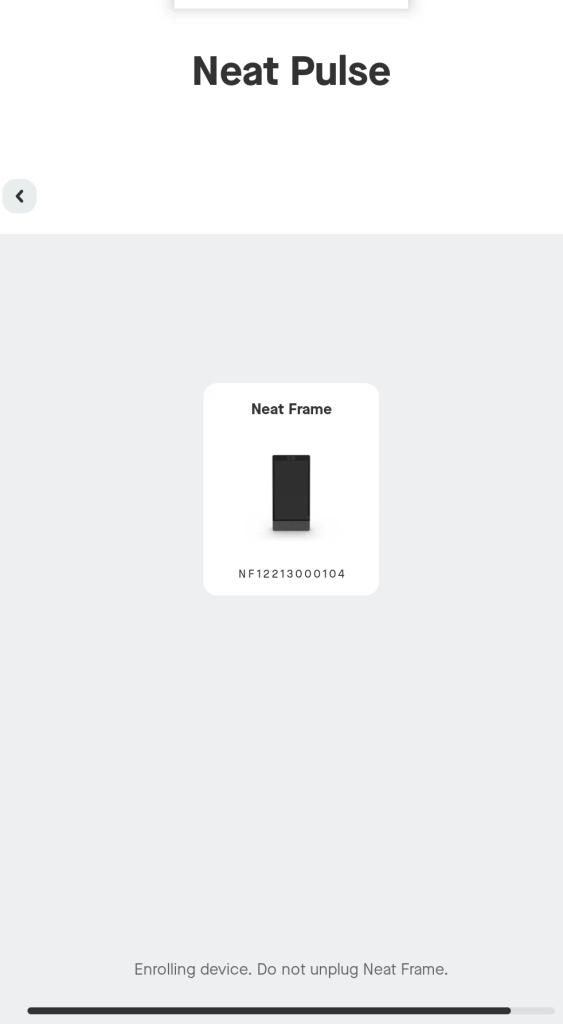
- Enter the generated code on the Neat device screen (see Figure 2).
The screen will show a progress bar to confirm that it is enrolling the device on Neat Pulse. Do not unplug your device during this process
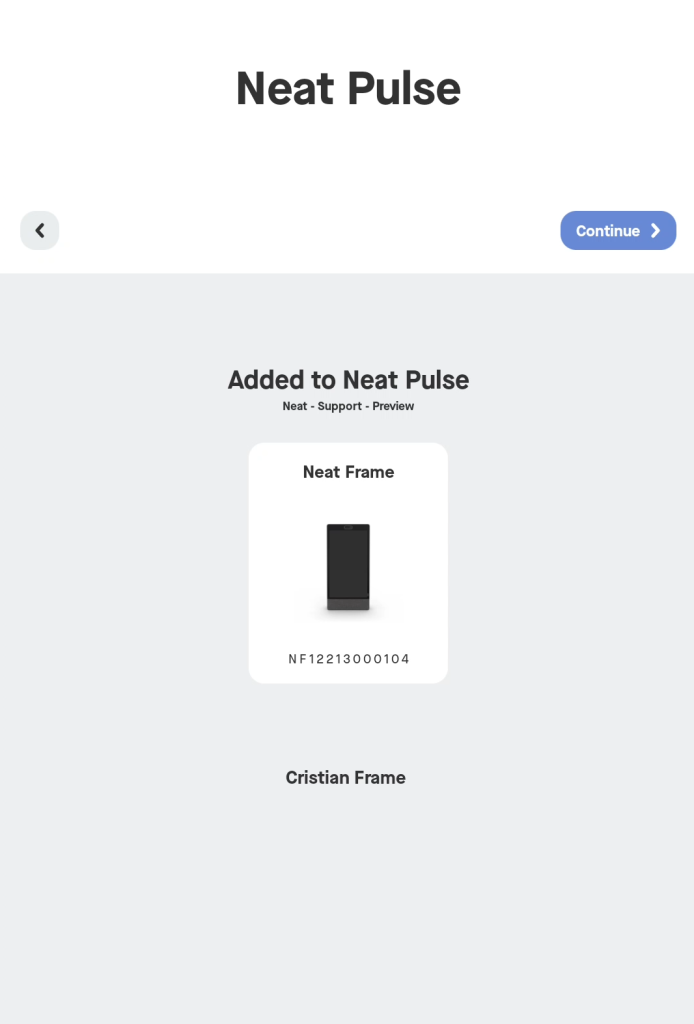
Once completed, the device screen will show that it has been added to Neat Pulse
4. Share device analytics with Neat
The next page is for Analytics and Improvements. You have the option to enable or disable sharing device analytics with Neat using the toggle button. Click Continue.
5. Camera preview
The next page allows you to see how you are always framed on the device. Click Looks good.
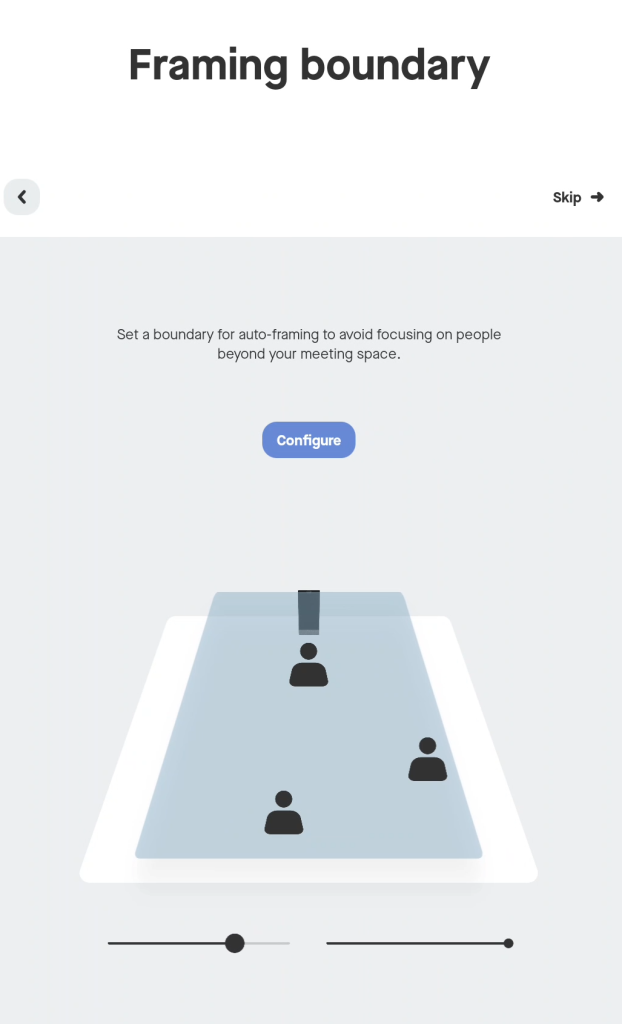
6. Framing boundary (optional)
This page allows you to set a boundary for auto-framing to avoid focusing on people beyond your meeting space.
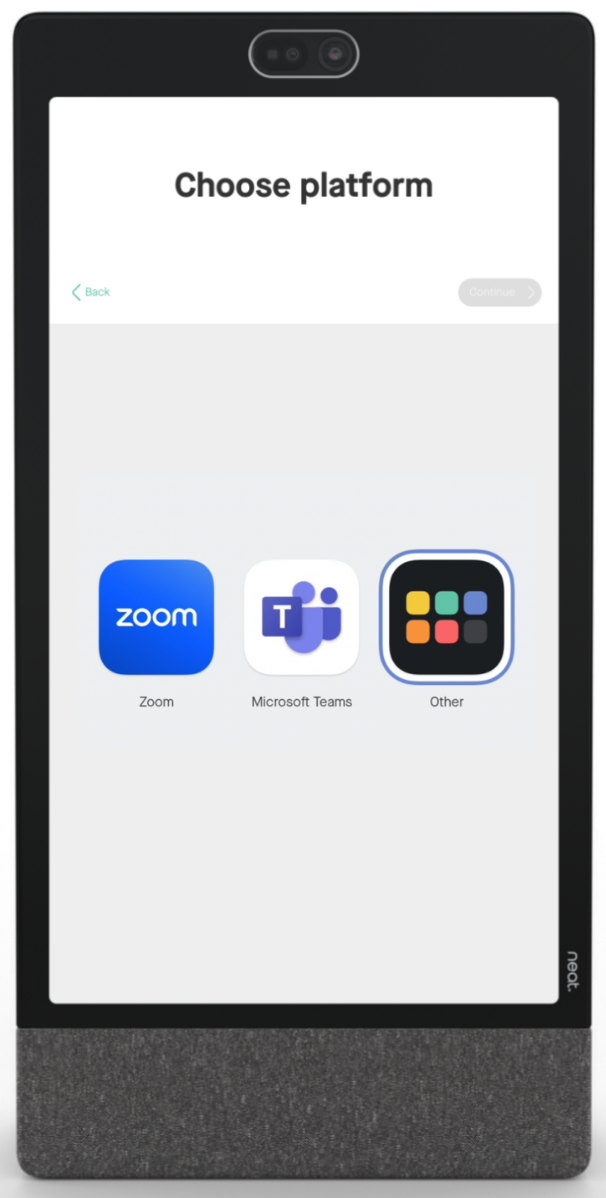
7. Choose Other App
Tap the App Hub icon (labelled Other) to select apps, then click Continue. Virtual Front Desk will install. (If you do not see "Other" you need to factory reset your Frame by holding the back pin for 4 sec and pressing the same pin again. Make sure in your Pulse's Apps Menu that Virtual Front Desk is selected prior to factory resetting your Frame.) Do not unplug your device whilst it is installing. A screen will open allowing you to select the apps that you want installed on the Frame. Once completed, a prompt displays to confirm that your device is now ready to use. Click Launch.
Note: You will only see Other (App Hub icon) if you have already enrolled your device on Neat Pulse.
Virtual Front Desk will load asking for a station's connection code. You can find in your Virtual Front Desk's dashboard. (Select the same region as your Virtual Front desk account.) app.virtualfrontdesk.com. Learn how to create your Virtual Front Desk station here.
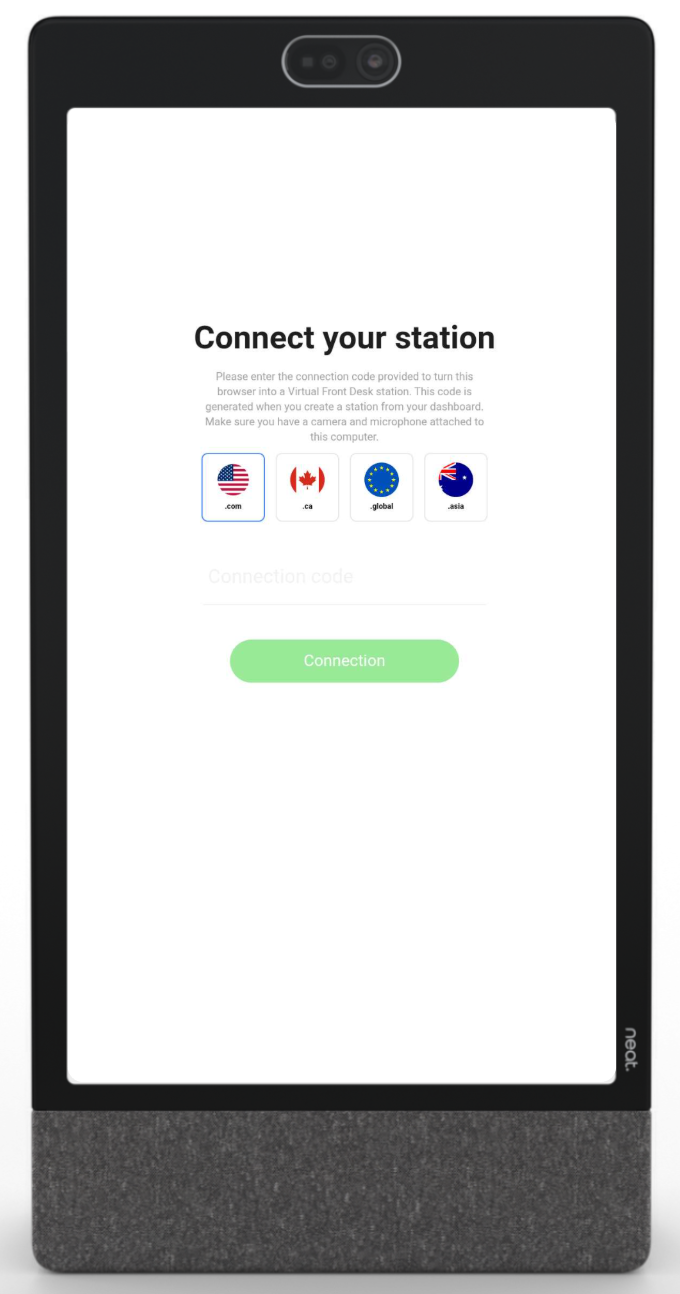
After entering your connection code your station will load.
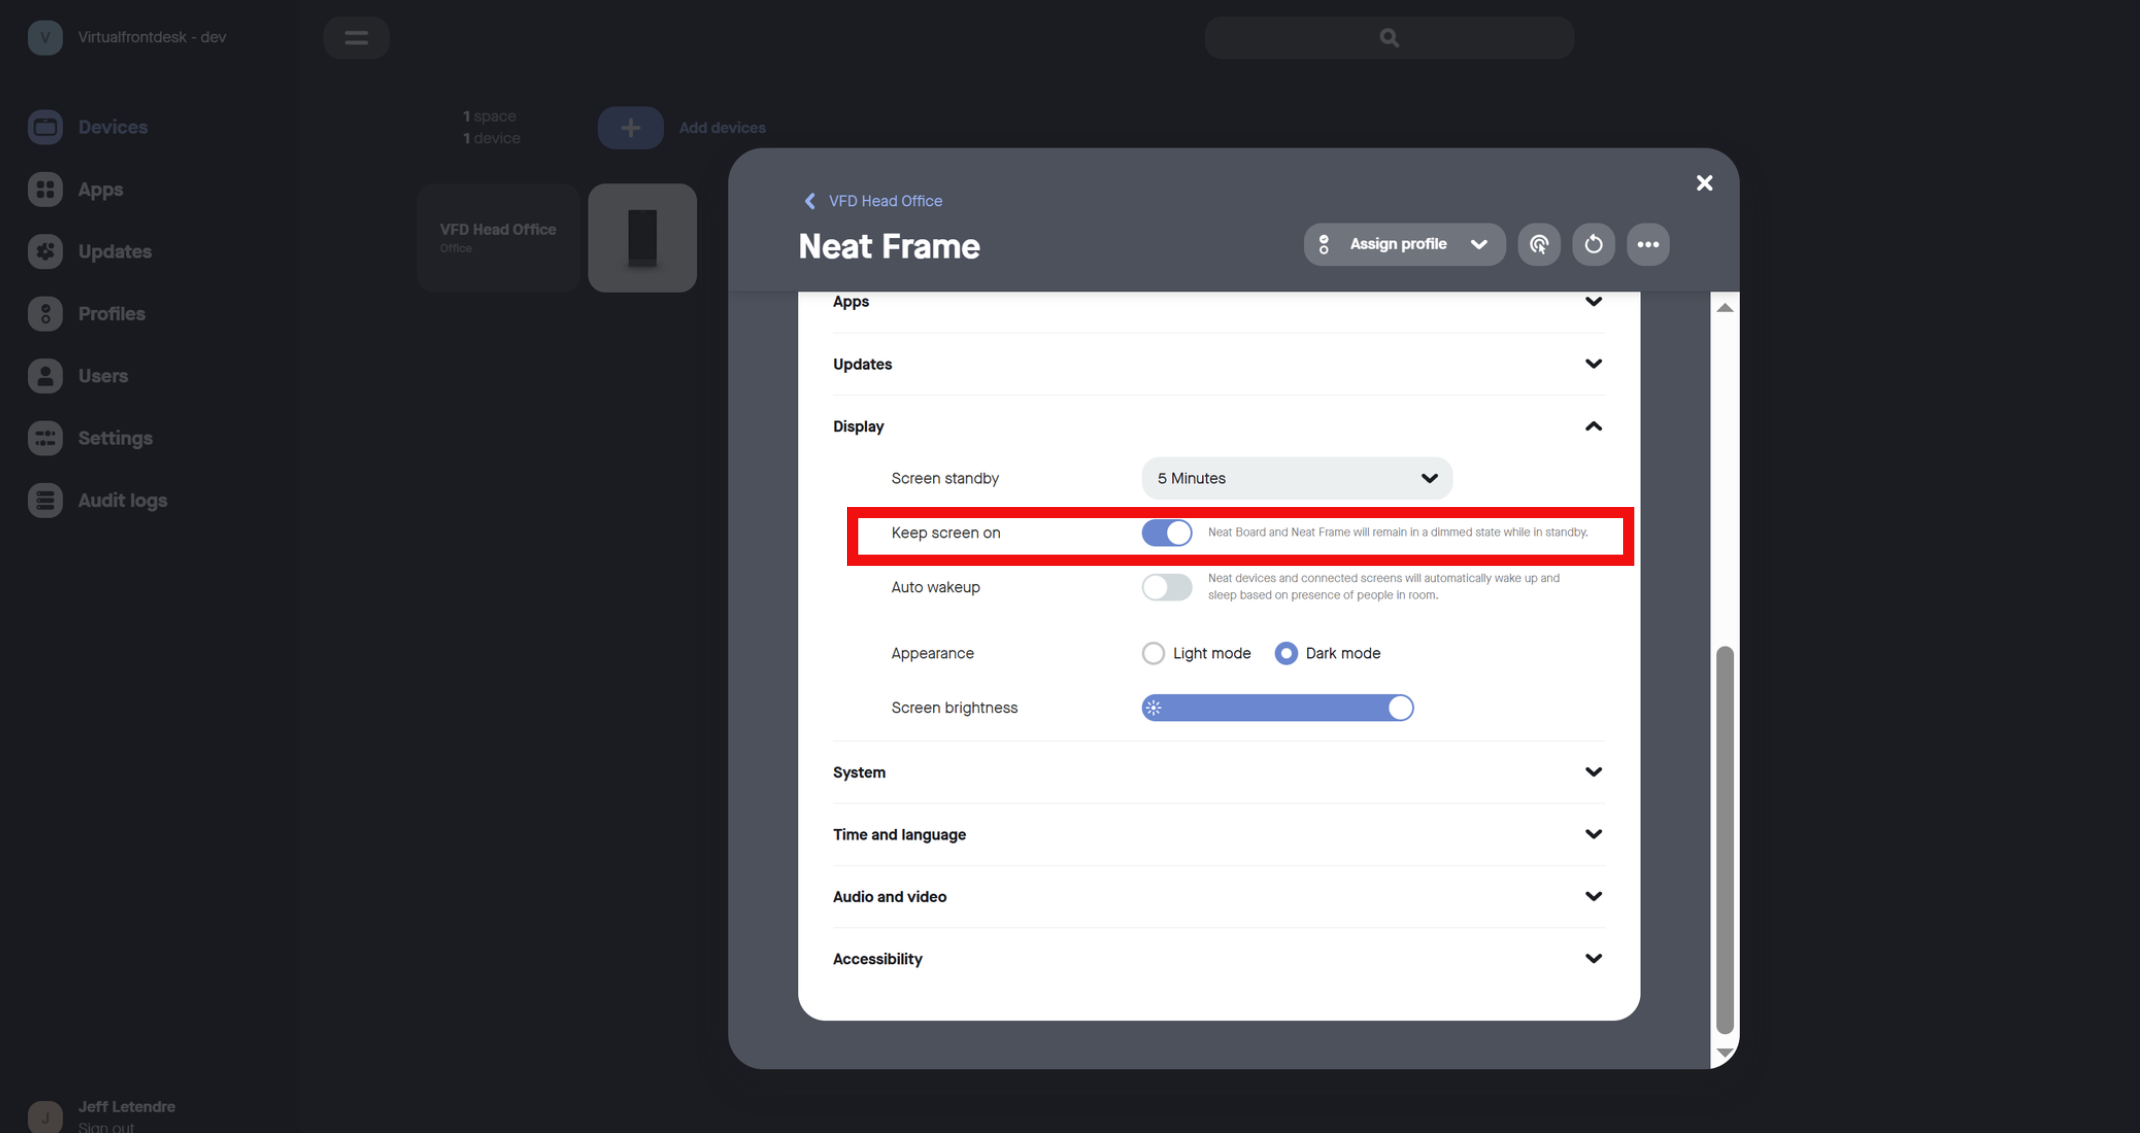
8. Final Step!
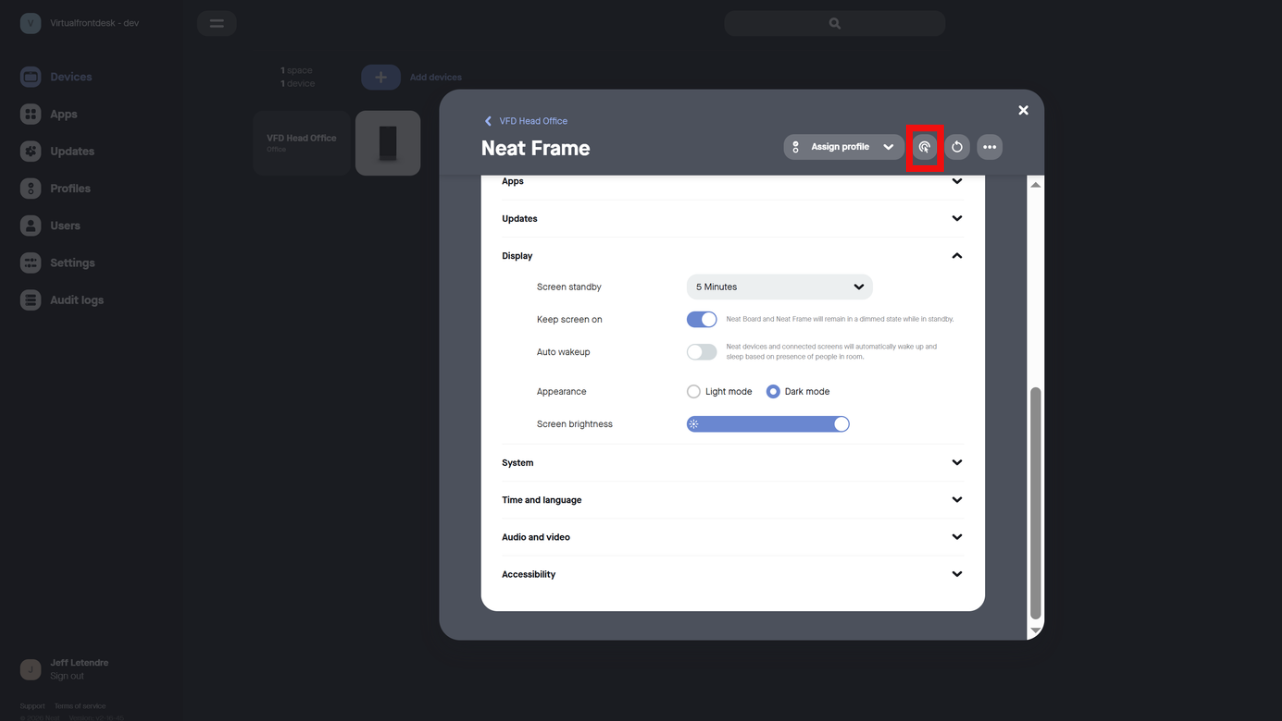
For the final steps, go to your Pulse account, click the device picture and under Apps, toggle the Kiosk mode to remove the settings menu from the screen. Next, go to Display and toggle Keep screen on. You are all set and ready to use Virtual Front Desk with your Frame!
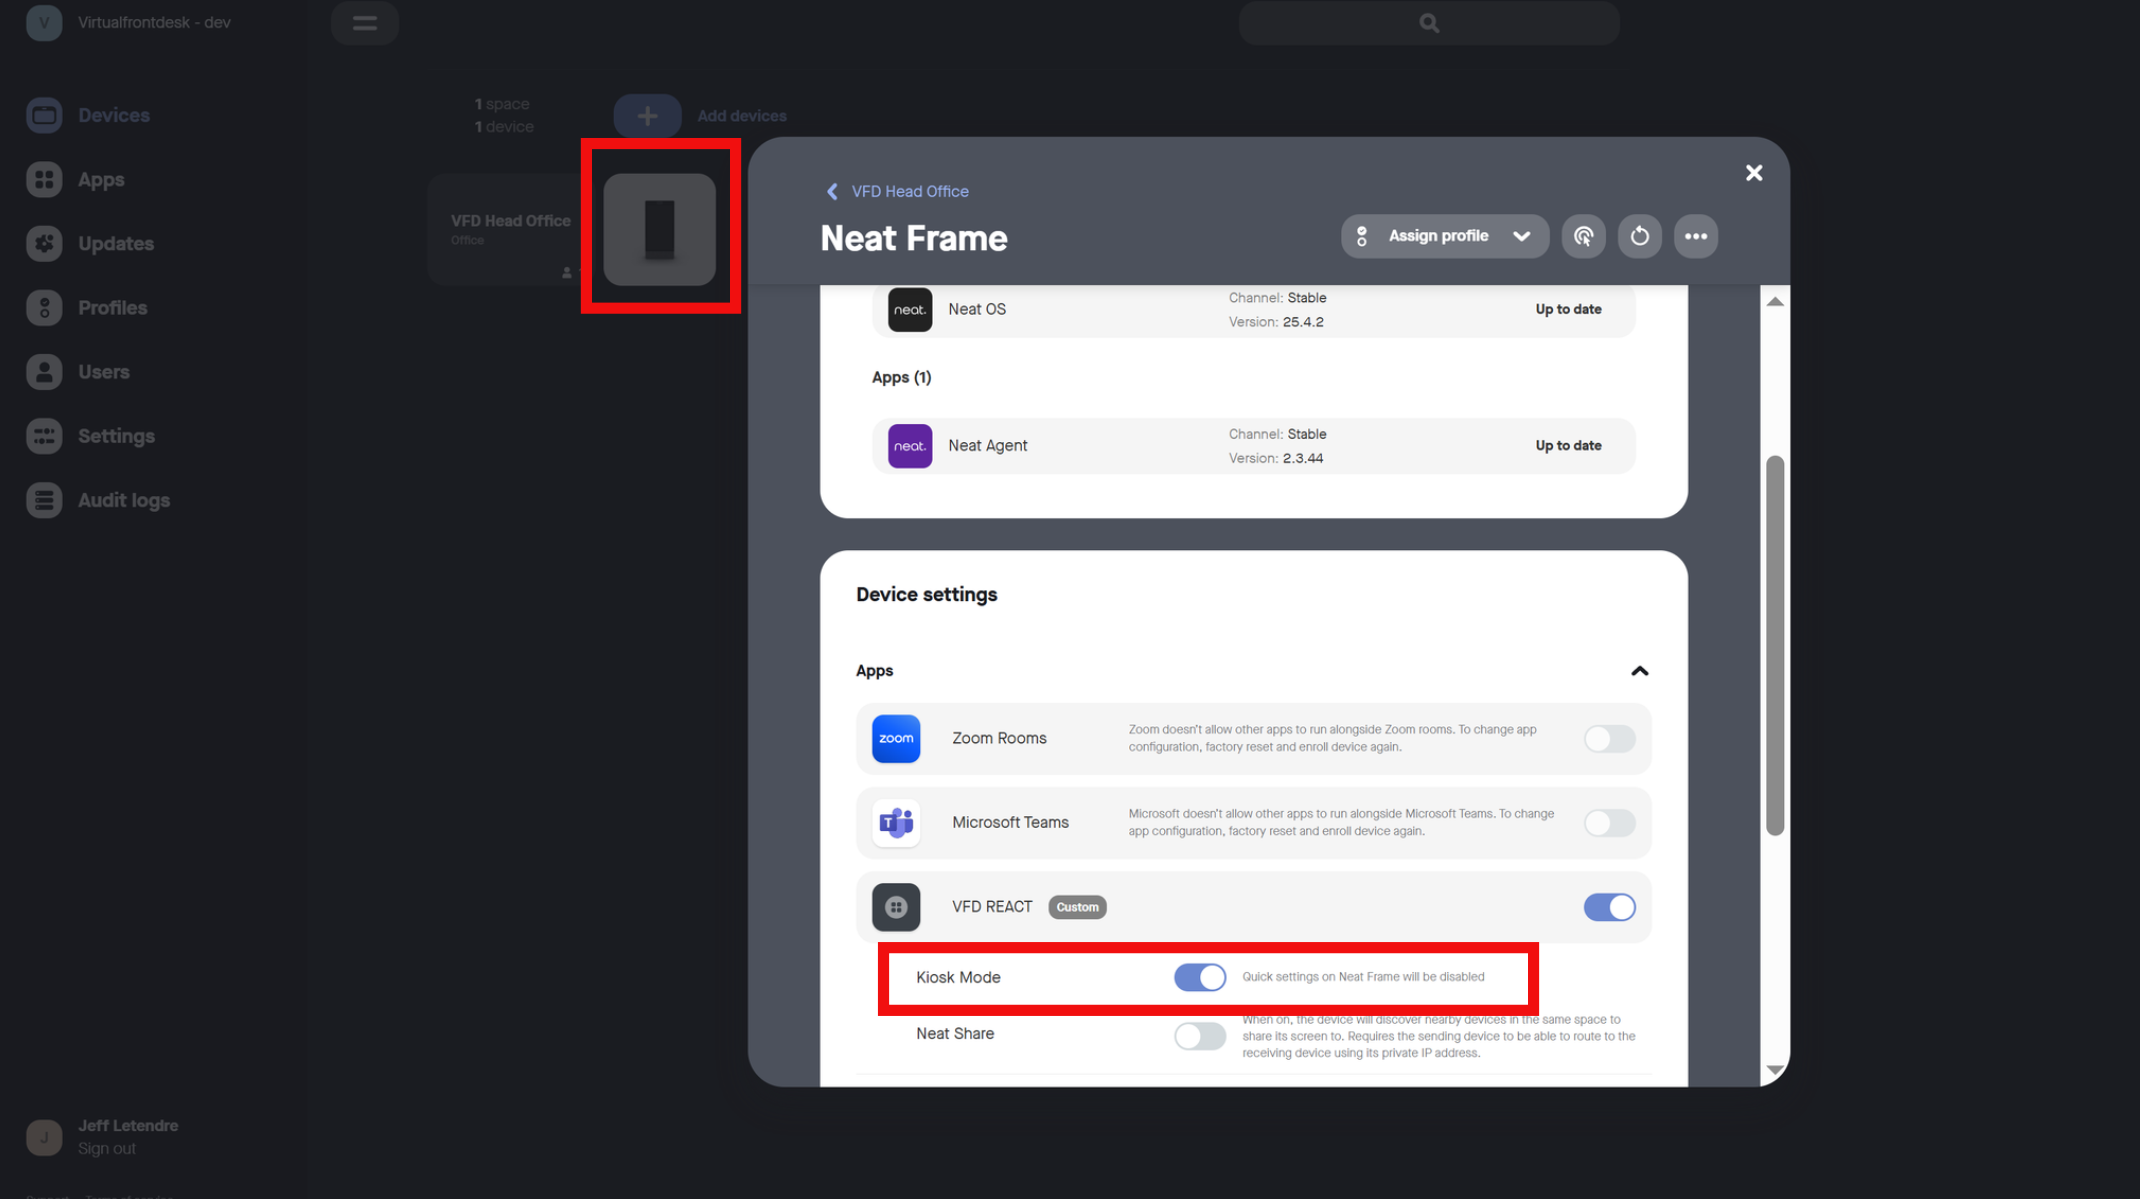
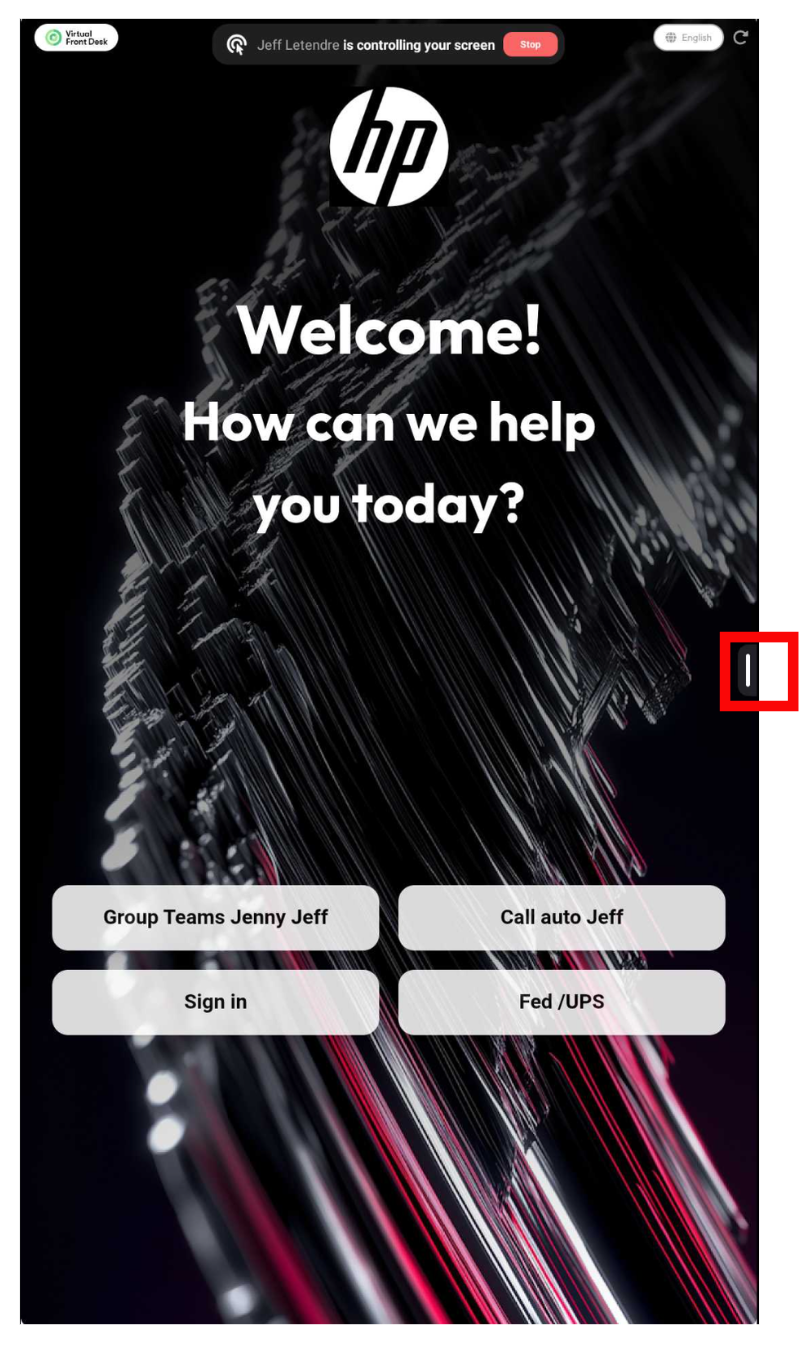
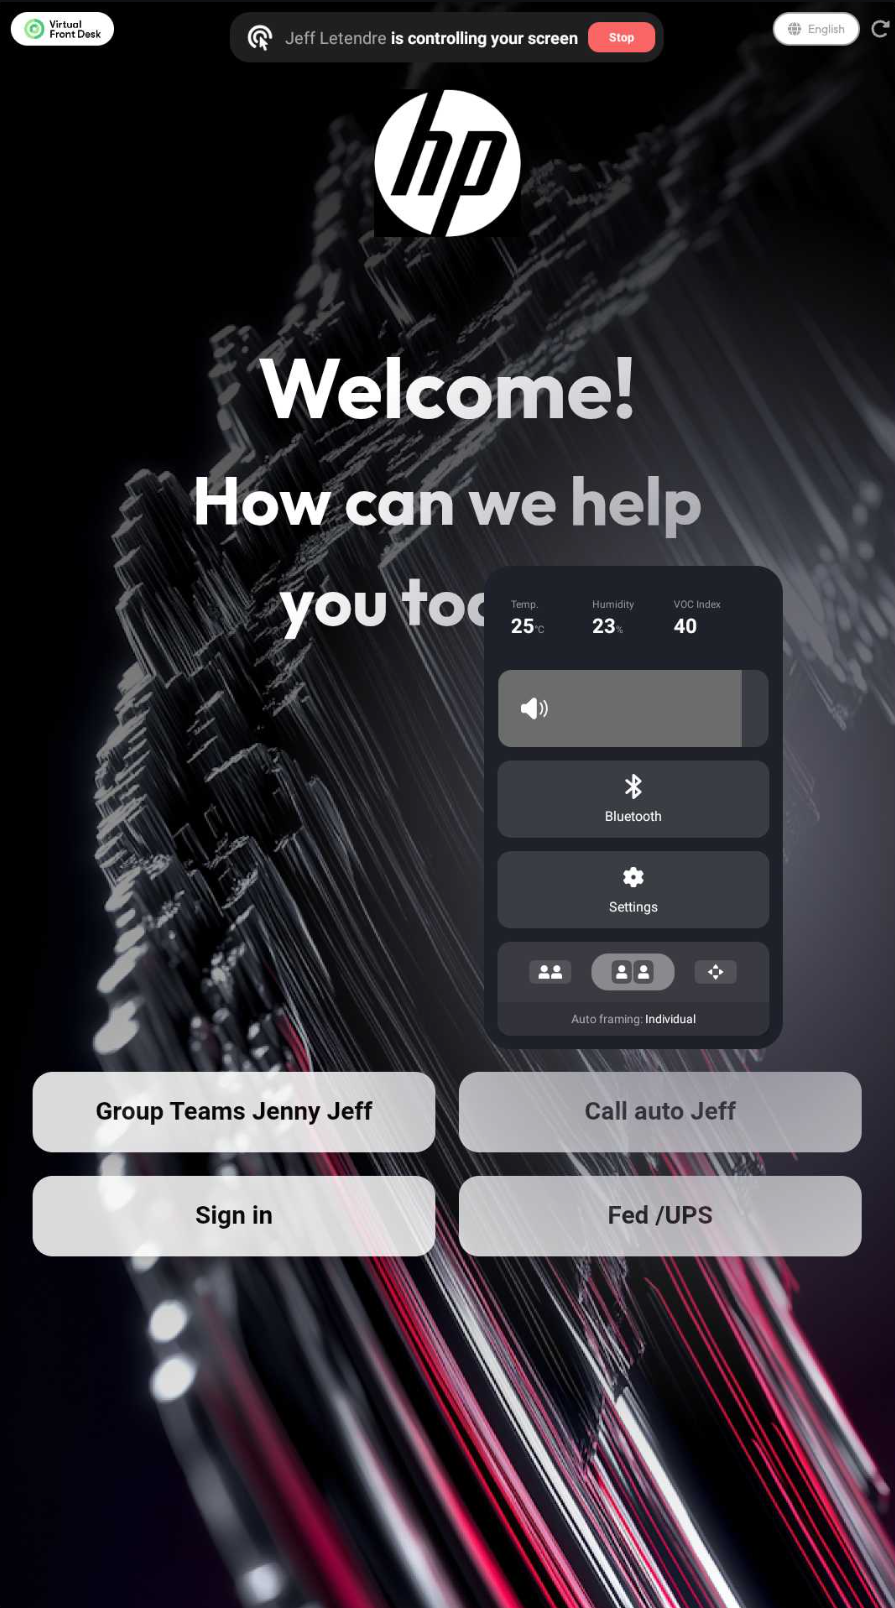
To adjust the volume on your Frame, first turn Kiosk Mode off temporarily. Then remotely access the device and swipe in from the right side of the screen to open the system settings. From there, you can adjust the volume and other device settings.