New Users Onboarding Tutorial
New Users Onboarding Tutorial
Welcome to Virtual Front Desk!
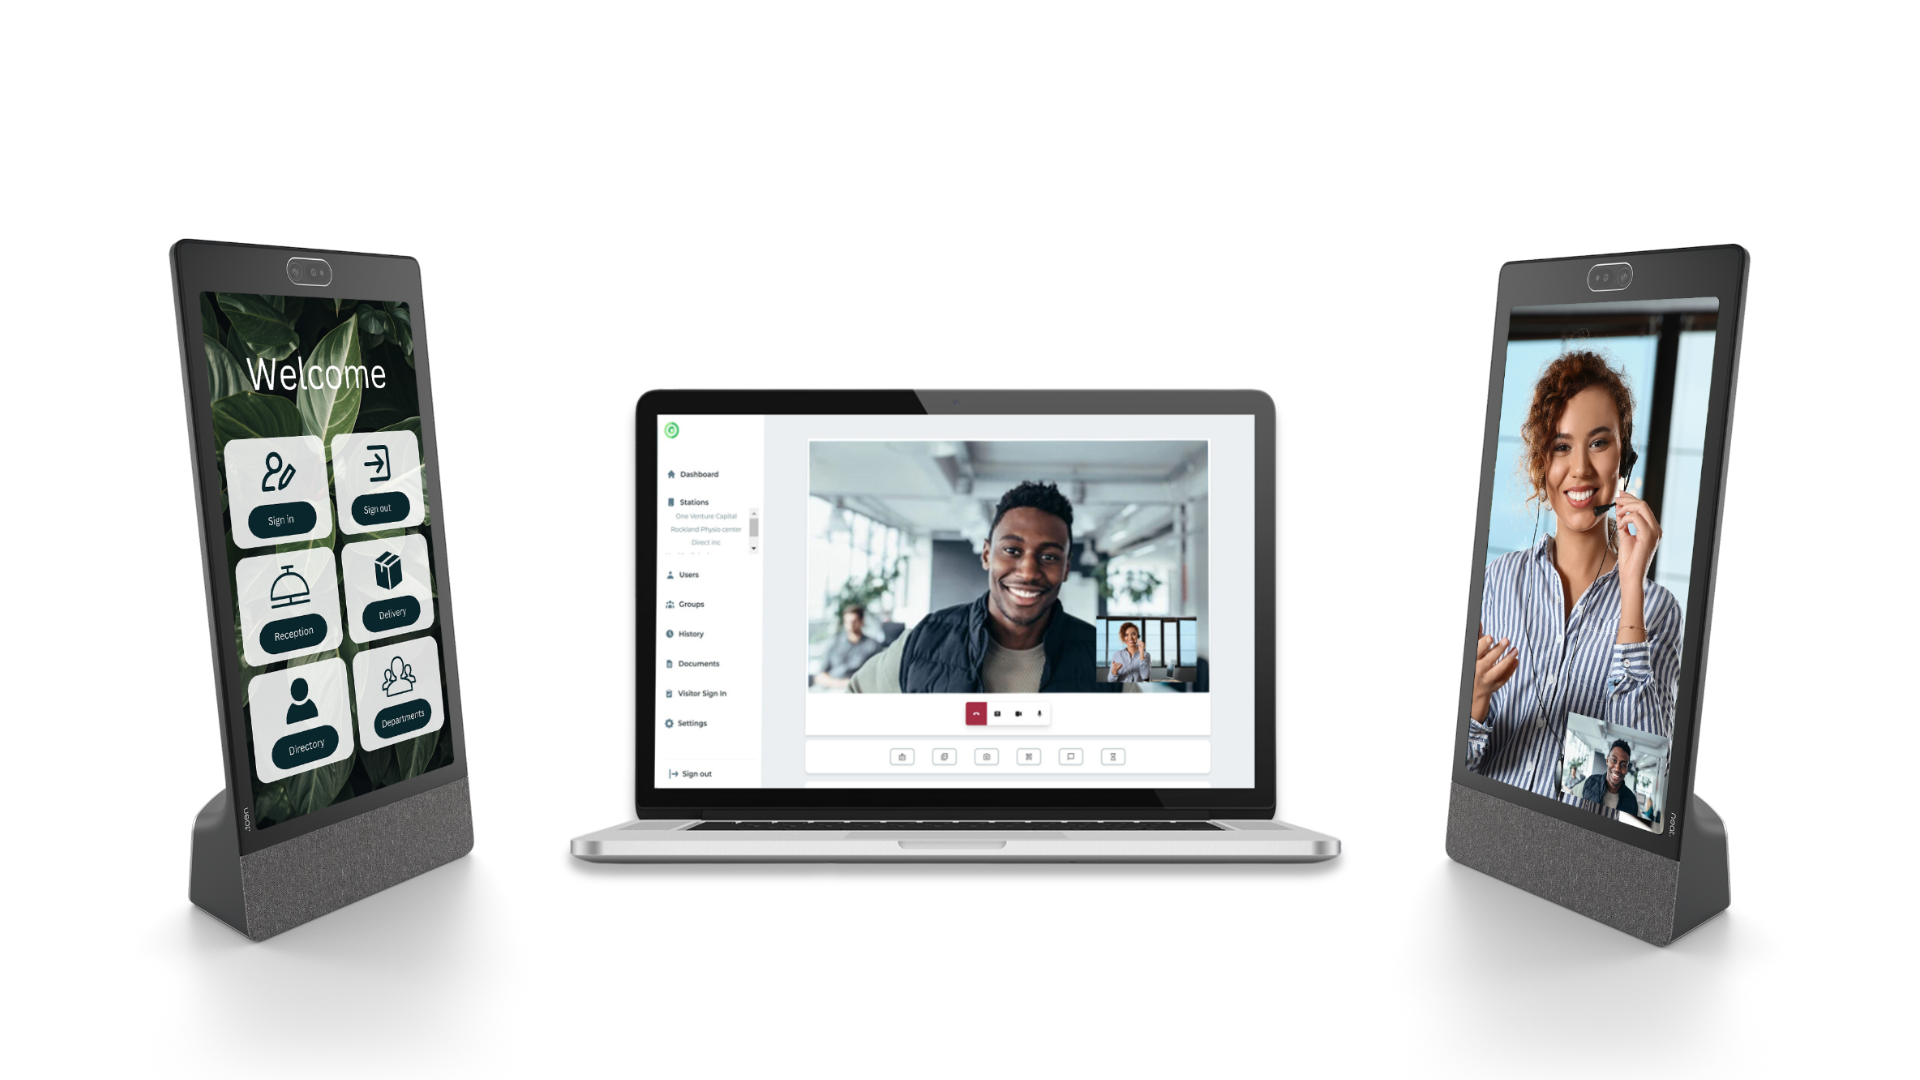
Virtual Front Desk gives organizations a flexible way to run a reception without someone physically present at the front desk. Visitors use a station to check in, find information, notify an employee, or speak with a live person by video.
Virtual Front Desk has two main parts:
- The station. A tablet, kiosk or all-in-one device located in a lobby, reception area or service location. Visitors use the station to choose from the options available, such as contacting an employee, checking in, requesting assistance or starting a video call.
- The dashboard. The web application at app.virtualfrontdesk.com where receptionists and other users sign in to receive and answer calls from one or several stations.
Depending on how your organization has configured Virtual Front Desk, a station can reach users through:
- Video call in the Virtual Front Desk dashboard
- The Virtual Front Desk mobile app
- Microsoft Teams
- SMS
- Slack
- A phone call, through call forwarding
This article is intended for regular users and receptionists rather than for administrators who configure the platform. If you will be receiving video calls in the Virtual Front Desk dashboard, follow the steps below to set up your account and learn how to receive and manage calls.
Note for Microsoft Teams users: Users imported from Microsoft Entra ID (Azure Active Directory) do not receive an email invitation to sign in to app.virtualfrontdesk.com. When the Microsoft Teams integration is in place, these users receive station calls directly in Teams and never need to sign in to Virtual Front Desk.
Getting started
1. Accept your invitation and sign in to the right region
Your administrator will send you an email invitation to join the organization. Sign in at app.virtualfrontdesk.com and select the same region as your organization:
- US: .com
- Canada: .ca
- Europe: .global
- Asia: .asia
If you sign in with the wrong region, a new, separate account is created for you. Sign out, sign in again with the correct region, and select your organization.
2. Select the right organization
A user can belong to several organizations. For example, if you used Virtual Front Desk before receiving an invitation, you may also have your own organization in which you are the owner.
Click the organization name at the top left of the dashboard to see every organization you belong to and your role in each one. Always make sure the organization you are working for is selected. A check mark shows the active organization.
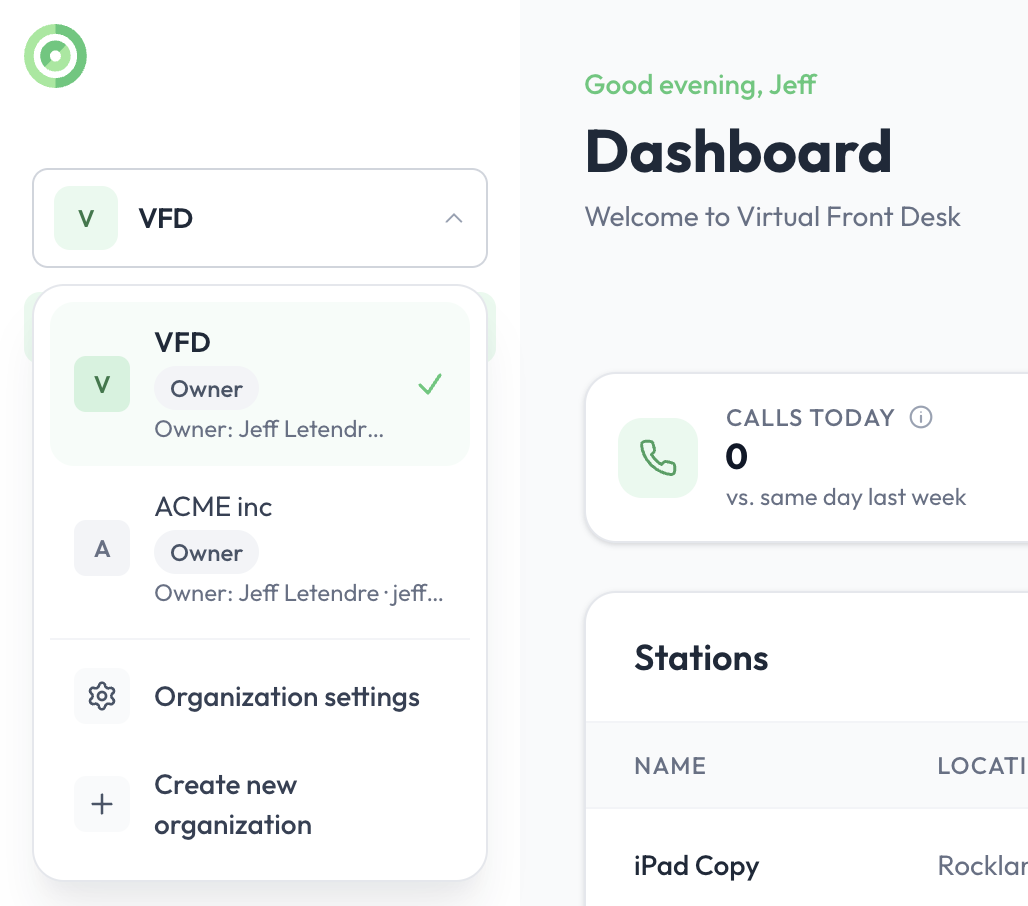
The organization switcher at the top left of the dashboard
3. Keep the dashboard open and enable sound
Virtual Front Desk is a web application, and the dashboard runs in your browser. We recommend Google Chrome or Microsoft Edge. You can keep working in other applications, as long as the dashboard remains open in a browser tab, and you will still be notified of incoming calls.
When you open or refresh the dashboard, an Enable sound notifications message appears. Click Enable so the dashboard can play a sound when a call arrives.
Tip: In Chrome, install Virtual Front Desk as an app by clicking the install icon in the address bar. The app gets its own window and desktop shortcut, and you will not need to re-enable sound each time you refresh the page.
4. Allow and select your camera and microphone
To receive video calls, your browser must be allowed to use your camera and microphone, and to show notifications. Accept these permission requests when your browser displays them.
To choose which camera and microphone Virtual Front Desk uses:
- Click the gear icon next to your name at the bottom left of the dashboard.
- Under Personal, select Notifications & calls.
- Under Camera and microphone, select your devices. Changes are saved immediately.
On the same page, you can also set a Video background (available in Chrome only).
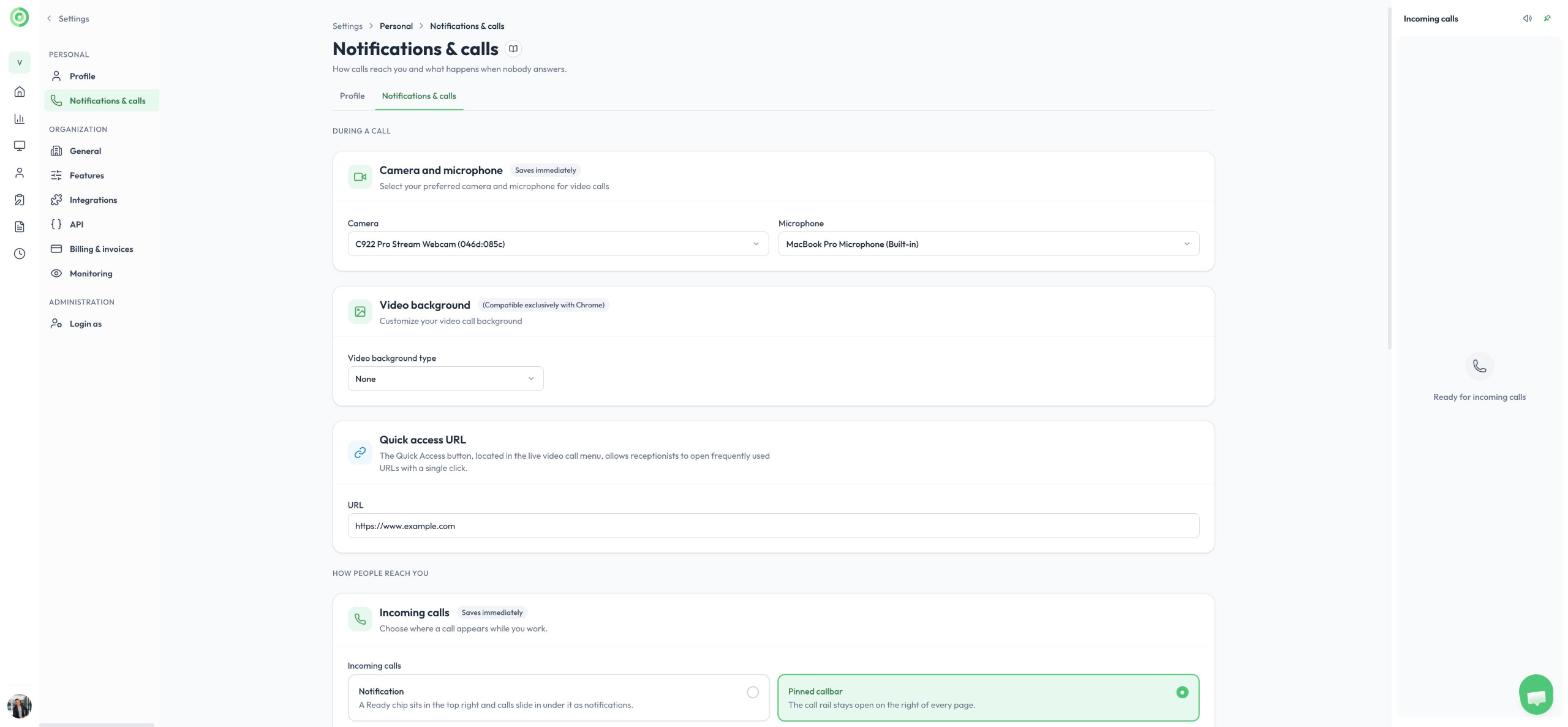
Selecting a camera and microphone in Notifications & calls
Your browser, not Virtual Front Desk, controls access to your camera and microphone. If your camera or audio still does not work after you select the correct device, check your browser’s site permissions and your computer’s sound and camera settings.
Using the dashboard
5. Get to know the dashboard
The main menu on the left gives you access to Dashboard, Analytics, Stations, User management, Visitor sign-in, Content library and History.
The Dashboard home page gives you an overview of your organization:
- Activity cards showing calls today, average wait before a call is answered, average call duration and calls this week.
- Live monitoring of the stations you are allowed to view.
- Stations, with the status and network strength of each station and a Call button to call a station directly.
- Users, showing which users are online or offline.
- Printers connected at each location.
Click Customize to choose which sections are shown, and Refresh to update the data.
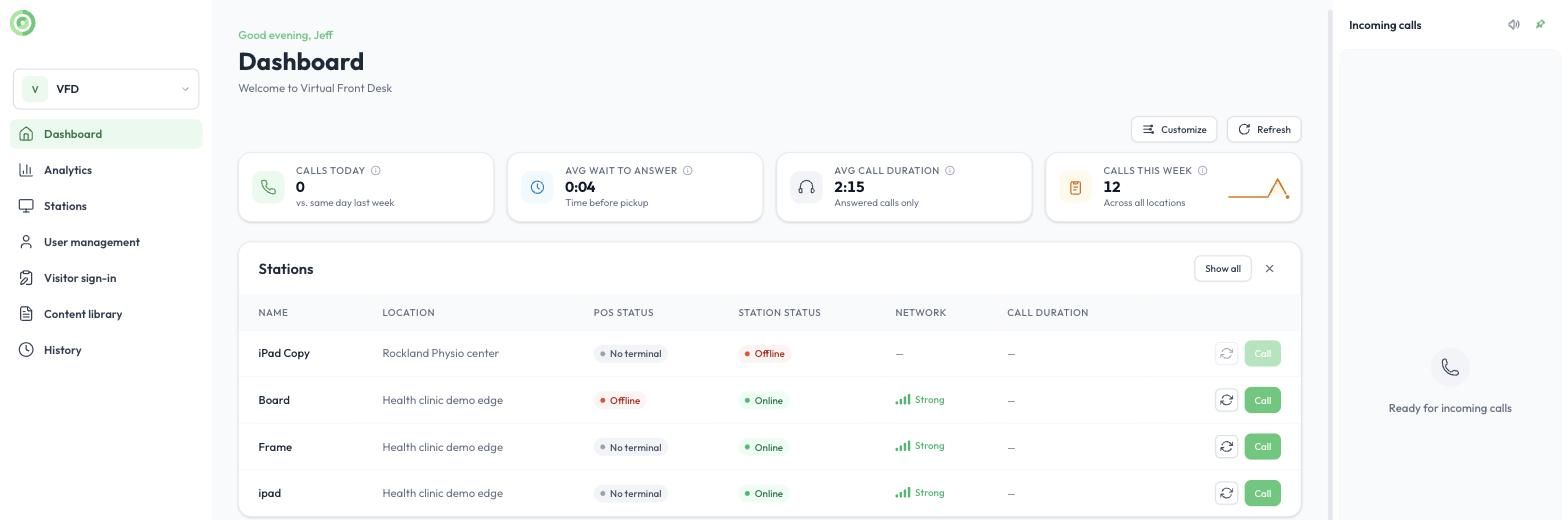
The Dashboard home page
6. Choose how incoming calls appear
Incoming calls appear on the right side of the dashboard. You can choose how they are displayed under Settings > Notifications & calls > Incoming calls:
- Pinned callbar: the call panel stays open on the right of every page.
- Notification: a Ready indicator sits at the top right, and calls slide in beneath it as notifications.
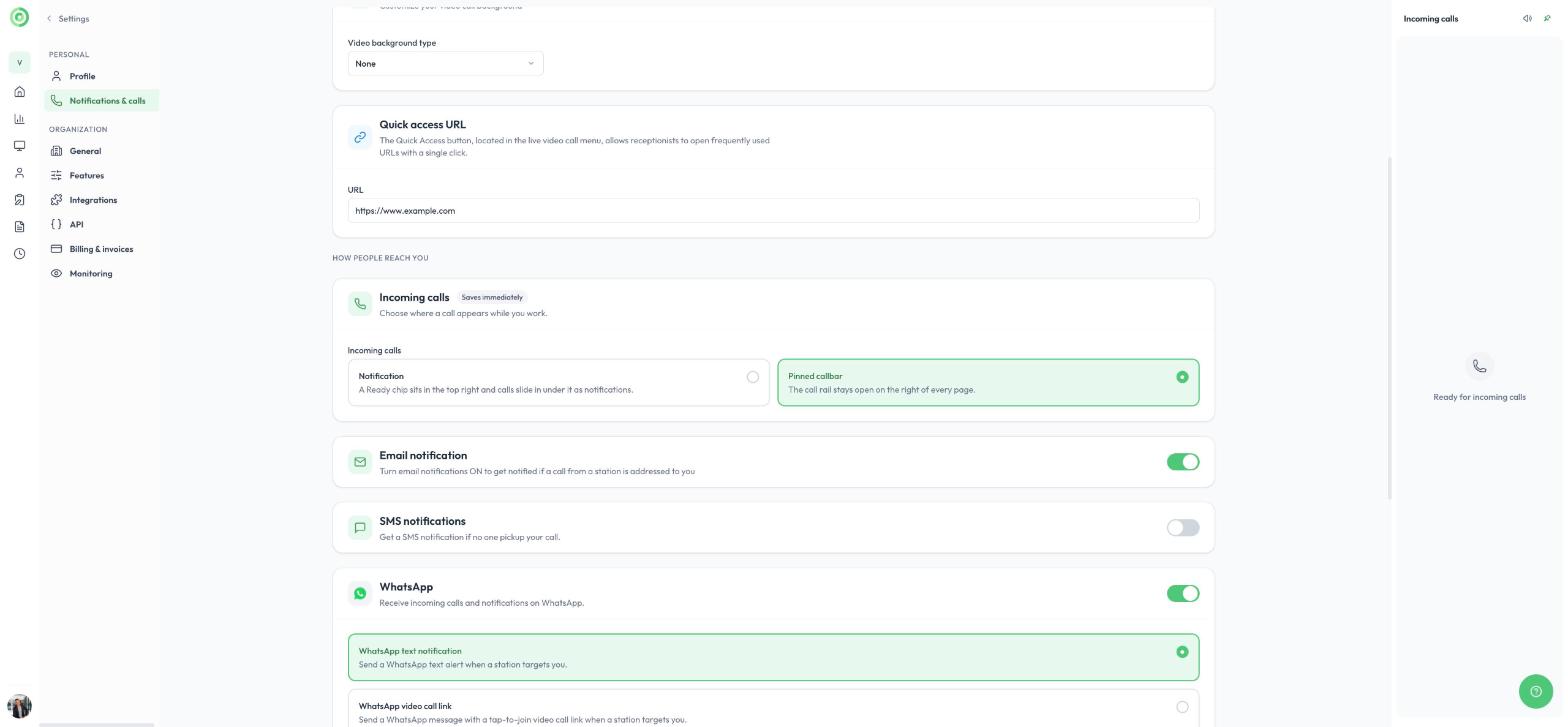
Choosing how incoming calls are displayed
7. Answer or hold a call
When a visitor calls, a notification appears in the Incoming calls panel. It tells you who is calling and from where, so you can greet the visitor appropriately:
- First line: the name of the button the visitor pressed on the station, such as Call Reception.
- Second line: the station name, followed by its location, such as Board - North Gate Medical Clinic.
- Timer: how long the visitor has been waiting, such as 19s.
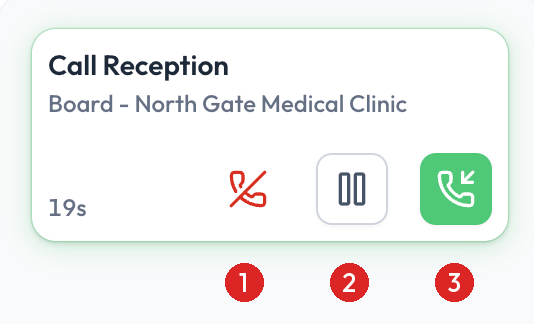
An incoming call notification
Use the three buttons on the notification:
- Hang up (red phone icon): ends the call for both you and the visitor. The call is not passed on to another user in the group.
- Hold (pause icon): places the visitor on hold, for example when you are already on a call or cannot answer right away. The station displays “You have been put on hold” so the visitor knows you will be with them shortly. You can answer when you are available.
- Answer (green phone icon): starts the video call with the visitor.
Switch between calls: while you are on a video call, new calls keep appearing as notifications. Click the new notification to answer it, for example to greet the visitor and let them know you will be right with them. You can then go back and forth between the two video calls. To learn more, read Live Call Features.
8. Understand how calls are routed
A call can be sent to you alone or to a group of receptionists. A group can ring several receptionists at the same time until someone answers, or ring them one after another in a call queue, moving to the next person after about 30 seconds. To learn more, read Groups and call queue.
9. Set up backup notifications
So that no visitor is left waiting, you can be notified through other channels as well. Go to Settings > Notifications & calls and review the How people reach you section:
- Email notification: receive an email when your button is pressed.
- SMS notifications: receive a text message when your button is pressed.
- WhatsApp: receive either a text alert or a tap-to-join video call link on WhatsApp when a station calls you.
- Call forwarding: forward the call to your mobile phone or landline if you cannot take it in Virtual Front Desk.
- Slack: under Connected apps, receive call notifications in Slack by direct message, and optionally in a channel.
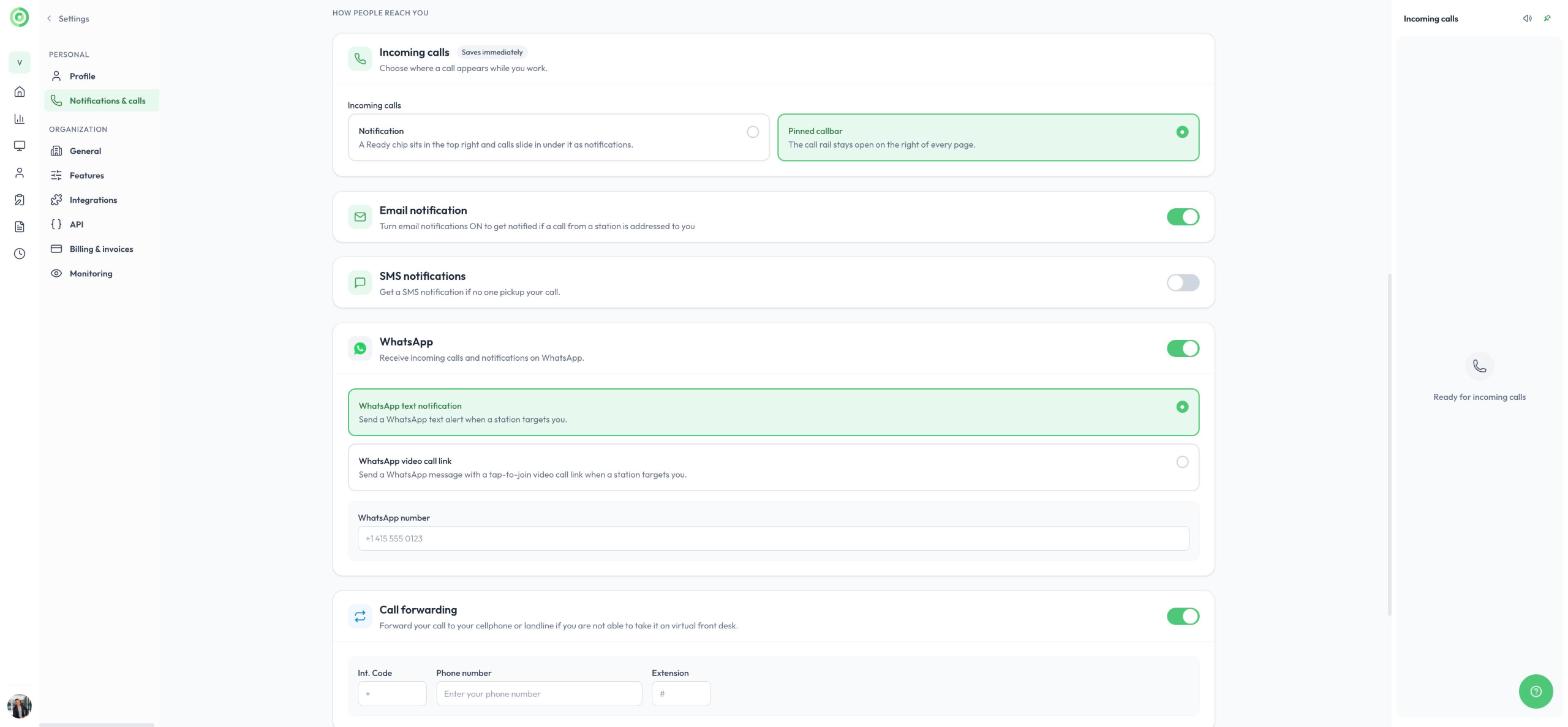
Email, SMS and WhatsApp notification options
These options are useful when you step away from your desk.
10. Receive calls on your phone
The Virtual Front Desk mobile app, available on the App Store and Google Play, lets you receive video calls on your phone or tablet. The mobile app is designed only for answering video calls. It does not include the full set of tools available when you answer a call from a computer. To learn more, read Mobile application iPhone and iPad.
11. Monitor your lobbies
With live monitoring, a station can stream a view of your lobby to the dashboard. If you see someone waiting, click Call to call the station directly. This opens the station’s camera and yours so you can greet the visitor without them touching the screen.
Monitoring streams have no audio and are not recorded. Visitors continue to see the normal welcome screen while the stream is active. You can monitor up to four lobbies at a time. Administrators choose which stations can stream under Settings > Monitoring. To learn more, read Monitoring or live streaming your stations.
12. Use the tools available during a call
If another call arrives while you are on a call, you can switch between the two. For example, greet the new visitor, let them know you will be right with them, and return to the first call.
During a video call you can do almost everything a receptionist would do in person, including:
- Scan or photograph ID documents
- Take screenshots
- Use a digital scanner
- Send text to the station screen
- Send documents to sign
- Print documents at the station
- Share your screen
- Take payments
- Open a frequently used website with the Quick Access button, set up under Settings > Notifications & calls > Quick access URL
To learn how to use each tool, read Live Call Features.
13. Visitor management and station content
Virtual Front Desk includes a full visitor management system. Before calling anyone, visitors can use the station to:
- Answer questions
- Sign documents
- Fill out online forms
- Take a selfie
- Take a picture of their ID
- Print a visitor badge
Sign-in forms are created by your administrators. A station’s welcome screen can also display an employee directory, PDFs, QR codes, online forms and looping videos.
14. The AI receptionist
Virtual Front Desk includes an AI receptionist that greets visitors and answers common questions before a call is placed to a person. This reduces the number of calls for repeated questions. Whenever the AI receptionist cannot answer a question, it offers to connect the visitor with someone. To learn more, read the AI Agent Setup Guide.
15. Review activity in History
History in the main menu records everything that happens in your organization. It includes the following logs:
- Call logs: every call, with its date, duration, who answered, and any documents or captures saved during the call.
- Other actions: other station activity, such as a visitor opening a PDF or a QR code.
- Sign-in logs: visitor sign-ins, including form answers, signed documents and photos.
- Pre-registration logs: visitors who completed a sign-in form on their own device before arriving. These visitors simply scan a QR code at the station to check in.
- Transaction logs: payments taken through Virtual Front Desk.
- AI conversations: conversations between visitors and the AI receptionist.
You can search by guest name or email, filter by location, station, user or status, and export the results.
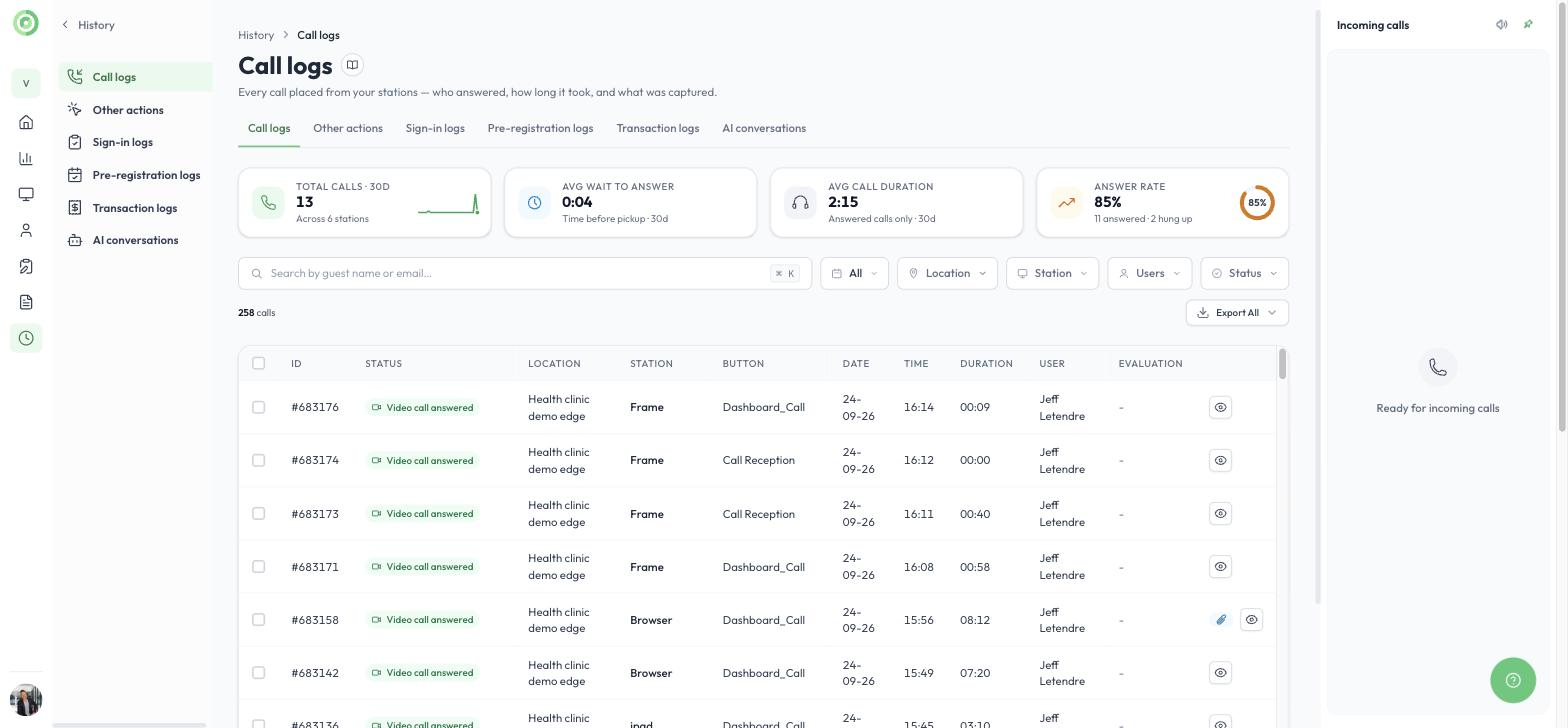
Call logs in History
To learn more, read History; Call logs, Sign in logs, Pre-Registration logs and Transaction logs.
Requirements and support
16. Use a reliable computer and connection
Virtual Front Desk relies on live video. For the best experience, use a stable, high-speed internet connection and a recent computer running the latest version of Chrome or Edge. An unstable network or an older computer can reduce call quality.
17. Get help
Click the ? button at the bottom right of the dashboard to open:
- Help center: guides, setup steps and answers. The platform is fully documented, and we encourage you to explore everything Virtual Front Desk can do.
- Chat with support: ask any question. Our assistant answers first, and you can ask to speak with a person from our support staff at any time. Through the chat we can start a video call or share screens to help you directly. Live support is available from 7 a.m. to 7 p.m. Eastern Time.
- Accessibility: adjust contrast and text size, or turn on screen reader support.
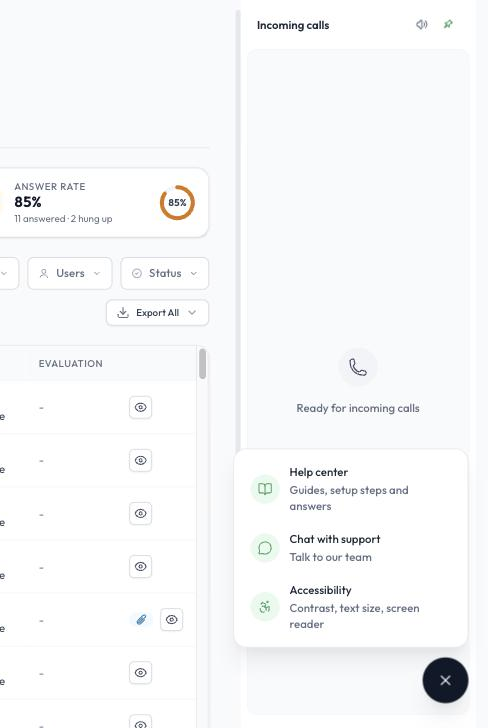
The help menu at the bottom right of the dashboard