
Virtual Front Desk API: overview and getting started
What is the Virtual Front Desk API?
The Virtual Front Desk API lets you connect Virtual Front Desk to the other software your organization already uses. Instead of copying information by hand from one system to another, your systems can exchange information with Virtual Front Desk automatically.
The API is designed for IT administrators, developers and integration partners, but you do not need to be a developer to understand what it can do for you. This article gives a general overview of the possibilities and explains how to get started.
The API is available on the Professional and Enterprise plans.
How it works
There are three ways to connect to Virtual Front Desk:
- The API: your system requests information from Virtual Front Desk, such as your visitor sign-ins or your call history, and receives it right away.
- Webhooks: Virtual Front Desk automatically notifies your system the moment something happens, such as a visitor signing in or a call going unanswered.
- AI assistants: you connect an AI assistant to your Virtual Front Desk data and ask questions in plain language, without writing any code.
What you can do with it
Every organization is different, so the best integration depends on your needs and on the systems you already use. Here are a few general ideas:
- Keep your other systems informed: let your own software know when visitors arrive or leave, so the right people and systems are always up to date.
- Bring your data into your own tools: use your visitor and call information in the reporting or business intelligence tools you already use.
- Stay ahead of issues: be alerted when a station goes offline or when calls are missed.
- Ask questions about your activity: use an AI assistant to get quick answers about your visitors, calls and stations.
We recommend discussing your project with your IT department or integration partner. Our support can also help you assess what is possible for your organization.
Before you start
- Your organization must be on the Professional or Enterprise plan.
- Only users with the Owner, Admin or Manager role can access the API settings in the Virtual Front Desk dashboard.
Open the API page
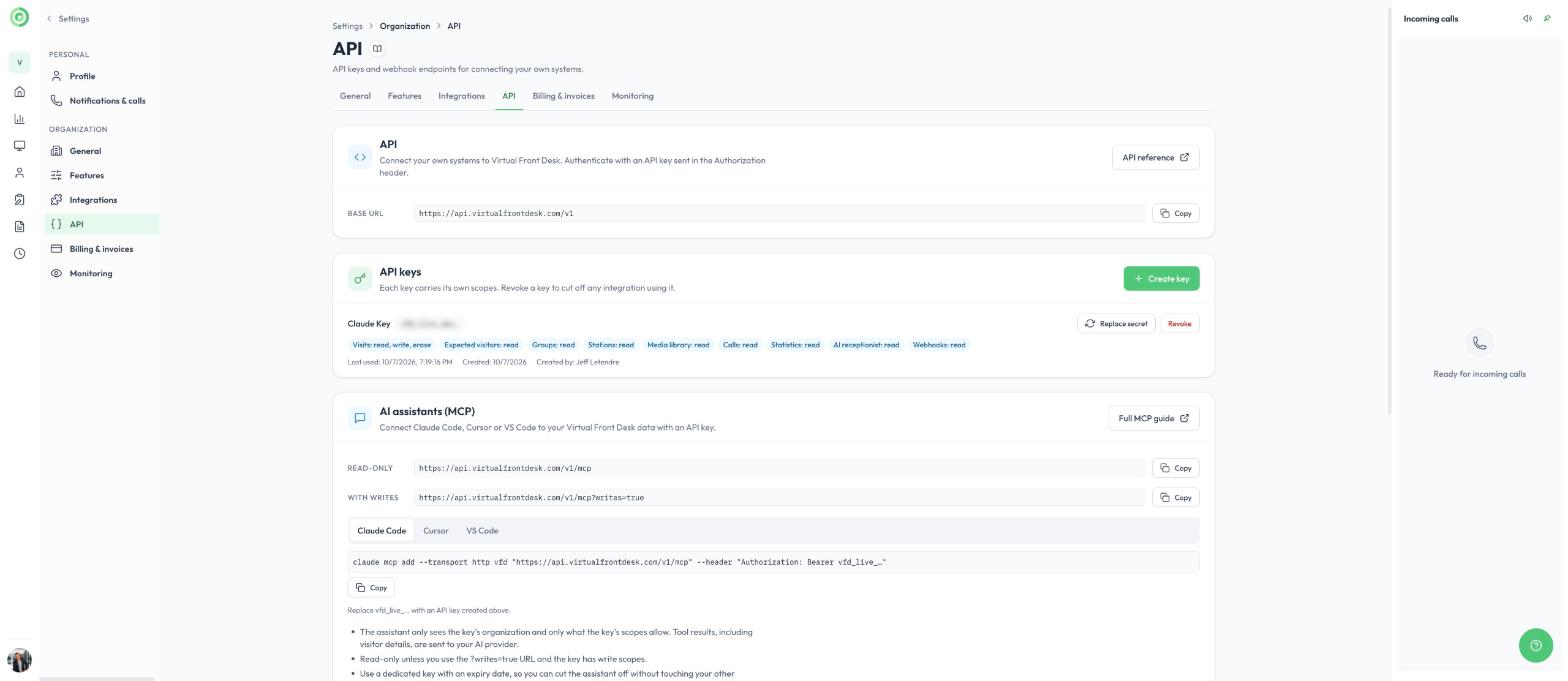
Click the Settings icon (the gear) next to your name, then under Organization, select API. The page is divided into five sections, explained below.
The API page under Settings > Organization
1. API
This section shows the Base URL, the address your systems use to connect to Virtual Front Desk. Click Copy to copy it.
The API reference button opens the complete technical documentation, which your developer or integration partner will use to build the integration.
2. API keys
An API key is the credential your system uses to connect to Virtual Front Desk. Each key has its own permissions, called scopes, so every integration only gets access to what it needs.
For each key, the list shows its name, the beginning of the key, its scopes, and when it was last used and created. Two buttons are available:
- Replace secret: issues a new secret for the key, for example if you think it may have been exposed.
- Revoke: permanently disables the key. Any integration using it immediately stops working.
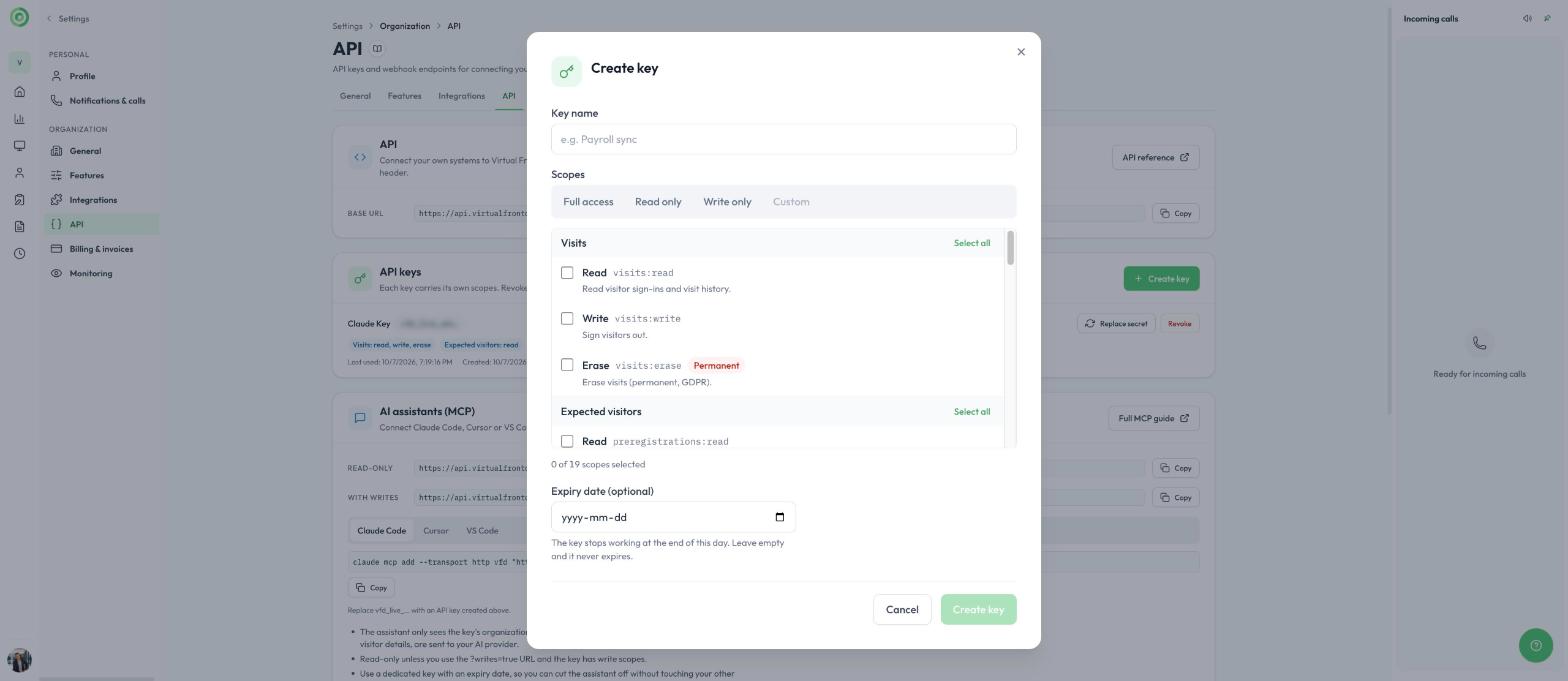
To create a key:
- Click Create key.
- Enter a Key name that describes the integration.
- Choose the Scopes. You can select Full access, Read only or Write only, or select individual permissions for each area. Only grant what the integration needs.
- Optionally, set an Expiry date. The key stops working at the end of that day. Leave it empty and the key never expires.
- Click Create key, then copy the key and store it in a safe place.
Creating an API key
The full key is shown only once. If it is lost, create a new key and revoke the old one.
3. AI assistants (MCP)
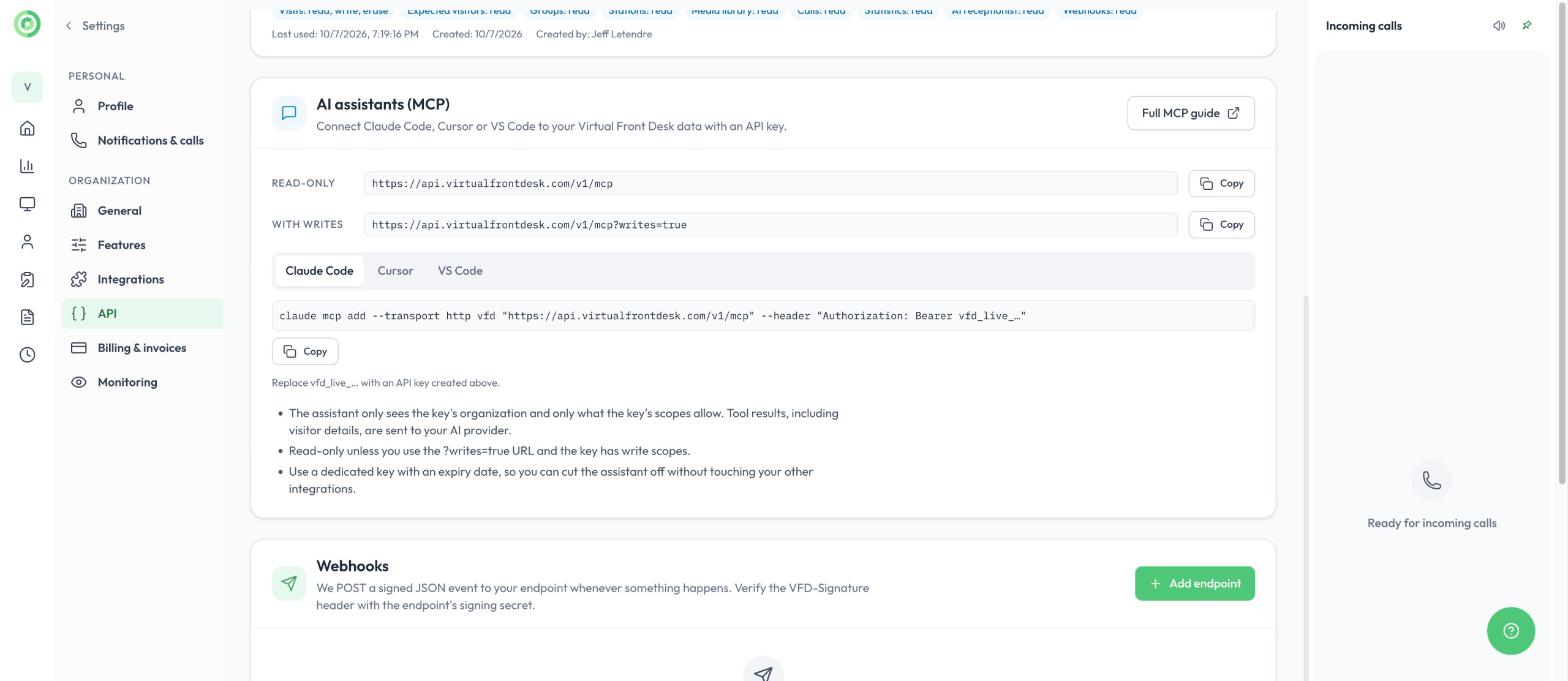
This section lets you connect an AI assistant, such as Claude Code, Cursor or VS Code, to your Virtual Front Desk data so you can ask questions in plain language.
- Read-only: the address to use when the assistant should only read your information. This is the recommended option.
- With writes: the address to use when the assistant should also be able to make changes, provided its API key has permissions to do so.
- The tabs below show a ready-to-copy setup command for each AI tool. Replace the end of the command with an API key created in the section above.
The AI assistants (MCP) section
Information the assistant reads, including visitor details, is sent to your AI provider. We recommend creating a dedicated key with an expiry date for your assistant.
4. Webhooks
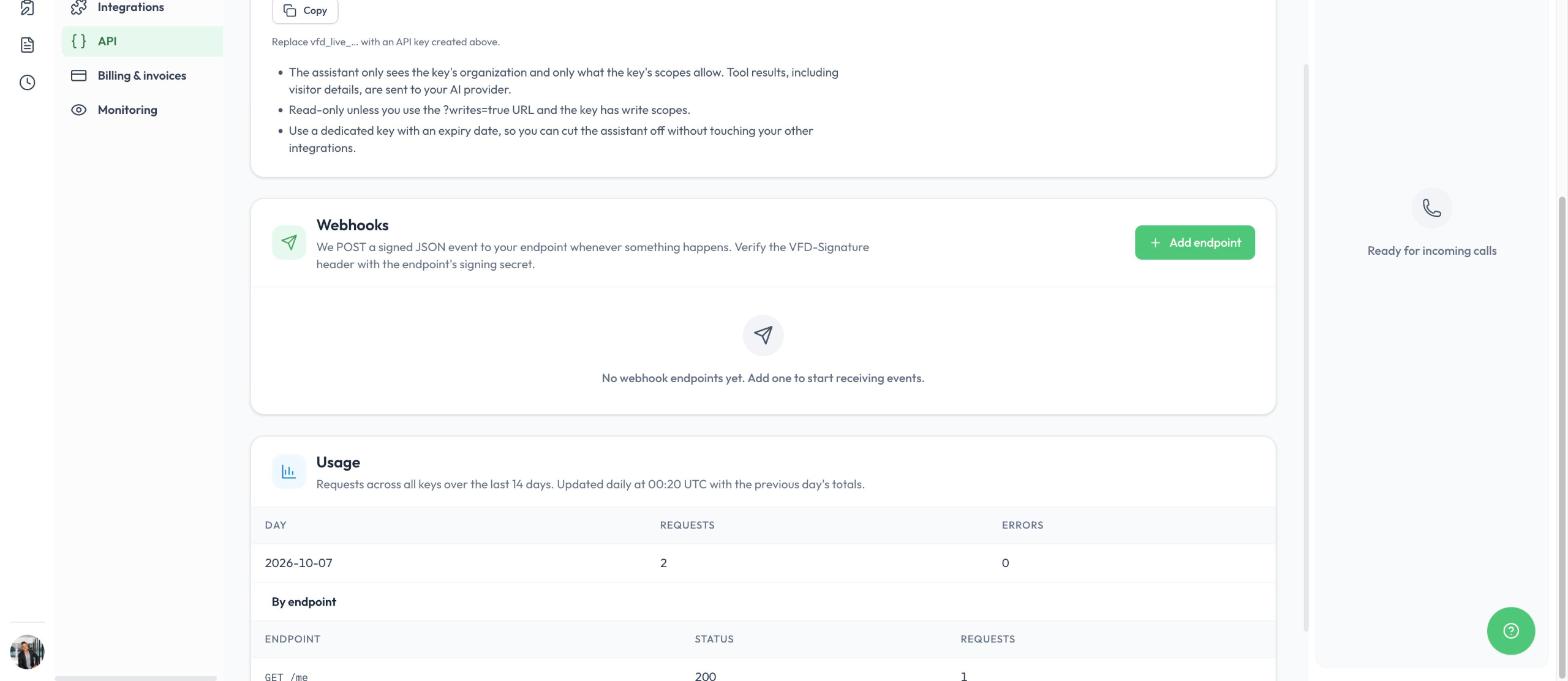
Webhooks let Virtual Front Desk notify your systems automatically when something happens. Click Add endpoint to enter the address of the system that should receive the notifications. Each notification is signed, so your system can verify that it really comes from Virtual Front Desk.
5. Usage
For each of the last 14 days, this section shows the number of API requests made with all your keys and the number of errors, with a breakdown by endpoint. It is updated once a day with the previous day's totals.
The Webhooks and Usage sections
Keep your integration secure
- Create a separate key for each integration, so you can revoke one without affecting the others.
- Give each key only the permissions it needs.
- Store your keys in a secure place and never share them by email or chat.
- If a key may have been exposed, click Replace secret or Revoke right away under Settings > Organization > API.
Learn more
The complete technical documentation is available in the Virtual Front Desk API reference. You can also open it with the API reference button under Settings > Organization > API.
Need help planning an integration? Contact our support and we will be happy to help.